
Effective Methods for How to Remove Stains from Leather at Home
This post contains affiliate links. As an Amazon Associate, we earn from qualifying purchases.
This post contains affiliate links. As an Amazon Associate, we earn from qualifying purchases.
To remove a stain from leather, follow this protocol: identify the stain type (oil, water, dye), isolate a cleaner that is mild and pH-neutral, and always test on a hidden area first. Manufacturer bulletins from the NHTSA and OEMs specify mild soap solutions like diluted Ivory or Pril, applied with a soft cloth and dabbed, never rubbed, to prevent driving the stain deeper.
The NHTSA’s 2013 technical bulletin isn’t just a guide for mechanics. It’s a clear, manufacturer-backed outline for what your leather can physically handle. The biggest mistake isn’t using the wrong product; it’s assuming all leather responds the same way to aggressive cleaners.
This is based on years of practical experience. Here’s a straightforward guide. I’ll break down the details, step by step, using the same logic a technician would.
Key Takeaways
- Always test any cleaner on a hidden area first, a skipped test can permanently alter dye and finish.
- For fresh oil stains, apply cornstarch or talc to absorb the oil before you attempt any liquid cleaning. This step cuts cleaning time in half.
- The gentlest effective method is the right one. Start with a damp cloth and mild soap (Ivory, Pril). Harsh solvents like acetone are almost always a mistake.
- Patience is part of the process. Dab, don’t rub, and allow the leather to dry completely between steps. Rushing forces stains deeper.
- Know your leather. Specialty leathers like perforated or Cadillac’s Tehama require specific care and can be ruined by general advice.
Safety First: The Test Patch
A damaged leather seat or bag is expensive to replace. The cost of prevention is two minutes and a hidden spot.
Find an inconspicuous area, under a seat flap, inside a belt loop, on a back panel. Apply your chosen cleaning solution with a cotton swab. Let it dry completely. Look for three things: color transfer on the swab, a change in the leather’s color, or a difference in texture. If you see any, stop. That cleaner is too strong for that leather.
Where this goes sideways: Skipping the test patch because the stain is small. A cleaner that clouds the finish or strips dye will do so on the first pass, and the damage is immediate.
This rule is mandatory. It’s echoed in multiple OEM service bulletins for a reason.
The 3-Step Protocol for Any Stain
Think of stain removal like first aid: assess, stabilize, treat. Jumping straight to “treat” often makes the injury worse.
1. Identify. What caused the stain? Oil, grease, and makeup feel slick. Water and ink soak in. Dye transfer from jeans shows as a blue smudge. Misidentifying an oil stain as a water stain means you’ll add water, which can spread the oil.
2. Isolate. Blot up any excess liquid with a clean, absorbent cloth. For a solid, gently scrape it off with a plastic edge. This step contains the problem.
3. Treat. Now you apply the specific solution for the stain type you identified, using the gentlest method that will work. This is where most people panic and grab the strongest cleaner, don’t. Start mild.
This protocol turns a reactive panic into a calm procedure. It’s the framework every professional uses.
Identify the Stain: Your Cleaning Roadmap
Your cleaning method is dictated by what spilled, not by how bad it looks. Misreading the stain type is the single fastest way to set a stain permanently.
| Stain Type | Feels/Looks Like | Immediate Action (Before Cleaning) |
|---|---|---|
| Oil/Grease/Makeup | Slick, shiny, smears when touched | Blot excess, then apply cornstarch/talc to absorb oil. Wait 12-24 hours. |
| Water-Based (Juice, Ink) | Damp spot, defined edges, may darken leather | Blot—do not rub—with a dry microfiber cloth. |
| Dye Transfer | Colored smudge (often blue/black) from denim or newsprint | Brush gently with a soft, dry brush to lift surface particles. |
| Unknown/Set-In | Discolored patch, rough texture, no obvious residue | Start with the mildest cleaner possible and work up cautiously. |
Let’s be clear about one thing: rubbing a water stain while it’s wet does not lift it. It drives the water, and any dissolved dirt or dye in it, deeper into the leather’s pores, widening the stain. I learned this the hard way on a light-colored bag, creating a faint gray shadow where a small spill had been. The leather will tell you what it needs. For water, it usually needs time and air.
For normal cleaning of soiled… Covers, plain water and a soft, non-pigmented cloth… Are recommended. If plain water is not adequate, a mild liquid soap… May be added to a quart of water. (Paraphrased from the NHTSA’s 2013 vehicle interior cleaning guide)
This is the baseline. Before you reach for a specialized product, try this.
Your Cleaning Toolkit: Soap, Solvent, or Specialist?
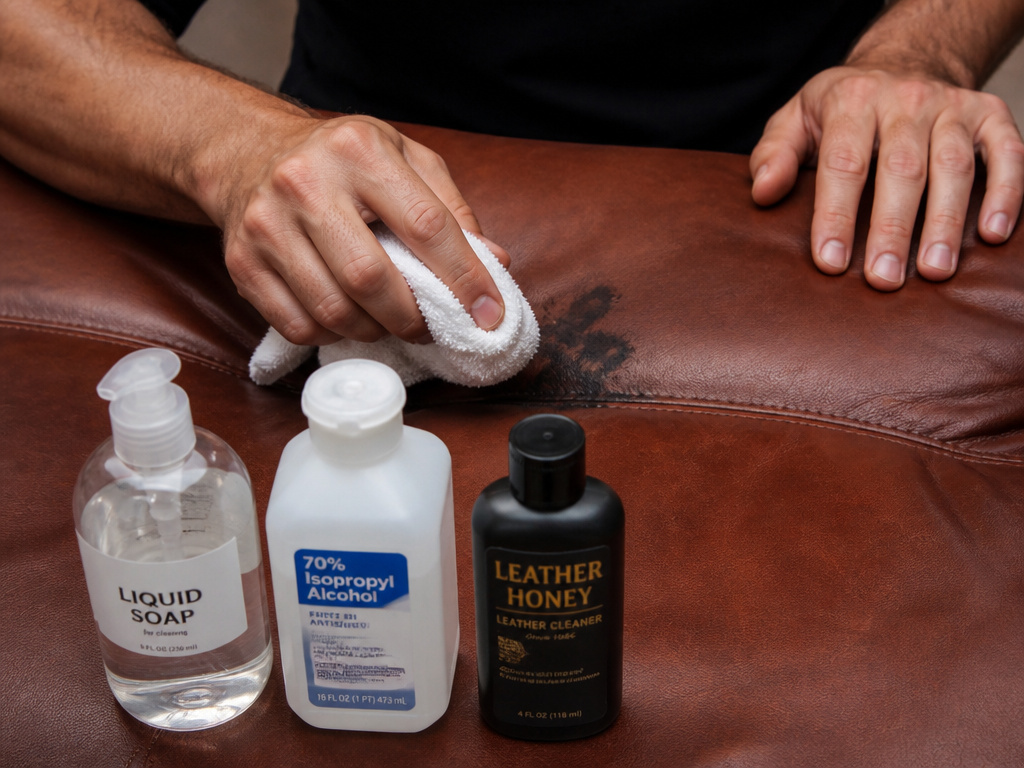
You don’t need a cabinet full of products. You need the right three for the job. Most commercial leather conditioners contain far more filler and silicone than actual nourishing oils, and the same goes for harsh, all-purpose stain removers.
1. Mild Soap Solution (Your First Choice)
- What it is: A few drops of clear, mild liquid soap (Ivory, Murphy’s Oil Soap, or Pril) diluted in a quart of lukewarm water.
- Best for: General grime, water-soluble stains (mud, food spills), and as an initial clean for unknown stains.
- How to use: Dampen a soft cloth in the solution, wring it out until it’s just damp, and gently dab the stain. Rinse the cloth in clean water, wring, and dab to rinse the area. Dry with a separate dry cloth.
2. Isopropyl Alcohol (The Cautious Solvent)
- What it is: 70% isopropyl alcohol, applied minimally.
- Best for: Tackling sticky residues, some ink stains, or sanitizing after mold removal. It evaporates quickly.
- How to use: Put a small amount on a cotton ball, not directly on the leather. Dab very lightly on the stain. This can dry leather, so condition the area afterward if the leather is unfinished.
3. Specialist Cleaner (For Specific, Stubborn Problems)
- What it is: A product formulated for a specific task, like a dedicated ink stain remover or a leather-safe degreaser.
- Best for: Stains that have resisted the soap solution, or for specific threats like dye transfer or pen marks.
- How to use: Follow the product’s instructions exactly, and always, always do a test patch first.
The practical takeaway? Start with the soap. It’s what the NHTSA service bulletin 06-00-89-029O recommends for general interior surfaces, and it’s less likely to go wrong. Moving straight to a specialist cleaner for a simple juice spill is overkill and risks damaging delicate finishes.
Treating Common Stain Types

Now, let’s apply the protocol. Here’s how to handle the stains that show up most often.
Oil and Grease Stains
For fresh grease stains, the goal is to absorb the oil before it soaks in. Cornstarch or talcum powder is your best friend here.
- Blot away any excess oil with a paper towel.
- Generously cover the stain with cornstarch. For a thick grease spot, let it sit for 12-24 hours. The powder will turn clumpy and dark as it absorbs the oil.
- Brush away the powder with a soft brush.
- If a shadow remains, use a tiny amount of dish soap (like Dawn) on a damp cloth to dab the area, then rinse and dry.
Using a chemical cleaner first can dissolve the grease and spread it. The powder method contains it.
Water Stains and Rings
Water stains are often a panic, but the fix is usually patience. Rubbing is the enemy.
- Blot the area gently with a dry microfiber cloth to remove surface moisture.
- Let the leather air-dry completely, away from direct heat. This can take a full day.
- Once bone-dry, the ring may have disappeared. If a faint mark remains, lightly buff the area with a soft, dry cloth or a clean, soft-bristle shoe brush. The nap of the leather can often be revived this way.
- If the stain persists, then move to a mild soap solution, following the dab-and-rinse method.
Heat guns or hairdryers can cook the stain into the leather, making it permanent.
Ink Stains
Ink stains need quick action, but gentle action. Ballpoint ink is oil-based; fountain pen ink is water-based.
- For a fresh spill, blot, do not smear, with a dry cloth.
- Try the mild soap solution first on a test patch. If the ink bleeds, stop.
- For stubborn ballpoint ink, a tiny amount of 70% isopropyl alcohol on a cotton swab can sometimes break it down. Dab, don’t scrub. For other inks, a product like Angelus Easy Cleaner is a safer bet than experimenting with household solvents.
- The key with any pen stain removal is to work from the outside of the stain inward to prevent spreading.
Dye Transfer
Dye transfer from blue jeans is common on light leather furniture or car seats.
- First, try brushing the area firmly with a soft, dry brush (a horsehair shoe brush works). You’d be surprised how much is just surface particles.
- If brushing doesn’t work, a dedicated cleaner for treating dye transfer is your next step. These are formulated to lift color without bleaching the underlying leather.
- A magic eraser (melamine foam) can work on heavily finished leather, but it is abrasive. Use it as a last resort, with extreme caution, and always condition the area afterward.
When to Call a Professional
You can handle most stains. But some scenarios mean it’s time to hand it off.
- The stain is on a high-value or antique item. The risk outweighs the DIY reward.
- The leather is a specialty type. This includes suede, nubuck, aniline-dyed leathers with no protective topcoat, or the mentioned Cadillac Tehama Leather. These require specific expertise.
- You’ve tried the mild methods and the stain persists, or you’ve made it worse. A pro has stronger tools and the experience to use them correctly.
- There’s structural damage. If the stain is accompanied by cracking, peeling, or a torn seam, cleaning is only part of the repair.
A leather repair professional certified by the Leather Institute of America can often work miracles on a seemingly ruined piece. Their fee is cheaper than a replacement.
Frequently Asked Questions
Can I use baby wipes on leather?
Maybe, but don’t. Many contain alcohol, fragrance, or other additives that can dry leather or leave a filmy residue. A cloth dampened with water is safer and free.
Does vinegar remove stains from leather?
White vinegar is acidic. While it can work on some mineral deposits or light mildew, it can also strip dyes and dry out leather. It’s a risky home remedy. A mild soap solution is a safer starting point.
How do you get old, set-in stains out of leather?
Start gentle. Use a soft brush to loosen any surface dirt. Apply a leather-specific cleaner, like Angelus Easy Cleaner or Lexol Leather Cleaner, following the instructions. For truly set-in stains, a professional cleaner with specialized solvents may be the only safe option.
Can baking soda remove stains from leather?
Baking soda is mildly abrasive. As a paste with water, it can act as a gentle scrub for some stains, but it must be rinsed thoroughly. For oily stains, cornstarch is a better absorbent and isn’t abrasive.
Will stain removal damage the leather’s finish?
It can, especially if you use a cleaner that’s too strong or abrasive. This is why the test patch is non-negotiable and why “dab, don’t rub” is the rule. Proper leather care products are designed to clean without stripping the protective topcoat.
Before You Go
One rule most guides skip: if a stain has been sitting for more than a few weeks, especially in a hot car, it may have bonded with the leather’s finish. In that case, aggressive DIY cleaning has a high chance of damaging the finish more than the stain did. Sometimes, the best fix is to clean the entire piece uniformly to reduce the contrast and let a skilled professional assess it.
Your first move should always be the gentlest one that has a chance to work. That means a damp cloth and maybe a drop of soap. The difference between a clean leather seat and a cloudy, damaged one often comes down to the patience you show in the first sixty seconds.
