
Learn How to Darken Leather Safely With This Proven Method
This post contains affiliate links. As an Amazon Associate, we earn from qualifying purchases.
This post contains affiliate links. As an Amazon Associate, we earn from qualifying purchases.
To darken leather, you must match your method to your leather’s type and finish. Use penetrating oils like mink oil or neatsfoot oil on absorbent, unfinished leathers to enrich color naturally. Use professional alcohol-based dyes like Fiebing’s Pro Dye on any leather for a permanent, uniform color change. The wrong product on a sealed or delicate finish leads to blotching, stiffness, or permanent damage.
That distinction between nourishing and coloring isn’t academic. It’s the line between a piece that ages with character and one that looks artificially painted. Oils work by filling the leather’s fiber structure, which changes how light reflects off the surface. Dyes chemically bond to the fibers themselves.
What follows is a breakdown of the three reliable paths: oils for a developing patina, dyes for a committed change, and conditioners for a subtle shift. We’ll also cover which leather types respond to each and the one test you must do first.
Key Takeaways
- Test First, Darken Second. Always apply your chosen product to a hidden area and wait 24 hours. Leather from different hides absorbs differently, even within the same batch.
- Oils Darken Permanently. Mink oil, neatsfoot oil, and other nourishing oils sink deep into the fibers. The darkening they cause is largely permanent and continues to develop over days.
- Dye Demands Preparation. For a clean, even dye job, the leather must be perfectly clean, dry, and free of any existing finishes or conditioners. Sealing the dye afterward is essential.
- Type Dictates Results. Vegetable-tanned and full-grain leathers drink up oil and dye. Heavily pigmented or sealed leathers will resist penetration, often requiring a dedicated dye for any real change.
- Patience is the Real Tool. Rushing leads to over-application, blotches, and a gummy feel. Thin, even coats with full drying time between them always win.
The First Rule: Know Your Leather
You wouldn’t use a chainsaw to trim a bonsai. Applying a heavy oil to a delicate aniline leather is the same category of mistake. The method you choose is entirely dictated by your leather’s tanning and finish.
There are two main questions. First, how was it tanned? Vegetable-tanned leather is the most receptive. Its open pores and lack of surface sealants mean oils and dyes penetrate deeply and evenly. Chrome-tanned leather is more common and often has a surface coating; it can be darkened, but results vary more. Second, what’s on the surface? An aniline leather has a light, transparent dye and maybe a light wax. It’s absorbent. A pigmented leather has a thicker, opaque coating of color and binder. It’s resistant.
Common mistake: Assuming “leather” is one uniform material. A wallet, a car seat, and a work boot may all be genuine leather, but their finishes dictate three completely different darkening approaches.
Cleaning is your mandatory first step. Dirt, skin oils, and old wax block absorption. Use a dedicated, pH-balanced leather cleaner. Let the piece dry completely, overnight in a warm, dry room is best. Now find an inconspicuous spot: the back of a strap, the inside of a fold, the underside of a cushion. Apply a dime-sized amount of your chosen product. Wait a full day. Check for color change, feel, and any adverse reaction. The leather will tell you what it needs.
The Oil Method: Adding Richness, Not Just Color
This is the oldest and most natural way to deepen leather’s tone. It’s not a surface stain. Oils like mink oil, neatsfoot oil, and Huberd’s Shoe Grease soak into the leather’s fiber structure, replacing lost fats and lubricating the strands. As they fill the microscopic spaces, the leather becomes more translucent and appears darker, a rich, warm darkening that looks earned, not applied.
I used to think cracked leather was always a lost cause. A “ruined” old jacket sat in my shop for months. On a whim, I worked a Bickmore Bick 4 conditioner into it over a week, letting each thin application soak in fully. The deep cracks in the finish remained, but the leather itself became supple and gained a deep, uniform richness. The damage was in the topcoat, not the hide. Many age marks are just thirsty leather.
| Oil Type | Best For | Darkening Effect | Risk If Skipped |
|---|---|---|---|
| Mink Oil | Work boots, saddles, belts. | Significant, permanent warming and darkening. | Can become sticky if over-applied; attracts dust. |
| Neatsfoot Oil | Saddlery, historical leather, dry vegetable-tanned items. | Deep, gradual darkening that continues to develop. | Over-saturation makes leather limp and can degrade stitching over years. |
| Conditioning Oil (e.g., Huberd’s, Obenauf’s) | Everyday boots, bags, and gear needing weather protection. | Moderate to strong darkening with a matte finish. | Heavy wax content can slightly stiffen very soft leathers. |
The process is simple, but the timing is everything. 1. Apply a thin, even coat. Use your fingers or a clean cloth. Rub it in thoroughly. You should not see a greasy layer sitting on top. 2. Let it absorb. Leave the piece in a warm, dry place for at least 12 hours, preferably 24. The oil is still migrating deep into the core. 3. Buff off excess. After the full wait, buff firmly with a clean, dry cloth. This removes any oil that didn’t absorb and brings up a slight sheen. 4. Evaluate and repeat. If you want it darker, apply another thin coat. Three light coats always beat one heavy, soggy one.
You’ll know you’ve done it right when the leather feels supple and warm to the touch, not greasy. It should have a muted, rich luster, not a shiny plastic look. The darkening is part of the leather now.
The Dye Method: A Permanent Color Change
When you need a specific, uniform color or are working with a resistant leather, oil isn’t the tool. You need a dye. Alcohol-based dyes like Fiebing’s Pro Dye are the professional standard. The alcohol carrier evaporates quickly, leaving the pigment bonded deep within the leather fibers. This is a permanent chemical change, not a physical filling.
The prep work here is 80% of the job. Any existing finish, wax, or oil will block the dye, leading to a splotchy, amateur result. For a finished leather, you may need to deglaze it, using a solvent like acetone or a dedicated deglazer to strip the topcoat. It’s a committed step. For unfinished leather, a thorough clean with saddle soap or a leather degreaser is enough. The piece must be bone-dry.
A 2023 industry report on color fastness noted that leather dyes are generally stable down to a pH of 3.5. At extremely low pH or in very hard water, some dyes can shift color unpredictably. This is why using distilled water for any wet steps matters.
Here’s the step-by-step breakdown for a clean dye job: 1. Protect and prepare. Tape off any areas you don’t want dyed. Wear nitrile gloves. Ensure your workspace is ventilated. 2. Apply with a dauber. A wool dauber or sponge gives more control and reduces streaking than a cloth. Apply the dye in circular motions, working quickly. The first coat will look blotchy, that’s normal. 3. Dry completely. Let the first coat dry for 15-30 minutes. The alcohol smell will fade as it evaporates. 4. Apply additional coats. Build the color with 2-4 thin coats, drying between each. This ensures evenness and depth. 5. Seal the dye. This is the step everyone wants to skip. An unsealed alcohol dye can bleed or rub off. Apply a dedicated leather sealer or resolene. It dries clear and locks the color in.
For small touch-ups or painting on designs, Angelus Leather Paint is the go-to. It’s an acrylic paint formulated for leather, flexible and durable. It sits more on the surface than a dye, so it’s ideal for covering imperfections on a pigmented leather finish or adding artistic details.
The Conditioner Method: A Subtle, Side-Effect Shift
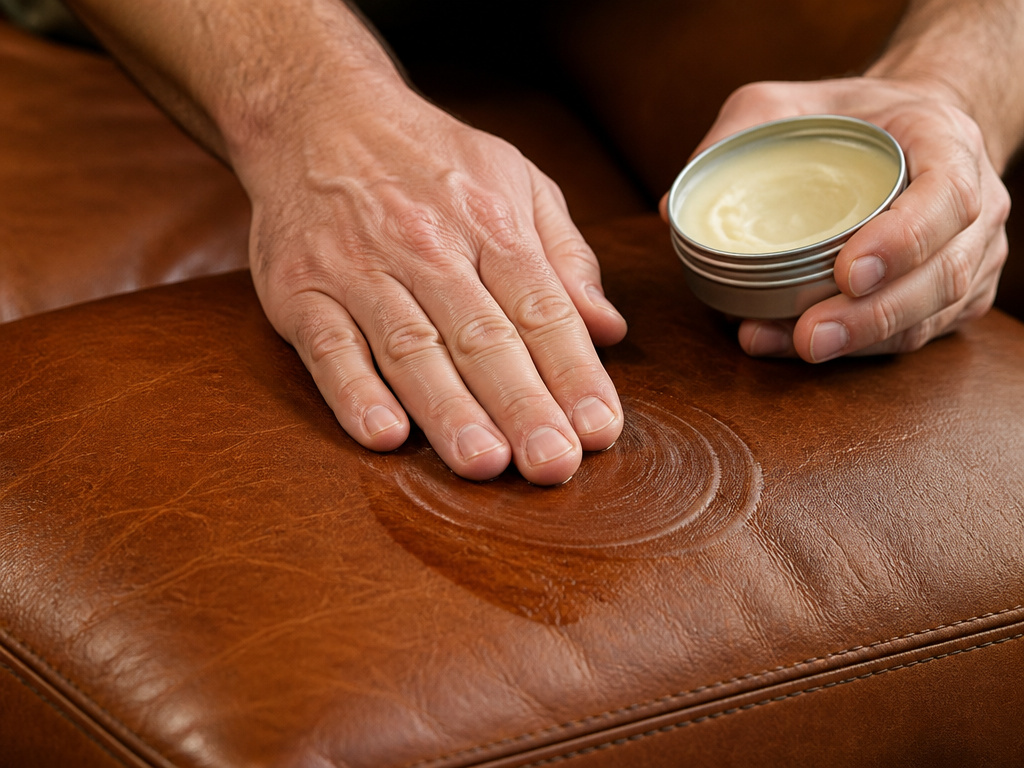 Some darkening isn’t the goal, but a welcome side effect of proper care. Many leather conditioners contain oils or waxes that will slightly darken leather as they nourish it. Products like Chamberlain’s Leather Milk or Saphir Renovateur fall here. The change is usually subtle, a shade or two, and evens out the leather’s overall appearance.
This method is perfect for high-quality aniline leather or semi-aniline leather furniture and jackets where you want to maintain the natural look but enrich it. The darkening comes from the conditioner restoring the leather’s natural oils, not from adding a pigment.
Where this goes sideways: Using a conditioner with silicone or heavy waxes on a porous aniline leather. It can sit on the surface, creating a waxy buildup that feels sticky and attracts dirt, while blocking the leather’s ability to breathe.
The rule is to use products intended for your leather’s category. A conditioner for delicate upholstery is different from one for a baseball glove. The darkening should be even and should not change the leather’s fundamental hand-feel. If the piece feels significantly different or tacky, you’ve used the wrong product or applied too much.
What Not to Use: The DIY Trap
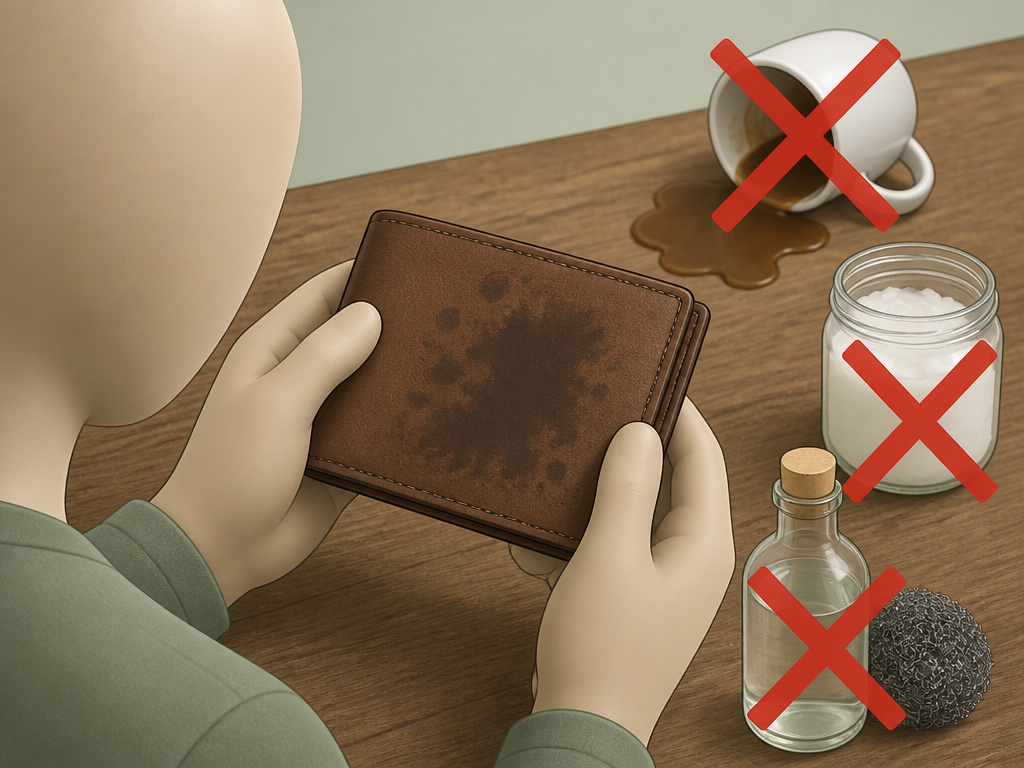 The internet is full of well-intentioned but terrible advice. Let’s be clear about one thing: household products are a gamble with poor odds.
Coffee or Tea: These are weak, acidic stains. They produce a temporary, muddy color that is not lightfast and often applies unevenly. They offer no conditioning benefit and can actually dry the leather.
Coconut Oil: It’s a popular DIY choice, but it’s a food product, not a leather treatment. It can go rancid, leading to unpleasant odors. It absorbs very unevenly, especially on finished leathers, creating dark spots.
Vinegar-Based Solutions (e.g., Vinegaroon): This is a specific chemical reaction (acetic acid reacting with iron from steel wool) that creates a dark gray/black stain on vegetable-tanned leather. It’s permanent and can be beautiful, but it’s highly technical. The acid must be perfectly neutralized with baking soda, or it will continue to eat away at the leather, making it brittle and weak over time. This is not a beginner technique.
These methods lack the controlled chemistry of dedicated leather products. You’re experimenting on your gear. The risk of a blotchy, damaged, or smelly result is high. The few dollars saved aren’t worth ruining a piece of full-grain leather.
| Leather Type | Recommended Method | Expected Result | Product Example |
|---|---|---|---|
| Vegetable-Tanned / Full-Grain | Oil or Dye | Deep, even, natural darkening. Develops a rich patina. | Huberd’s Shoe Grease, Fiebing’s Pro Dye |
| Aniline / Semi-Aniline | Light Conditioner | Subtle, even enriching of existing color. Maintains natural feel. | Chamberlain’s Leather Milk No. 1 |
| Pigmented / Corrected Grain | Dye or Leather Paint | Good color change, but may require deglazing first. Paint is good for touch-ups. | Angelus Leather Paint, Fiebing’s Leather Dye |
| Suede / Nubuck | Specialist Spray | Minimal darkening; primarily for protection and stain resistance. | Saphir Suede & Nubuck Protector |
Frequently Asked Questions
Does mink oil permanently darken leather?
Yes, in most cases. Mink oil penetrates deeply into the leather fibers, and the darkening effect is not designed to fade out. While some lightening may occur with time and cleaning, the leather will remain noticeably darker than its original state. Always test on a hidden area first.
Can you darken leather with just conditioner?
Many conditioners will darken leather slightly as a side effect of their nourishing oils. However, the change is usually subtle, a shade or two, and is meant to even out the color, not transform it. For a significant darkening, you need a product marketed for that purpose, like a dedicated oil or dye.
How long does it take for leather to darken after treatment?
With oils, you’ll see an initial change within an hour, but the full, final color develops over 12 to 24 hours as the oil fully migrates into the core. With dyes, the color is immediate upon drying, but you should allow 24 hours before sealing or using the item to ensure all carriers have evaporated.
Will darkening leather make it stiff?
Not if done correctly. Oils and conditioners should soften leather. Stiffness results from over-application (creating a gummy layer) or using the wrong product (like a wax-heavy conditioner on a soft leather). Dyes can slightly stiffen leather, which is why a conditioning step after sealing is often recommended.
Can you darken patent leather or vinyl?
No, not effectively. Patent leather has a thick, non-porous plastic coating. Vinyl is not leather at all. Neither material will absorb oils or dyes. Any attempt will result in a messy surface coating that will scrape or peel off.
Before You Go
The goal isn’t just a darker piece of leather; it’s a healthier one. Darkening should be a byproduct of nourishment or a deliberate, professional recoloring, not a cover-up for damage or a reckless experiment.
If you want a true color change, commit to the dye process and its required prep and seal steps. And if you’re holding a family heirloom or a high-end designer piece, consider consulting a professional restorer first. The line between a beautiful restoration and an irreversible mistake is thinner than you think.
Understand that a perfect, factory-even color is often the enemy of character. The slight variations from a hand-applied oil treatment are what create a personal patina. That’s the story you’re helping to write.
