
Master How to Break In a Leather Saddle and Avoid Mistakes
This post contains affiliate links. As an Amazon Associate, we earn from qualifying purchases.
This post contains affiliate links. As an Amazon Associate, we earn from qualifying purchases.
To break in a leather saddle, you combine riding time with precise, periodic tension adjustments and the exclusive use of a wax-based leather dressing like Brooks Proofide. The goal is to let the leather soften and mold to your sit bones without letting it sag more than 5-6mm at the rear, which risks contact with the metal frame.
That 5-6mm measurement is the mechanical threshold where comfort turns into structural risk. A sagging saddle doesn’t just feel bad; it can press against the frame or seatpost, stressing the leather fibers and leading to premature failure.Your job during the break-in period is to manage that stretch.
What follows: the exact tensioning procedure, why you must avoid oils, the one saddle model that breaks in faster (and who should avoid it), and the maintenance rhythm that keeps a broken-in saddle perfect for decades.
Key Takeaways
- The leather is “broken in” when it’s flexible and shows two distinct dimples from your sit bones, this can take weeks to months of regular riding.
- Check saddle tension every six months using the 5-6mm flex test: press down on the rear; if it gives more, make a ¼ to ½ turn on the tension nut.
- Use only Brooks Proofide or a similar wax-based conditioner. Oil-based dressings can over-soften and weaken load-bearing leather fibers.
- Never adjust tension on a wet saddle, and avoid long rides in heavy rain, water can permanently stretch the leather if it’s under load.
- The Brooks Swallow saddle breaks in faster due to its design but offers less support, making it unsuitable for heavier riders or daily commuting.
The 5mm Flex Test and Tensioning Basics
You don’t break in a saddle by just riding it into submission. You guide it. The primary tool for that is the tensioning nut at the front of the saddle, and your primary metric is a 5-6mm flex at the rear.
Here’s the thing. New saddle leather is stiff from tanning and molding. As you ride, the fibers relax and stretch. A little stretch creates the comfortable hammock effect. Too much stretch lets the leather bottom out. The official Brooks care manual states the flex at the rear should not exceed 5 or 6 mm when pressed down firmly with your palm. Exceed that, and you’re no longer sitting on leather, you’re sitting on the frame.
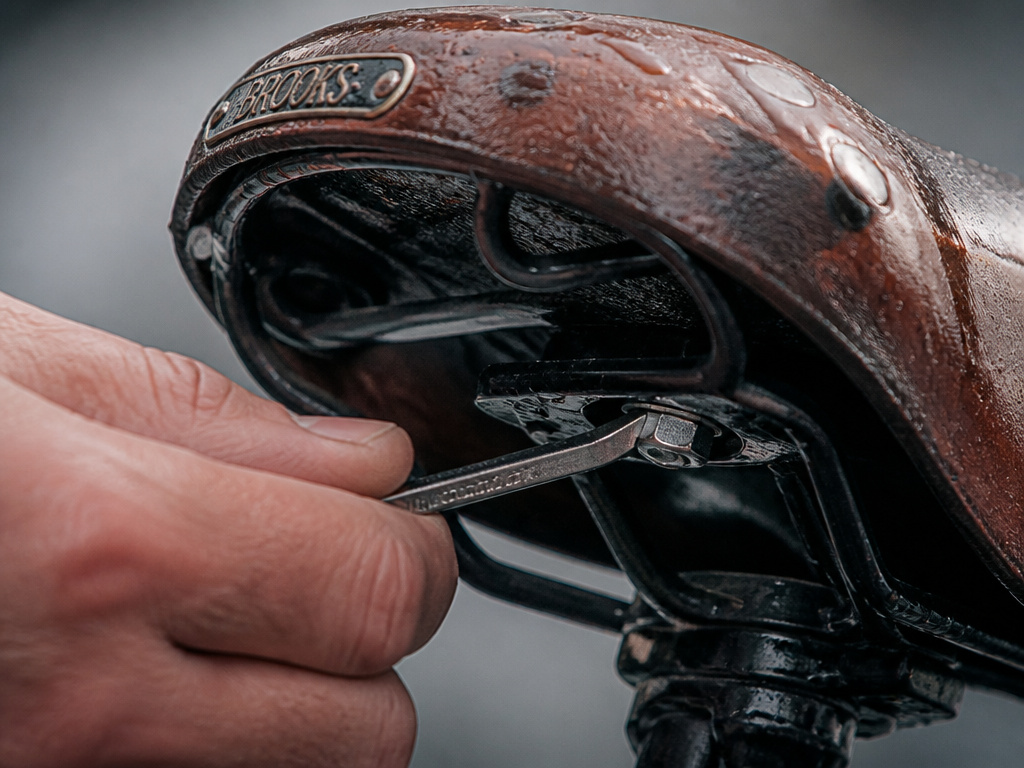
Press down on the rear of the saddle with the palm of your hand. If the leather flexes more than 5–6 mm, it’s time to adjust the tension. Make a ¼ to ½ clockwise turn (90–180 degrees) on the tension nut at the nose using a Brooks spanner or a correctly sized open-end wrench.
The process is simple, but the details matter. 1. Work from the front. You need clear access to the tension nut. 2. Turn only the nut. If the nose pin turns with the nut, you’ll get nowhere. Use pliers to grip the pin flat and hold it steady. 3. Make small adjustments. A quarter-turn is often enough. Re-test the flex after each adjustment. 4. Let it settle. Ride for a few hours or a day after tensioning before checking again. The leather needs to redistribute the new stress.
This measurement is the core of proper saddle maintenance.You’ll do this a few times during the initial break-in, then roughly every six months thereafter.
Proofide: The Only Dressing You Should Use
The internet is full of “miracle” leather conditioners. For a Brooks saddle, that search begins and ends with Proofide. This isn’t brand loyalty; it’s materials science. Proofide is a wax-based dressing, not an oil.
The distinction is everything. Modern tanning produces leather that is already supple. The goal of conditioning during break-in isn’t to inject more softness, but to maintain the leather’s natural oils and protect it from drying out. An oil-based dressing penetrates deep and can over-lubricate the fibers. In load-bearing leather, that increases its ability to stretch, the opposite of what you want. A wax-based balsam like Proofide hydrates the surface and provides a protective layer without compromising the fiber structure.
This advice is echoed by equestrian experts. Bates Saddles, a major horse saddle manufacturer, explicitly states they “tend to not recommend oil dressings anymore” for modern, load-bearing leather, preferring wax-based balsams to prevent over-stretching.
How to apply Proofide correctly:
- Focus underneath. Apply a thin layer to the unfinished underside of the saddle, where it can be fully absorbed. This is where the leather needs moisture most.
- Go light on top. Apply a very scant amount to the top, let it permeate for an hour, then buff it off completely to a slight sheen. A greasy top attracts dirt and stains your shorts.
- Mind the exceptions. Do not apply any Proofide to the top of “Aged Saddles,” as it can alter their finished patina.
- Follow the rhythm. Apply Proofide every six months, or more often if you ride in dry, sunny conditions. Over-treatment is a real danger, it can clog the leather’s pores.
This process of conditioning a leather saddle is less about forcing it soft and more about preserving it as it softens through use.
What “Breaking In” Actually Feels Like (And How Long It Takes)
You’re looking for two dimples. Not a single saggy bowl, but two distinct depressions that match your sit bone spacing. The leather around them will remain firm, providing support. That’s the sign of a properly broken-in saddle.
The timeline is a function of your weight, riding frequency, and the saddle model. A lightweight rider on a daily 10-mile commute might see those dimples in three weeks. A weekend warrior might take two months. The Brooks Swallow, with its lack of supportive side flaps, breaks in much faster, sometimes in half the time, but that’s because it’s designed for a aggressive, racing posture and less overall support.
| Saddle Model | Break-In Speed | Best For | Weight Consideration |
|---|---|---|---|
| B17 (Standard) | Steady, predictable | Touring, daily riding | Robust, handles most weights |
| Swallow | Faster | Racing, sport geometry | Not ideal for heavier riders |
| B33 / B135 | Slower | Heavy-duty touring (rated for 280lb/127kg) | Built for higher load capacity |
You can’t rush this. Attempts to accelerate the process by over-tensioning or soaking the leather will damage it. The goal is to let the methods for softening stiff leather work with time and pressure, not against them.
Three Mistakes That Permanently Damage a Saddle
 Most saddle damage happens during the break-in period, when owners are most impatient. Here are the irreversible errors.
Where this goes sideways: Tensioning a wet saddle. The leather stretches like putty under load, and when it dries, it sets in that over-stretched position. The resulting sag is permanent.
- Tensioning When Wet. This is the cardinal sin. If you get caught in the rain, dry the saddle naturally at room temperature. Never put a wet saddle near a heater or in direct sun. Before you even think about the tension spanner, ensure the leather is completely dry to the touch.
- Using the Wrong Conditioner. Oils, neatsfoot, mink oil, silicone sprays, they’ll all make the leather supple initially. Then they’ll over-soften it, leading to excessive stretch and a loss of support. They can also degrade the thread and darken the leather unevenly. Stick with the wax-based formula.
- Ignoring the Sag. That comfortable, deep cradle can slowly become a structural problem. If you ignore the 5-6mm rule, the leather can eventually chafe against the seatpost or rails. Once the fibers are stretched beyond their rebound point, you can’t tension them back. The saddle is finished.
These mistakes are why a foundational practical leather softening guide emphasizes technique over brute force.
The Swallow Saddle: A Special Case
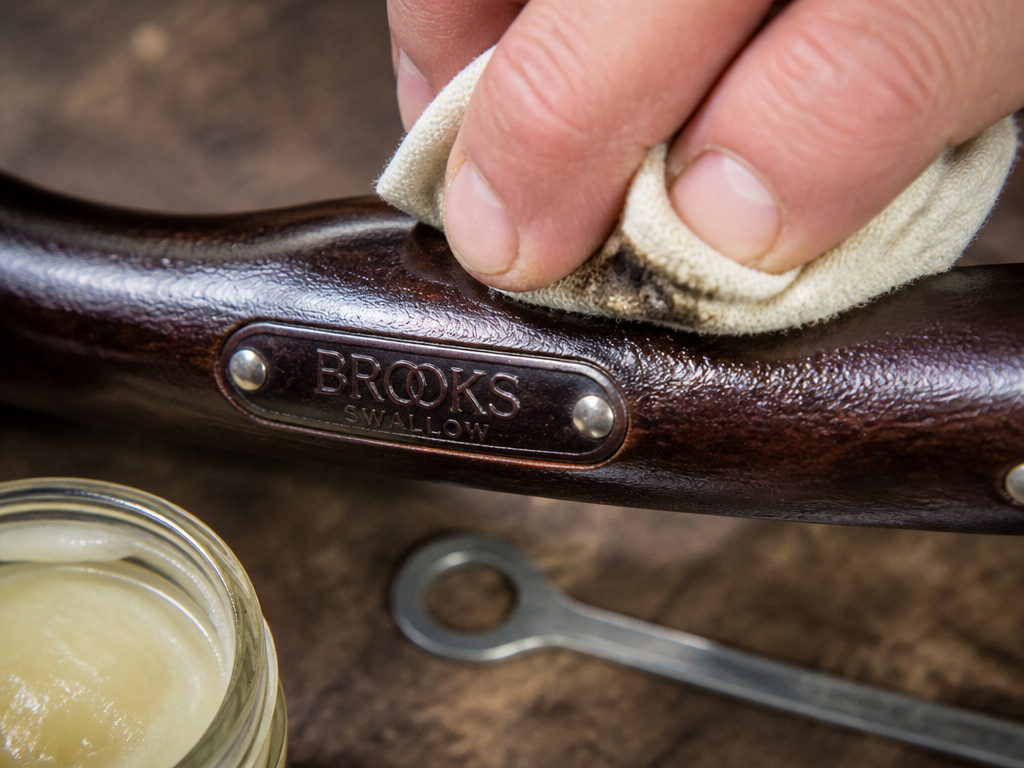 The Brooks Swaddle is the exception that proves every rule. It’s designed for a specific, hunched-over racing posture (30-45 degrees), and it lacks the full “wings” or flaps of saddles like the B17. This means less leather to support your sit bones.
Consequently, it breaks in faster. It also requires more frequent tension checks, as the smaller leather panel is under higher stress. If you’re a heavier rider or want a saddle for upright commuting, the Swallow’s fast break-in is a liability, not a benefit.
Choosing the right model from the start is the most important step in the entire process. It’s the difference between a saddle that breaks in to fit you and one you fight for its entire life.
Maintenance After the Break-In
A broken-in saddle is a living, stabilized product. Your job shifts from active forming to vigilant upkeep.
Your maintenance calendar has two items: * Tension Check: Every six months. Perform the 5-6mm flex test. * Conditioning: Every six months. Apply Proofide, focusing on the underside.
Store the bike indoors, away from direct sunlight and heat sources, which can dry and crack the leather. Wipe down the saddle after a sweaty ride to remove salt and moisture. If you use a saddle cover, make sure it’s breathable.
This ongoing essential leather saddle care guide is what transforms a decade of use into several decades. The patina will deepen, the dimples will become more personal, and the saddle will become irreplaceably yours.
Frequently Asked Questions
Can I use saddle soap to clean my leather saddle?
Only if it’s genuinely filthy from mud or grime. For routine cleaning, a damp cloth is sufficient. Saddle soap is a cleaning agent that can strip natural oils. Overuse, especially on a breaking-in saddle, can dry out the leather and slow the process. If you must use it, follow with a very light application of Proofide to replenish lost moisture. Here’s a guide on proper saddle soap application for when it’s truly needed.
How is breaking in a saddle different from breaking in boots?
The goal is similar, to mold stiff leather to your body, but the mechanics differ. Boots rely on flex, heat, and moisture from your foot to soften leather boots. A saddle uses sustained, static pressure from your sit bones combined with controlled tension adjustments. You cannot “wear” a saddle around the house to break it in; it requires actual riding time under your full weight.
My saddle is squeaking. Is that normal?
Slight squeak during the first few rides is normal as the leather fibers move against the frame and rivets. It should diminish as the saddle breaks in. If a loud squeak persists, it could indicate a need for a slight tension adjustment or that the leather is rubbing against a dry spot on the metal. Don’t oil it. Check the tension and ensure the saddle is properly mounted.
What if I over-tighten the saddle?
You’ll know. The saddle will feel hard as a board, and the leather may bulge upwards near the rivets. Loosen the tension nut slightly (counter-clockwise) by an eighth of a turn and ride for a day to let the leather relax. The key is that small, incremental adjustments prevent this. Over-tightening can stress the rivets and the leather’s attachment points.
Before You Go
The one rule most guides skip: if you ever see the leather sagging so it touches the metal rails when you’re not sitting on it, stop riding it immediately. No amount of tensioning will fix that. The leather fibers have stretched beyond recovery. At that point, the break-in conversation is over, and it’s time for a replacement.
Everything above assumes you’re starting with a quality, tensionable leather saddle. The process is an investment of patience, rewarding you with a piece of gear that conforms uniquely to you. It’s not the fastest path to comfort, but it’s the only path to a saddle that gets better for years.
