
How to Glue Leather | The Double-Coat Method That Lasts
This post contains affiliate links. As an Amazon Associate, we earn from qualifying purchases.
This post contains affiliate links. As an Amazon Associate, we earn from qualifying purchases.
To glue leather properly, use a flexible contact cement like Barge All-Purpose Cement. Apply a thin, even coat to both surfaces, let it dry until tacky (5-10 minutes), then press them together for a permanent, flexible bond that won’t crack. This double-coat method is 66% stronger than a single coat, according to adhesion tests.
The strength comes from how leather absorbs glue. The porous fibers soak up the first coat, creating a foundation. The second coat bonds to that first layer and recoats the surface, creating a mechanical lock that stays flexible. Skip this, and you get a weak point that fails the first time the leather bends.
What follows is a breakdown of why this method beats every shortcut, the exact tools you need, and the step-by-step process to make any repair or project hold for years.
Key Takeaways
Contact cement is essential for leather-to-leather bonds that need to flex; super glue creates a brittle, rigid spot that cracks. – The double-coat method, applying glue to both pieces, creates a bond that tests show is 66% stronger than a single coat. – Let the glue dry to tacky before joining. Pressing wet pieces together squeezes out adhesive and creates a weak bond. – Temperature and humidity control the clock. Full cure takes 24-48 hours; working below 41°F or above 104°F ruins the chemistry. – Cleanup is part of the job. Have mineral spirits or acetone ready to wipe excess immediately; cured glue requires careful scraping.
The One Adhesive Rule for Leather
Forget the super glue in your junk drawer. Cyanoacrylate adhesives set rigid and brittle. Leather bends, stretches, and flexes with use. A rigid glue spot can’t move with it, so the bond snaps or the leather around it stiffens and cracks.
The right answer is a flexible contact cement. Products like Barge All-Purpose Cement, Renia Aquilim 315, or Tandy Leather Eco-Flo Leather Weld are formulated to dry flexible. They create a bond that moves with the material, which is why they’re the standard in shoe repair and upholstery shops.
A 2024 YouTube leatherworking test comparing bond methods found that two coats of contact cement produced a bond 66% stronger than a single coat. The first coat soaks into the porous leather fibers; the second coat bonds to that first layer and creates a surface-to-surface lock.
This isn’t about brand loyalty. It’s about chemistry. Polyurethane and neoprene-based contact cements remain pliable after curing. If your project involves leather that will ever be bent, sat on, or worn, this is the only category of adhesive that makes sense.
The Core Principle: The Double-Coat Method
The double-coat method is what separates a temporary fix from a permanent repair. Here’s why it works and the one mistake that undoes it.
You apply a thin, even coat of cement to both surfaces to be bonded. Not a glob. A thin, consistent film. Then you wait. The solvents evaporate, leaving the adhesive tacky but not wet to the touch. This usually takes 5 to 10 minutes in a room-temperature, low-humidity environment. You’ll know it’s ready when it doesn’t transfer to your finger when lightly touched, but still feels sticky.
Then you press the two tacky surfaces together. The bond is instant and permanent. No sliding, no repositioning. That’s the “contact” in contact cement.
Where this goes sideways: Joining the pieces while the glue is still wet. This squeezes the adhesive out from the seam, starving the bond of material. It also often gets glue all over the surface of your leather, creating a mess that’s hard to clean without damaging the finish. The bond will feel weak and peel apart within days.
| Step | Right Way | Risk If Skipped |
|---|---|---|
| Apply Glue | Thin, even coat to BOTH pieces. | Uneven coverage creates weak spots that fail under stress. |
| Dry Time | Wait 5–10 mins until tacky (no transfer). | Wet glue squeezes out, creating a weak bond and surface mess. |
| Join | Align perfectly and press firmly across entire seam. | Misalignment is permanent; poor pressure causes delamination. |
The waiting is the hardest part. But that evaporating solvent is what makes the bond strong. Rush it, and you’ll be redoing the work.
Essential Tools for a Clean Job
 You can do this with just the glue tube, but the right tools turn a messy gamble into a clean, repeatable process. These are the four I keep on my bench.
- A Natural Bristle Brush or Dabber: The applicator that comes with the glue is often terrible. A small, cheap natural bristle brush (like a 1/2″ acid brush) gives you control to spread a perfectly even, thin coat. Synthetic brushes can melt from the solvents.
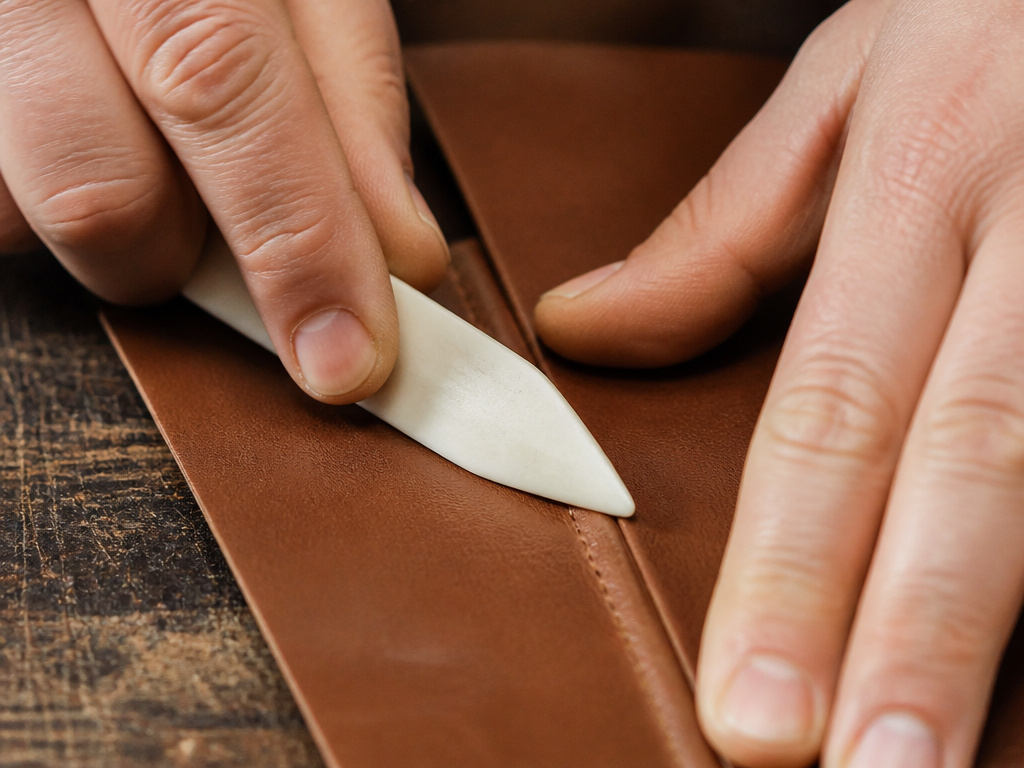
- A Bone Folder or Roller: After joining, you need even pressure across the entire seam. A bone folder (a smooth, rounded plastic or bone tool) or a small rubber roller presses out air bubbles and ensures full contact without marring the leather.
- Masking Tape or Clamps: For complex repairs or edges, use low-tack painter’s tape to mask off areas you don’t want glue to touch. Spring clamps or binder clips can hold pieces in alignment while the bond cures if needed.
- Solvent and Scrapers for Cleanup: Have mineral spirits (for wet cement) and acetone (for cured spots) ready on a clean rag. A plastic scraper or a dull wooden stick can lift cured glue without scratching the leather.
I abandoned using just the bottle’s nozzle for precise work after a project on a curved bag gusset went sideways. The glue blobbed, oozed past the seam, and took an hour to clean up. The lack of control compared to a simple brush was the specific reason. Now the brush is the first tool I reach for.
Step-by-Step Guide: Gluing Leather to Leather
 Follow this sequence. The order matters more than speed.
1. Prepare the Surface.
Clean both leather pieces with a damp cloth and let them dry completely. Any dirt, oil, or conditioner will block the adhesive. For smooth, finished leather, lightly roughen the glue area with 400-grit sandpaper to give the cement some “tooth.” Wipe away the dust.
2. Apply the First Coat.
Using your brush, apply a thin, even layer of contact cement to the first piece. Cover the entire bonding area. Repeat on the second piece. This is your double coat.
3. Wait for the Tack.
Let both pieces sit for 5 to 10 minutes. Test for tackiness by gently touching a corner with your knuckle. It should feel sticky but not wet, and no glue should transfer. Humidity over 60% can double this time.
4. Join and Press.
Carefully align the two pieces. Once they touch, the bond is immediate. Start from one end, pressing down as you go to avoid trapping air. Then, use your bone folder or roller to apply firm, even pressure across the entire seam.
5. Cure Fully.
While the bond is strong enough to handle now, full cure takes 24 to 48 hours. The chemical cross-linking that delivers maximum strength happens during this time. Don’t stress the seam by bending or stretching it until at least a day has passed.
Common mistake: Testing the bond strength after an hour by pulling at it. You’re breaking the microscopic chains that are still forming. Leave it alone for a full day.
When the Standard Method Needs a Tweak
Leather isn’t a uniform material. The type you’re working with changes the prep work.
For Suede or Nubuck: The fuzzy surface soaks up glue differently. Apply a slightly thinner coat to avoid saturating and matting down the nap. Be extra careful with alignment, as the rough texture can make repositioning impossible without tearing fibers.
For Non-Absorbent Surfaces (Wood, Metal, Plastic): This flips the script. If you’re doing a project like gluing leather to wood, the manufacturer instructions change. For non-porous surfaces, you often apply a thin coat to both parts, let them dry completely (5-10 minutes), then press together for an instant bond. Always check the adhesive’s technical sheet for the specific substrate.
Temperature and Humidity are Silent Partners.
The Loctite product sheet states its glue works best between 41°F and 104°F. Outside that range, the curing chemistry slows down or stops. In a cold garage, your glue may stay tacky for an hour and never achieve full strength. In high humidity, the water in the air interferes with solvent evaporation, leading to a gummy, weak bond. Work in a climate-controlled space if you can.
Choosing Your Adhesive: A Quick Comparison
Not all contact cements are identical. Your project scope dictates the best leather adhesive from the start.
| Adhesive Type | Best For | Key Property | Working Time |
|---|---|---|---|
| Traditional Contact Cement (Barge) | Leather-to-leather, heavy repairs. | Highest strength, flexible, water-resistant. | ~5-10 min dry time. |
| Water-Based Contact Cement (Eco-Flo) | Indoor projects, low odor. | Flexible, non-flammable, easier cleanup. | ~10-15 min dry time. |
| Cyanoacrylate (Super Glue) | Tiny spot repairs, non-flexing areas. | Fast set, rigid bond. | Seconds. |
| Polyurethane Glue | Leather to porous materials (wood, foam). | Expands as it cures, fills gaps. | 15-20 min clamp time. |
For 90% of leatherwork, a traditional solvent-based contact cement is the default. The water-based versions are excellent for indoor use, but they can sometimes have slightly lower ultimate strength on heavy loads. Super glue has its place, securing a decorative rivet back or filling a pinhead-sized hole, but never for constructing a seam.
If you’re ever in doubt about how to choose leather glue, prioritize flexibility and working time over sheer instant grip.
How to Fix Glue Mistakes
You will get glue where it doesn’t belong. Planning your cleanup is part of the job.
For wet cement, immediately wipe the area with a rag dampened with mineral spirits. Don’t rub hard, as you can spread the glue or drive it deeper into the leather. Blot and lift.
For cured cement, it gets trickier. Acetone (nail polish remover) can dissolve many contact cements, but it can also strip dyes and finishes from the leather. Always test on a hidden area first. Apply a tiny amount to a cotton swab, dab at the edge of the glue spot, and see if it loosens without damaging the leather. For stubborn spots, you may need to carefully scrape with a plastic razor blade held at a low angle.
If a project goes wrong and you need to remove glue from leather entirely, patience and solvent are your only tools. There are no magic erasers.
Frequently Asked Questions
Can I use Gorilla Glue on leather?
You can, but you probably shouldn’t for most projects. Original Gorilla Glue is a polyurethane adhesive that expands as it cures. It can foam out of seams and is very difficult to clean up. It’s better suited for bonding leather to a porous material like wood where the expansion can fill gaps. For leather-to-leather, a dedicated contact cement is a cleaner, more predictable choice.
How long does leather glue take to dry?
This has two answers. Dry to tacky for bonding is usually 5-10 minutes. Full cure for maximum strength is 24-48 hours. The item is usable after the initial bond sets, but avoid stressing, bending, or getting it wet for at least a full day to let the chemistry complete.
Why did my glued leather come apart?
Three likely reasons. First, the surfaces weren’t clean or were too smooth (needing light sanding). Second, the glue was joined while still wet, creating a starved bond. Third, you used the wrong adhesive, a rigid super glue on a flexing piece will crack and fail every time.
Is there a glue that works on both leather and fabric?
Yes, but it requires careful selection. A flexible fabric glue or a multi-surface contact cement can work. The process for a leather to fabric bond is critical: you must often apply glue to the leather side only, let it get tacky, then press onto the fabric. Testing on scraps first is non-negotiable.
Can I reglue a piece if the bond fails?
Sometimes. You must first remove all the old adhesive from both surfaces completely. Any leftover glue will prevent the new coat from bonding directly to the leather fibers. This often means sanding or carefully scraping down to fresh material, which can thin the leather. It’s often easier to start with a new piece if possible.
Before You Go
The real secret isn’t a specific brand. It’s the method: clean surfaces, a thin double coat, waiting for the tack, and then marrying the pieces for good. That sequence works with Barge, Renia, or any other quality contact cement.
If you only remember one thing, let it be this: glue needs to dry before you join the leather, not after. The moment of patience while it gets tacky is what buys you a bond that lasts for years, not weeks.
Everything above assumes you’re working with real, porous leather. If you’re dealing with a synthetic “bonded leather” or plastic-coated vinyl, the rules change, those materials often need specialty primers for the glue to grab at all. In that case, the adhesive’s technical data sheet is your final guide.
