
What Is a Pricking Iron? Building Perfect Stitches in Leather
This post contains affiliate links. As an Amazon Associate, we earn from qualifying purchases.
A pricking iron is a hand tool used in leathercraft to create a series of evenly spaced marks or holes along a stitch line. It ensures uniform stitch spacing, which is the foundation of professional-looking hand-sewn leatherwork. The tool typically has multiple slanted teeth and is struck with a mallet, either to just mark the leather for a follow-up awl or to punch completely through.
That definition covers the what, but the why is what separates clean work from amateur hour. Perfectly spaced holes aren’t just about looks, they dictate how your needles pass, how your thread lays, and how much tension the finished seam can handle before it fails.
What follows is a breakdown of the mechanics, the two main styles (French and Diamond), how to match tooth spacing to your leather, and the one technique, walking the iron, that guarantees consistency from your first hole to your last.
Key Takeaways
- A pricking iron creates guide marks or holes; a stitching awl or needle follows to open the hole fully. Using the iron alone on leather over 3-4mm thick risks breaking teeth. The “walking” technique, placing the last tooth into the previous mark, is essential for maintaining perfect spacing over a long stitch line.
- French style irons create a slimmer, more traditional slanted hole, while Diamond style irons produce a more pronounced angled hole. Neither is objectively better; the choice is aesthetic.
- For general work, a 3.85mm or 3.0mm spacing (roughly 8-9 stitches per inch) is the most versatile starting point for wallets, bags, and belts.
- Store pricking irons in a tool roll or individual pouch. Teeth hitting other metal tools in a drawer is the fastest way to dull or damage a fine edge.
How a Pricking Iron Actually Works
Let me share what I’ve learned about the physics of it. You don’t just hit it and hope. The slanted teeth are designed to push leather fibers aside, not shear through them like a drill bit. This creates a clean, angled channel that guides your awl or needle with minimal resistance.
A pricking iron is a multi-pronged leatherworking tool struck with a mallet to create evenly spaced indentations or holes along a marked stitch line. The primary function is to ensure uniform stitch spacing, a critical factor for both the aesthetic and structural integrity of hand-stitched leather goods. Angled teeth, typically between 40 and 45 degrees, create slanted holes that facilitate the crossing of needles in saddle stitching.
The angle of the teeth is what makes hand stitching possible. A vertical hole forces you to fight the leather on every pass. A slanted hole gives the needle a path, reducing friction and allowing the two needles of a saddle stitch to cross in the middle of the leather panel. That crossing point is where the legendary strength of hand stitching comes from.
Walk the iron. This is the technique that guarantees your spacing stays true. After making your first set of impressions, you lift the iron and place its last tooth into the last hole you just created. Then you strike again. This chains the spacing together with mechanical precision, eliminating the tiny cumulative errors that happen if you try to eyeball each new position. Most people skip this on their first project. The back half of their stitch line starts to wander, and the whole piece looks off.
Pricking Iron vs. Stitching Chisel vs. Awl
The names get used interchangeably, but the functions have distinct edges. Confusing them leads to torn leather and broken tools.
A stitching chisel (sometimes called a diamond chisel) is built to punch completely through the leather in one blow. Its teeth are stronger and often have a more aggressive diamond shape. It’s a one-step tool: punch and stitch. A pricking iron is often used to just mark the leather, requiring a stitching awl to finish opening the hole. This two-step process gives you more control, especially on curves or thick stacks.
The leather awl is the finishing tool. After the pricking iron sets the spacing and the angle, the awl follows each mark to open a clean, polished hole for the needle. Think of the iron as the architect laying out the plan and the awl as the craftsman executing the detail.
| Tool | Primary Action | Best For | Risk If Used Wrong |
|---|---|---|---|
| Pricking Iron | Marks or partially pierces at set spacing | Controlled work, curved lines, thicker leather | Teeth snap if forced through material >4mm without an awl |
| Stitching Chisel | Punches completely through leather | Faster production on straight lines, thinner leather | Can tear fibers on dense or dry leather, leaving a ragged hole |
| Awl | Opens a single, polished hole | Finishing pricked marks, detailed work, tight corners | Requires significant skill to maintain consistent spacing and angle freehand |
The practical takeaway? For a beginner focused on quality, a pricking iron and awl combo teaches you more control. For speed on long, straight seams on sub-3mm leather, a stitching chisel works. But never use a chisel like an awl, or an awl like a spacing tool. Each has its job.
French Style vs. Diamond Style: The Aesthetic Choice
This is where personal preference meets your project’s final look. The difference isn’t academic; it’s visible in every stitch.
French style irons have slim, finely tapered teeth that produce a narrow, elegant slanted hole. The resulting stitch line is subtle and traditional, the kind you see on heritage boots and classic briefcases. I prefer French style irons because they’re what I learned with, and they pair perfectly with the traditional saddle stitch method I use for most goods.
Diamond style irons have teeth with a more pronounced lozenge or diamond shape. They create a wider, more angled hole, which leads to a stitch line with a bold, layered appearance. This style is hugely popular in Japanese-inspired leathercraft for its distinct visual punch.
Here’s the straightforward guide: neither is objectively better. French style offers a refined, classic line. Diamond style offers a bold, decorative line. Your choice should be based on the look you want for your wallet, bag, or belt. A high-quality version of either will last decades, so pick the aesthetic that speaks to you.
Choosing the Right Pricking Iron for Your Work
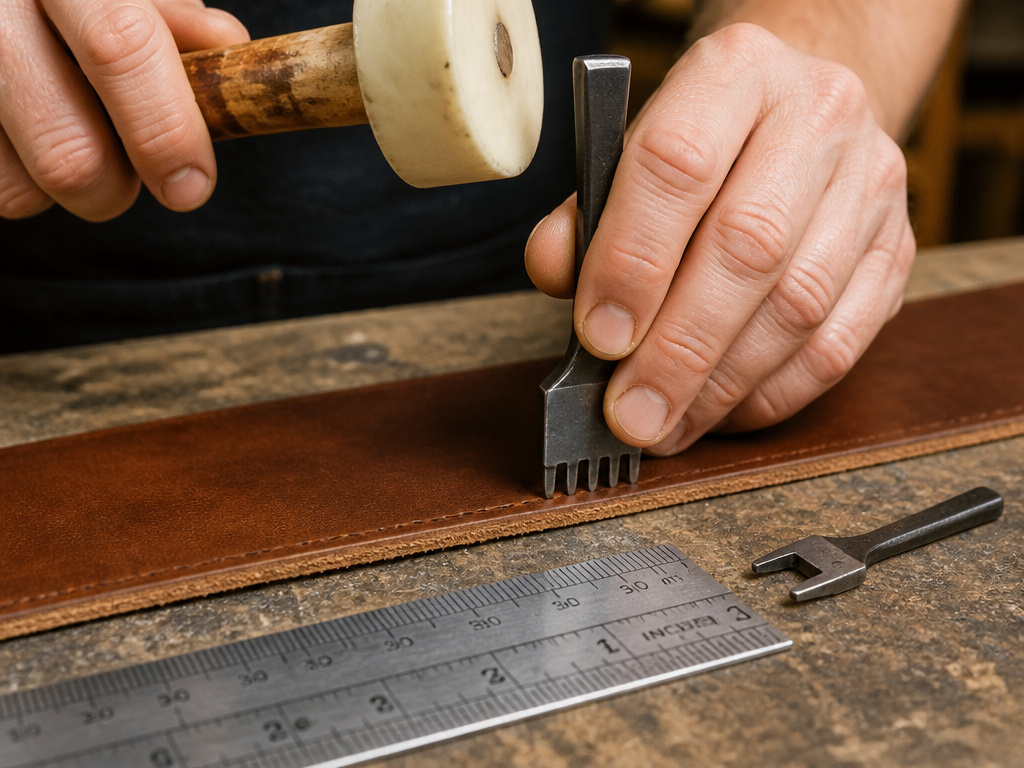 You need to match two specs to your leather: tooth spacing (SPI/TPI) and tooth count. Getting this wrong makes stitching a fight.
Spacing is measured in millimeters between teeth or stitches per inch (SPI). This determines how close your stitches sit. * 5.0mm (5 SPI): For heavy, rustic work like belts, straps, and bags where a bold stitch line is desired. * 3.85mm – 4.0mm (6-7 SPI): A versatile middle ground. The 3.85mm French style iron is my default for general leatherwork. It suits a wide range of leathers and projects. * 3.0mm (8-9 SPI): The sweet spot for refined work. Ideal for wallets, card holders, and notebook covers where the stitch line is a key detail. * 2.5mm (10 SPI) and finer: For delicate work on thin leathers like watch straps. These require precision and a very light touch.
Tooth count is about workflow. A two-prong iron is for starting lines and navigating curves. A four- or six-prong iron is for efficiency on long, straight runs. I recommend starting with a two-prong and a four-prong in the same spacing. This covers 95% of projects. Ten-prong irons exist, but they’re cumbersome to reposition accurately.
Where this goes sideways: Using a 3.0mm iron on 5mm thick saddle leather. The fine teeth can’t displace that much material cleanly and will either bend or snap. Match your tool to your material.
The Step-by-Step Process for Using a Pricking Iron
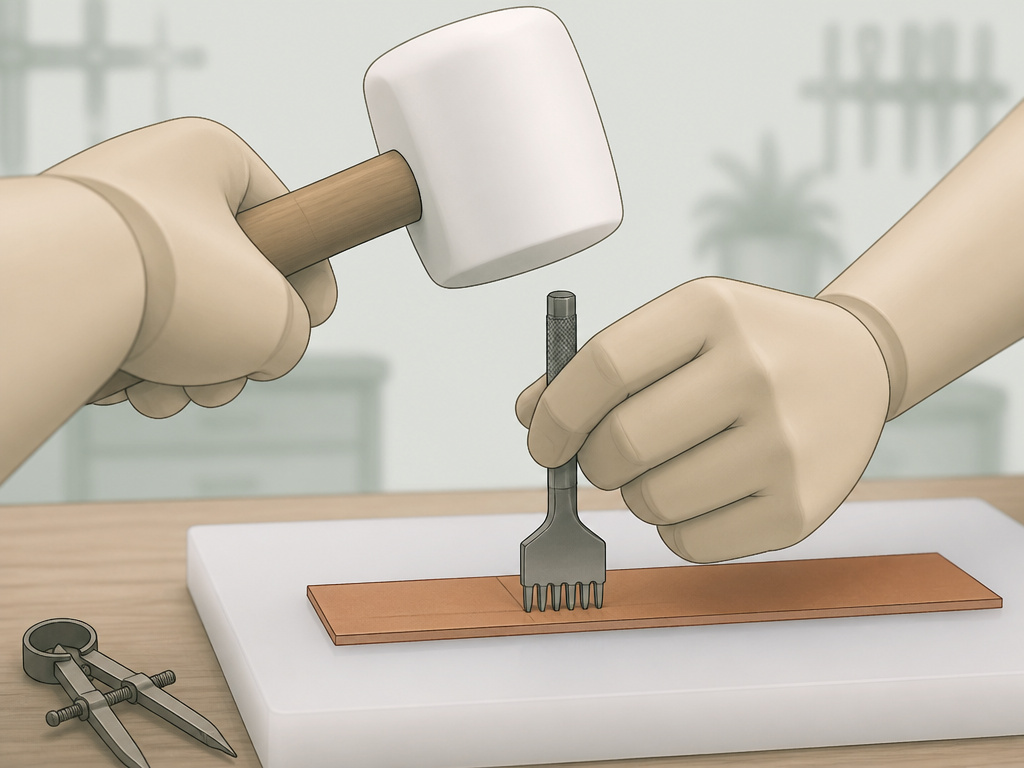 This is based on years of practical experience. Rushing these steps is how you ruin a piece after hours of careful cutting and skiving.
- Prepare your punching surface. Never strike directly on a granite slab or metal table. The teeth will hit the unyielding surface and dull instantly. Use a dedicated polyethylene punching pad or a stack of scrap leather. The surface should give just enough to let the teeth penetrate fully without hitting bottom.
- Mark your stitch line. Use a wing divider or overstitch wheel to scribe a clear, consistent line. This is your guide. Trying to follow a pencil line by eye with a multi-prong iron guarantees a wavy stitch.
- Position and strike. Hold the iron perfectly vertical, aligned with your marked line. Strike firmly once with a poly or rawhide mallet. A metal hammer will damage the iron’s top.
- Walk the iron. Lift, place the last tooth into the last mark, re-align to your scribed line, and strike again. Repeat this sequence to the end of your line.
- Open the holes with an awl. If you’re only marking, now take your stitching awl and open each mark. This is where you finalize the clean, angled hole the needle will see.
Skipping step five and forcing the iron to punch through thick leather is the most common beginner mistake. You’ll hear a sharp ping. That’s the sound of a tooth shearing off at the base. The tool is often ruined.
Care, Maintenance, and Storage
A pricking iron isn’t a screwdriver. You can’t toss it in a toolbox. The teeth are precision-ground and hardened to around 58-60 HRC, but they’re not indestructible.
After each use, wipe the teeth clean with a dry cloth to remove any leather residue or oils. Once a month, give them a very light coat of camellia oil or a dedicated tool wax to prevent rust, especially if you live in a humid climate. Sharpening is a job for a professional or an experienced hand with diamond files; attempting it yourself can ruin the tooth profile and angle.
Store them with intention. A tool roll with individual pockets is the best solution. The second-best is a drawer organizer with soft dividers. The worst thing you can do is throw them loose into a drawer where the teeth clatter against other metal. That fine edge will be gone in a week.
Frequently Asked Questions
What’s the difference between a pricking iron and a stitching awl?
Pricking iron sets the spacing and angle for multiple holes at once. A stitching awl is a single-pointed tool used to open or create individual holes. The iron is for layout; the awl is for execution. You often use them together for the highest level of control.
Can I use a pricking iron on all types of leather?
You can use it on most, but you must adjust your technique. On soft, chrome-tanned leathers, a light tap may be enough to mark. On dense, vegetable-tanned leather, you’ll need a firmer strike. The universal rule is to avoid forcing it through any single layer thicker than 4mm. For thicker stacks, mark with the iron, then use an awl.
How do I choose the right SPI or TPI for my project?
Consider your leather thickness and desired look. Thicker leather (4mm+) pairs well with 4-5mm spacing for a bold stitch. Medium-weight leather (2-3mm) for bags and wallets shines with 3.0-3.85mm spacing. For delicate work on leather under 1.5mm, look at 2.5mm or finer. A 3.85mm or 3.0mm iron is the most practical first purchase.
Do I need a special mallet?
Yes. Use a poly, rawhide, or wooden mallet. A metal hammer will mushroom the top of the iron, eventually making it unusable. The Osborne Poly Hammer is a standard for a reason, it delivers force without damaging your tools.
Why are some pricking irons so expensive?
You’re paying for metallurgy and precision. Brands like KS Blade Punch or Barry King Tools use high-alloy steel, precise heat-treating, and CNC machining to ensure every tooth is identical and holds an edge. A cheap iron will have inconsistent spacing, soft teeth that deform, and a rough finish that drags in the leather. For a tool you’ll use for decades, the investment is justified.
Before You Go
Understand leather better to make confident choices about your tools. A pricking iron isn’t a magic wand; it’s a precision instrument that demands good technique. Start with a single spacing, 3.85mm is a safe bet, and a two-prong and four-prong set from Barry King Tools or C. Skelton.S. Osborne. Master the walking technique on scrap leather before you touch your project piece.
The leather will tell you what it needs. If you’re fighting to pull the iron out, your teeth are dull or you’re working material that’s too thick. If your stitch line wanders, you skipped the walking step. Listen to that feedback. It’s faster than any tutorial. Your first set of clean, evenly spaced holes is the moment leathercraft stops being a chore and starts being a craft.
