
How to Color Leather: A Complete Guide to Dyeing and Painting
This post contains affiliate links. As an Amazon Associate, we earn from qualifying purchases.
To color leather, you must match the colorant type to the leather’s original finish and execute a three-step process: deep cleaning, surface preparation, and controlled application of multiple thin layers. The prep work, removing old finishes and contaminants, decides whether the new color bonds or peels within a year.
That bond is mechanical and chemical. A colorant sticks to a surface, not to wax, oil, or the ghost of a previous dye job. Most failures trace back to a skipped cleaning step or a mismatch between a penetrating dye and a sealed, pigmented leather.
What follows is a breakdown of the three colorant paths, dye, paint, and finish, and the specific prep each one demands. You’ll learn why water hardness matters for dye mixing, when sanding is mandatory versus destructive, and the one tool category professional restorers refuse to use.
Key Takeaways
- The leather’s original finish, aniline, semi-aniline, or pigmented, dictates your prep method and colorant choice. Getting this wrong guarantees adhesion failure.
- Surface preparation is 80% of the work. This means removing all silicone, wax, and old finish with a dedicated deglazer or cleaner before any sanding or coloring begins.
- Always apply multiple thin coats. A single thick coat of dye or paint will dry unevenly, remain tacky, and crack as the leather flexes.
- Electric spray guns put out too much material, leading to runs, waste, and a finish that cracks and peels. Use an airbrush, HVLP gun, or wipe-on methods instead.
- Seal alcohol-based dyes with a compatible topcoat. If you skip this, the color will bleed and rub off onto clothing.
The 3-Step Leather Coloring Process
This isn’t art class. You can’t just slap color on and hope. The process is a sequence of removal, preparation, and building. Skip a step, and the leather will tell you, usually with a crack or a peel.
First, identify what you’re working with. Is the leather porous and natural-looking (aniline), slightly protected (semi-aniline), or coated with a plastic-like layer (pigmented)? The answer changes your first move.
The Technical Snippet: For color-fastness assessment, the industry references standards like EN ISO 105-A02 (visual grey scale) and EN ISO 105-A05 (instrumental measurement). The International Union of Leather Technologists and Chemists Societies (IULTCS) provides the detailed test methods that define how well a dye resists fading from light, rubbing, and perspiration.
Step 1: Deep Cleaning & Stripping
You’re not cleaning dirt. You’re removing the barrier. Old conditioners, silicone sprays, waxes, and the original factory topcoat all prevent new color from bonding.
For aniline or semi-aniline leather, start with a dedicated leather deglazer or prep agent like Leatherique’s product. Apply it with a lint-free cloth and scrub in small circles. You’ll see grime and old finish transfer to the cloth. For pigmented or “finished” leather, you often need a stronger stripper. The goal is to get back to the raw, absorbent leather surface.
Where this goes sideways: Using saddle soap or a general cleaner. These leave behind oils and surfactants that create a new barrier. You’ll think the surface is clean, but your dye will bead up and blotch.
I learned this the hard way on a vintage briefcase. The owner had religiously used a popular conditioner. I cleaned it, but not deeply enough. The first coat of Fiebing’s Pro Dye pooled and slid around like water on wax. The fix meant starting over with a stainless steel deglazing pan, which added two hours to the job.
Step 2: Surface Preparation (Sanding)
Sanding isn’t about smoothing. It’s about creating a mechanical “tooth” for the new color to grip. But sand the wrong leather, and you’ll ruin it.
| Leather Type | Sanding Required? | Grit & Notes |
|---|---|---|
| Pigmented / Top-Coated | Yes, mandatory. | Start with 220-400 grit. You must break the sealed surface. |
| Semi-Aniline | Usually not. | Only sand if there’s a “shelled” area from oil buildup. Use 1000+ grit lightly. |
| Aniline | No. | Never sand. You will destroy the natural grain and create suede. |
| Suede / Nubuck | No. | Never sand. The surface is the finish. |
The “shelled” leather edge case is real. Sometimes, body oils or contaminants create a hard, localized patch on otherwise healthy semi-aniline leather. Sand only that patch with 1000-grit paper, just enough to break the shell. Over-sanding here turns that spot into a sueded blemish that won’t hold color the same way.
Pour a small amount of your prep agent into a bowl. Use it to wet-sand. This keeps dust down and helps you see when you’ve broken through the old finish. Wipe constantly with a clean, white paper towel. If the towel shows color, you’re removing old dye. Keep going until the towel wipes clean.
Step 3: Controlled Application
This is where patience pays. The rule is multiple thin coats. Whether you’re dyeing, painting, or applying a pigmented finish, a single thick layer will fail.
- For Dyes (Fiebing’s Pro Dye, Eco-Flo): Use a wool dauber or sponge. Dip, dab off excess, and apply in circular motions, working quickly. The first coat will look blotchy. That’s fine. Let it dry completely (15-30 minutes) before the next coat. Three thin coats beat one saturated coat every time.
- For Paints & Finishes (Angelus, Leather Magic): You can wipe, brush, or spray. If wiping, use a soft sponge applicator and spread a whisper-thin layer. If spraying, use an airbrush or HVLP gun. Avoid electric spray guns. They dump too much material, causing runs and a thick, crack-prone finish. Manufacturers like Leather Magic explicitly warn against them.
Work at room temperature (70-85°F or 21-30°C) with low humidity. High humidity makes water-based products dry slowly and can cause blooming. A hair dryer on a low, cool setting can speed drying between coats, but don’t cook the leather.
Choosing Your Colorant: Dye vs. Paint vs. Finish
This is the core choice. Each option sits in a different layer of the leather and serves a different purpose. Picking the wrong one is the most common reason for a disappointing result.
Let’s be clear about one thing: “Dye” and “paint” are not interchangeable. A dye penetrates and stains the leather fibers. A paint or finish sits on top, forming a new layer. Your goal determines your tool.
Leather Dye: For Penetrating, Flexible Color
Dye is for when you want the color to be part of the leather, not on it. It’s absorbed into the fibers, so it moves and flexes with the material. It won’t crack or create a plastic feel.
Best for: Restoring faded aniline leather, changing the color of vegetable-tanned projects, achieving a deep, rich tone that shows the natural grain.
Reach for: Fiebing’s Pro Dye (alcohol-based) or Eco-Flo Gel Antique (water-based gel). Alcohol-based dyes dry faster and penetrate deeper, but water-based are easier to clean up and mix.
The catch: Dye doesn’t hide imperfections. It amplifies them. Your prep must be flawless. Also, alcohol-based dyes must be sealed with a topcoat like Resolene or a leather finisher, or they will bleed.
The part nobody mentions: Your water matters. According to technical documents from chemical suppliers, some dyes become unstable in very hard water. If your water leaves scale on your faucet, use distilled water to mix your dye. The wrong pH or mineral content can shift the color as it dries.
Leather Paint & Pigmented Finish: For Opaque Coverage & Protection
Paint is a surface coating. It covers. Use it to hide scars, completely change a dark color to a light one, or apply intricate designs. A pigmented polyurethane finish (like Leather Magic’s product) is the industrial version, it’s what most modern car seats and furniture are coated with at the factory.
Best for: Coloring pigmented leather, covering significant damage, dramatic color changes (black to white), or adding artistic designs.
Reach for: Angelus Leather Paint (acrylic-based) for artistry and flexibility. For a durable, factory-like coat, a water-based polyurethane finish is the professional choice.
The practical takeaway: These are layers. They need a perfectly prepped, matte surface to adhere to. They also have a cure time. While dry to the touch in hours, a polyurethane finish needs a full 48 hours to reach maximum durability. Don’t stress the piece before then.
| Characteristic | Dye (Alcohol/Water-Based) | Paint (Acrylic) | Finish (Polyurethane) |
|---|---|---|---|
| Where it sits | Inside the fibers | On the surface | On the surface (as a film) |
| Feel | Natural leather feel | Can feel slightly stiff | Can feel plasticky if over-applied |
| Flexibility | Excellent | Good | Very Good (when cured) |
| Hides Scratches | No | Yes | Yes |
| Best For | Restoring grain, color changes | Art, opaque coverage, repairs | Durability, factory-style recoloring |
Tools & Supplies You Actually Need
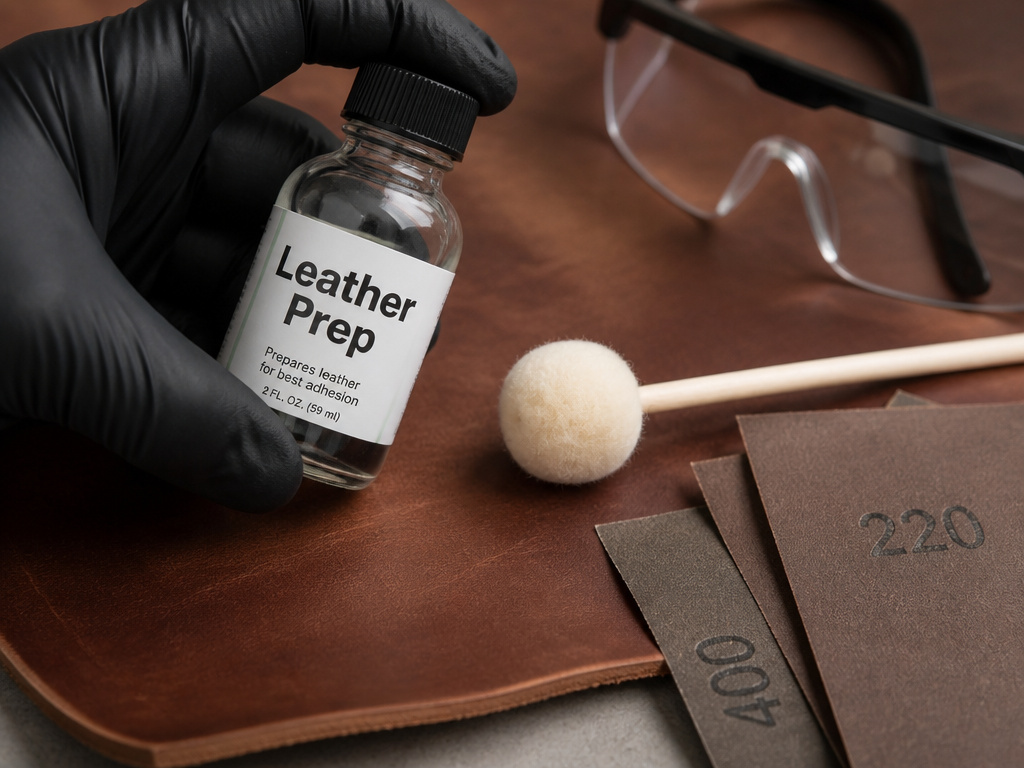 You don’t need a pro shop. You need the right few things. Here’s the kit that replaces guesswork.
- Deglazer or Leather Prep: This step is essential. Leatherique Prepping Agent or a dedicated degreaser.
- Sandpaper: 220, 400, and 1000 grit. Use the 220 for heavy stripping on pigmented leather, 400 for wet-sanding, and 1000 for final smoothing or touching “shelled” areas.
- Application Tools: Wool daubers for dye, soft sponge applicators for wiping on finish, fine bristle brushes for paint details. For spraying, a mini HVLP gun or airbrush.
- Clean Rags: White, lint-free paper towels or cotton cloths. You need to see the grime come off.
- Protective Gear: Disposable nitrile gloves and safety glasses. Dye stains skin and eyes.
Skip this if: You’re working on suede or nubuck. Those materials should never be sanded. Their preparation is limited to gentle brushing and specialized cleaning.
How to Match or Mix a Specific Color
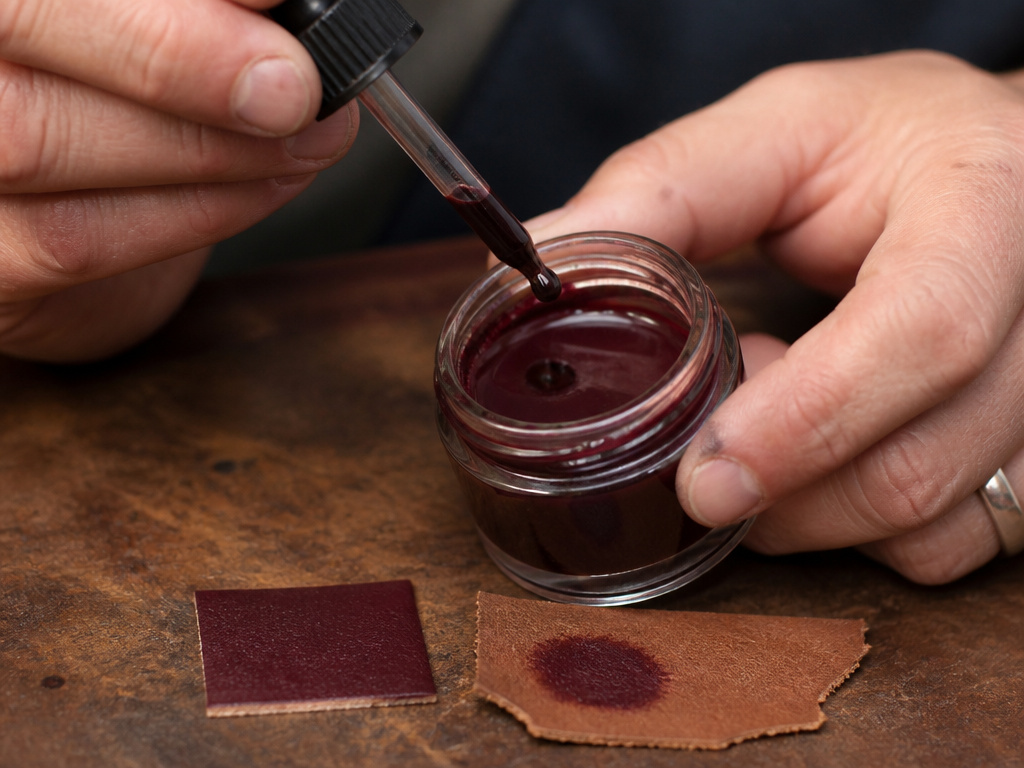 Want factory-match car seats or to replicate a vintage burgundy? Off-the-shelf colors are approximations. For a true match, you need a custom mix.
Even with an OEM color library, leather varies between hides and production runs. A “formula” is a starting point, not a guarantee. The most reliable method is to send a 1×1 inch swatch cut from an unexposed area (under a seat cushion, inside a flap) to a company that offers custom mixing, like Leatherique.
If you’re mixing yourself: * Start with a base color closest to your target. * Add adjusting colors drop by drop, mixing thoroughly. * Apply a test swipe to a scrap piece of the same leather (or a hidden area) and let it dry completely. Colors dry darker. * Write down your formula: “10 parts Base Brown + 1 part Red + 0.5 part Black.”
Understand leather better to make confident choices. The color you see wet is a lie. The dried result is the truth.
Frequently Asked Questions
Can you dye any type of leather?
You can apply color to any leather, but the method changes. Porous leathers (aniline, vegetable-tanned) accept penetrating dyes. Sealed leathers (pigmented, patent) require surface preparation (sanding) and a paint or pigmented finish to bond correctly. You cannot dye patent leather; you can only paint over its existing glossy film.
What’s the difference between aniline and pigmented leather for coloring?
Aniline leather has a transparent, absorbed color. To recolor it, you use a penetrating dye that follows the same path. Pigmented leather has a layer of opaque paint on top. To recolor it, you must sand off that top layer to create adhesion for a new pigmented finish. Treating them the same way leads to failure.
How long does leather dye or paint take to dry?
Dye dries to the touch in 15-30 minutes. Paint or a wipe-on finish dries in 1-2 hours. However, “dry” and “cured” are different. A polyurethane finish needs 48 hours to fully cure and reach its maximum durability and resistance to abrasion. Avoid using the item during this cure time.
Why did my new leather color crack or peel?
This is almost always an adhesion failure. The causes, in order of likelihood: 1) Inadequate cleaning (silicone/oil residue remained), 2) No surface preparation on a sealed leather (no sanding), 3) Application was too thick in a single coat, 4) You used an oil or solvent-based product on a modern leather, which rejects it.
Is it better to brush, wipe, or spray on the color?
It depends on the product and the project. Dyes are best applied with a dauber or sponge for even penetration. Paints and finishes can be wiped on with a sponge for control on flat surfaces or sprayed for a perfectly even, professional coat on complex shapes like car seats. Brushing is best for details and touch-ups.
Before You Go
The one rule that overrides all others: test first. Always perform your entire process, clean, prep, apply, on a hidden area or a scrap piece of the same leather. The leather will tell you what it needs. If the color beads up, you didn’t clean enough. If it scratches off easily after drying, you didn’t prep the surface.
This is based on years of practical experience. I’ve seen beautiful jobs done with a sponge and patience, and expensive failures come out of a full spray booth. The tool is less important than the process.
If you’re attempting a drastic color change, like black to tan, accept that it’s a project, not a quick fix. It will require complete removal of the old pigment and multiple opaque coats. Sometimes, the most confident choice is to embrace the leather’s current character and simply refresh and protect it instead.
