
Your Guide on How to Oil Leather Boots | 3 Essential Steps
This post contains affiliate links. As an Amazon Associate, we earn from qualifying purchases.
Oiling leather boots requires matching three things: the right oil for your leather, a clean and dry surface, and the “to the touch” test to stop before you overdo it. Apply a thin, even coat, let it absorb for at least 20 minutes, then buff. Oiling every month is a rough guide, but your finger on the leather is the final judge, if it feels oily, stop; if it feels dry, it’s time.
That ‘to the touch’ rule is the physical signal that the leather’s fibers have taken in what they can hold. Oiling past that point doesn’t nourish; it saturates.A perpetually damp environment inside the leather’s structure is what leads to the slow, unseen rot so many owners mistake for simple wear.
What follows is the breakdown of why that test works, the single most common mistake that ruins good boots, and how to adjust everything for a desert worksite versus a humid basement. We’ll walk through the clean-condition-protect sequence, name the oils that work, and show you where to put them.
Key Takeaways
- The “to the touch” test is your primary guide for frequency and amount. If your finger feels oily after touching the leather, stop. If it feels dry, it needs oil.
- Over-oiling causes rot, under-oiling causes cracks. Over-oiling creates a constantly damp microenvironment that accelerates hydrolysis, breaking down the leather’s collagen fibers from the inside.
- Climate dictates schedule. Increase frequency in hot, dry climates; decrease it in consistently humid environments. Boots in Arizona need more attention than boots in Florida.
- Always clean first. Oil locks in whatever it touches. Applying it over dirt or salt guarantees you’re preserving abrasives against the leather.
- Protection is a separate step. Condition first with an oil or conditioner, then, only if needed for wet conditions, apply a dedicated protectant like Obenauf’s Heavy Duty LP.
Why Your Boots Feel Like Cardboard (And Why Oil Fixes It)
Leather is a network of collagen fibers, and it loses its natural oils through wear, sun, and simple evaporation.Those fibers get brittle and pull apart. That’s a crack.
Oiling replenishes that lost fat content, letting the fibers slide against each other again. They flex instead of snap. A well-oiled boot is softer, molds to your foot faster, and resists water because the plumped-up fibers leave less space for moisture to seep in.
The goal is to get the oil into that fiber network, not to paint the surface. That’s why the type of oil and how you apply it matter more than the brand on the bottle.
The One Product Mistake That Ruins Good Leather
Walk into any big-box store and you’ll see shelves of spray-on “leather conditioners” and silicone-based “protectors.” Here’s the thing. Silicone doesn’t condition. It coats.
It sits on top of the leather, clogging the pores and creating a plastic-like barrier. Not only does it prevent any real conditioner from getting in later, but it also traps any existing moisture inside. Over time, that trapped moisture and the inflexible sealant cause the leather to stiffen and crack underneath its shiny shell. It’s the equivalent of wrapping a callus in tape and calling it healed.
Stick with products that list actual oils or waxes as their primary ingredients: mink oil, neatsfoot oil, beeswax, or blends like Obenauf’s. If you want a waterproofer, use it after conditioning, and accept that it will change the leather’s breathability.
The Clean, Dry, and Ready Pre-Oil Checklist
Oiling over dirt is like buttering a dusty piece of bread. You’re just making the problem permanent. This step is essential.
First, remove the laces and any removable footbeds. Brush off all loose dirt with a stiff horsehair or nylon brush. For mud, let it dry completely first, then brush it out. For salt stains or ingrained grime, use a damp cloth with a drop of saddle soap or a dedicated leather cleaner like Red Wing’s Foam Leather Cleaner. Wipe away all cleaner residue with a separate damp cloth.
Then, let the boots dry fully. Not just surface dry, completely air-dried at room temperature. Never use direct heat from a radiator, fire, or hairdryer. JK Boots explicitly warns that drying by a fire “could cause them to dry out and crack.” The leather needs to be room-temperature and dry to the touch before the first drop of oil goes on.
Common mistake: Oiling damp boots. The oil cannot penetrate wet fibers, so it sits on the surface, attracting dirt and creating a greasy, ineffective layer that impedes future conditioning.
How to Choose Your Oil: A Quick Comparison
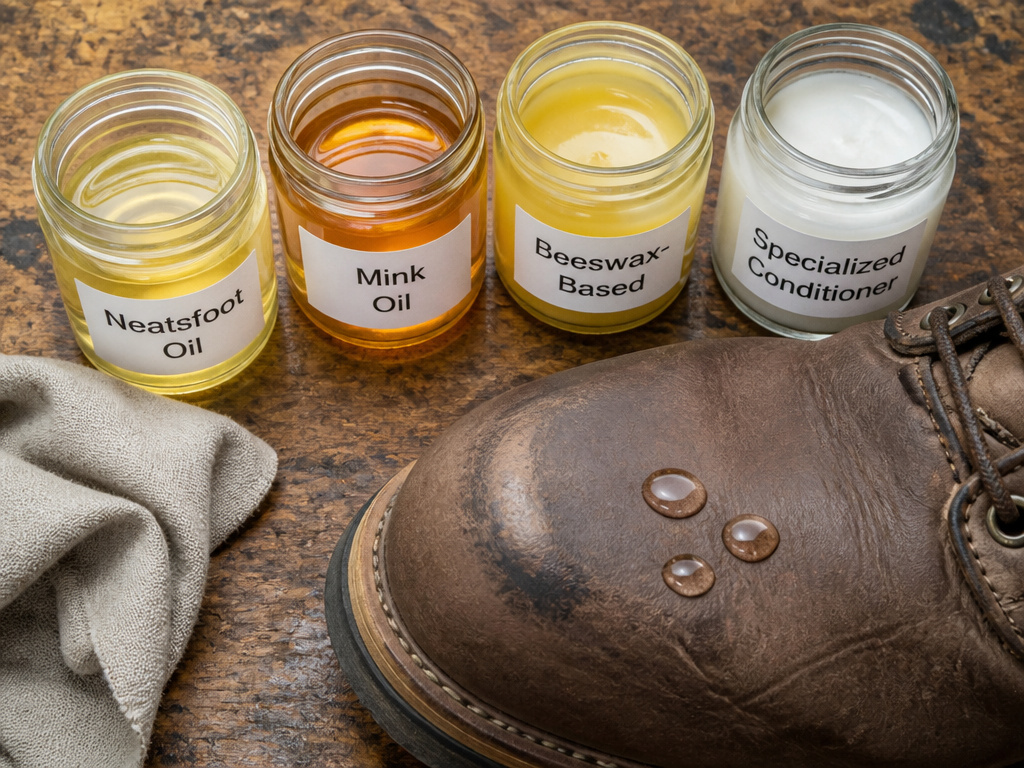
Not all oils are the same. Your choice depends on your leather type and your end goal, simple conditioning, darkening, or maximum waterproofing.
| Oil Type | Best For | Key Consideration |
|---|---|---|
| Neatsfoot Oil | Deep conditioning dry, stiff leather (e.g., work boots) | Penetrates very deeply; can darken leather significantly and soften it over time. |
| Mink Oil | Conditioning with added water resistance | Darkens leather; can feel slightly greasy if over-applied. A classic, reliable choice. |
| Beeswax-Based (Obenauf’s LP) | Extreme waterproofing for harsh, wet conditions | Forms a protective, waxy seal. Use after conditioning, as it can inhibit future oil absorption. |
| Specialized Conditioner (e.g., Red Wing All Natural Leather Conditioner) | Maintaining finish on dress or finished boots | Often lighter, designed to condition without drastically darkening or altering the look. |
For general-purpose conditioning of rugged boots, you can’t go wrong with a pure mink oil or a neatsfoot oil blend. For a deeper dive on picking one, our guide to selecting leather oil breaks down the pros and cons of each type.
The Three Rules of Application
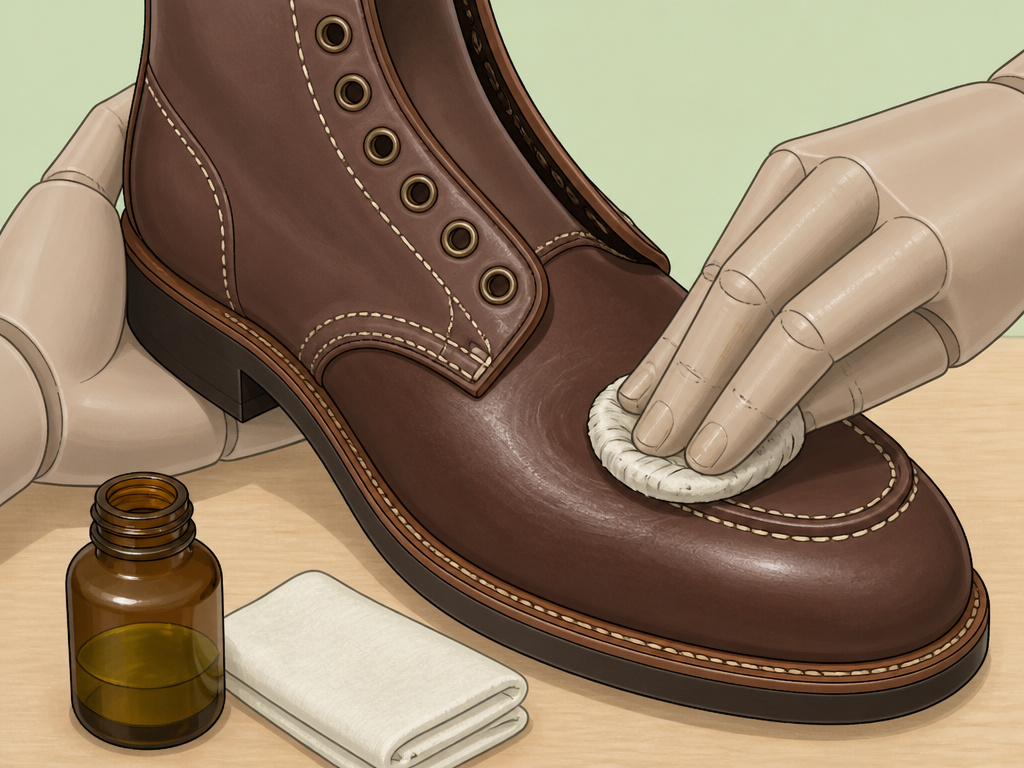
This is where boots get saved or spoiled. The process is simple, but rushing it has consequences.
- Use a thin coat. Pour a small amount of oil onto a clean, soft cloth or your fingers. Rub it into the leather in a circular motion, covering the entire surface, including the tongue and the backstay. Avoid pouring oil directly onto the boot.
- Consequence of skipping: A thick, gloppy application won’t absorb. It sits on top, attracting every speck of dust and eventually going rancid.
- Avoid the stitching and hardware. Try to apply oil only to the leather panels. While a little on the threads is inevitable, soaking them can degrade the waxed thread over many applications.
- Consequence of skipping: Chronically oil-soaked thread can rot, compromising the boot’s structural integrity long before the leather wears out.
- Follow the “to the touch” rule. As you work, feel the leather with your clean finger. The moment it starts to feel oily or slick, move to a new, drier area. Your goal is to feed the leather, not bathe it.
Let the oil absorb. Danner’s guide for full-grain leather recommends letting conditioner set for about 20 minutes. After that time, buff the boots vigorously with a clean, dry cloth to remove any excess oil from the surface. This prevents that tacky, dirt-magnet feeling.
The “To the Touch” Test (and Why It Works)
Forget marking your calendar. JK Boots frames it perfectly: “Oil about once a month ‘to the touch’.” Your finger is the best tool you have.
Press a clean finger firmly against the leather, especially on the flex points like the toe box and ankle. What do you feel? * If your finger comes away feeling oily or slick, the leather is saturated. Stop. More oil will not help. * If your finger comes away feeling dry, the leather has absorbed the available oil and could likely use more.
This test works because it measures the leather’s capacity, not the calendar. A boot worn daily in a dry warehouse will feel dry faster than one worn weekly in a humid climate. Let the material tell you what it needs.
Where this goes sideways: Oiling on a strict schedule regardless of feel. This is how over-oiling happens. A boot that feels oily on day 15 doesn’t need oil on day 30 just because the month is up. You’ll saturate it and start the rotting process.
Climate Changes Everything: Your Adjustment Guide
The standard “monthly” advice shatters against real-world weather. Your environment is the biggest variable in your care routine.
- Hot & Dry Climates (Arizona, Nevada, deserts): The leather loses its natural oils to rapid evaporation. JK Boots advises you “may need to increase how often you condition.” You might be on a 2-3 week cycle during summer.
- Humid Climates (Florida, Pacific Northwest, coastal areas): The ambient moisture in the air slows evaporation. The same source notes “humid areas may require less frequent oiling.” You could stretch to 6-8 weeks.
- Wet & Wintery Conditions: Here, the priority shifts from conditioning to protection. After a thorough oiling, consider a wax-based protector like Sno-Seal or Nikwax Fabric & Leather Proof for the season. Remember, this is a sacrificial barrier for the elements.
When to Stop: Protecting Your Oiled Boots
Conditioning is maintenance. Protection is defense. They are different jobs.
If your boots are conditioned but will face relentless wet, snow, or mud, a protectant is your next step. A wax-based product like Obenauf’s Heavy Duty LP is the standard for a reason. It melts into the leather’s pores, creating a physical water-repellent barrier.
Apply it sparingly to clean, conditioned, and dry boots. Use a hair dryer on low heat to warm the leather and melt the wax in for deeper penetration. Buff off any excess.
The trade-off is breathability. A well-sealed boot will be warmer and less breathable. For most everyday use, a well-oiled boot is protection enough. For a complete walkthrough, our guide on how to protect leather boots covers the specifics.
The Boots That Break the Rules
Not every pair follows the standard script. Here’s what to watch for.
- Full-Grain vs. Oiled Leather: Boots like the Red Wing SuperSole 402 are made with pre-oiled, full-grain leather. They need conditioning, but they start with a better base. Use the brand’s recommended All Natural Boot Oil or Mink Oil.
- Leather with Fabric Panels: Many modern hiking boots mix leather with nylon. Danner’s care guide is clear: “avoid getting any boot wax or dressing on this material.” Apply your oil carefully with a cloth, targeting only the leather.
- Very Light or Suede Leather: Oils will permanently darken these. Test any product in a hidden spot first. Consider a dedicated, non-darkening conditioner from the manufacturer.
The core principle still holds: clean it, feel it, feed it as needed.
Frequently Asked Questions
Can you over-oil leather boots?
Yes, absolutely. Over-oiling is worse than under-oiling. It saturates the leather fibers, creating a damp environment that accelerates a chemical breakdown called hydrolysis. This causes the leather to weaken and rot from the inside out, becoming mushy and losing its structural integrity.
How long should oil sit on boots before buffing?
Let the oil absorb for at least 20-30 minutes. Danner’s official guidance for full-grain leather is to allow conditioner to set for about 20 minutes before buffing. This gives the leather time to drink it in. After that, buff vigorously with a clean cloth to remove any surface oil.
Does oiling boots make them waterproof?
Oiling significantly improves water resistance by plumping the fibers, but it does not make them fully waterproof. For waterproofing, you need a wax-based sealant (like Obenauf’s LP or Sno-Seal) applied over a conditioned boot. This creates a more complete barrier, but reduces breathability.
What’s the difference between oil and conditioner?
The terms are often used interchangeably, but there’s a nuance. “Oil” (mink, neatsfoot) is a pure conditioning agent that penetrates deeply. “Conditioner” is often a blended product that may contain oils, waxes, and other ingredients for cleaning or protecting. For dry, thirsty boots, start with a pure oil.
Before You Go
The real secret is in your hands. The difference between a boot that lasts a decade and one that cracks in a year is the owner who learns to listen to the leather.
Start with the “to the touch” test this week. Clean a pair, feel the leather, and apply a thin coat of a simple oil like mink oil. Buff it off. Notice how the leather feels the next day, softer, richer, more alive. That’s the feedback loop you want. Everything else, from climate adjustments to product choices, builds from that simple point of contact. Your boots will tell you what they need. You just have to know how to ask.
