
How to Punch Holes in Leather | A Straightforward Guide
This post contains affiliate links. As an Amazon Associate, we earn from qualifying purchases.
To punch a clean hole in leather, match three things: the punch tool’s cutting diameter to your hardware, a supportive surface underneath (not a self-healing mat), and a perpendicular strike with a non-bouncing mallet. A standard 4-5mm drive punch handles most rivet and buckle holes in 4-6oz leather with one solid hit. Use a lighter positioning tap first, then commit with a firm, controlled blow.
Let’s be clear about one thing. A clean hole isn’t a luxury; it’s the foundation of a secure rivet, a smooth-running buckle tongue, or a straight hand-stitched seam. Tear the leather or punch off-center, and your project’s finish suffers immediately.
This is based on years of practical experience. What follows: the blunt truth about picking a punch, the single most overlooked part of your setup, and a method that works whether you’re setting snaps on a wallet or adding a hole to a belt.
Key Takeaways
- A drive punch or pricking irons are the right tools for the job. Rotary punches are convenient but limited in reach.
- The surface you punch onto matters more than the punch itself. A self-healing craft mat will ruin your punch tip and produce ragged holes.
- Mark your holes accurately with a wing divider or scratch awl first. A positioning tap with the punch is your last chance to adjust.
- A lighter mallet gives you more control than a heavy one. Bounce leads to double strikes and misaligned holes.
- Replace a punch that’s nicked or chipped. Sharpening can only do so much before the steel geometry is gone.
What is the Best Tool for Punching Holes in Leather?
You have a small pile of options, and they are not interchangeable. Picking the wrong one is how you end up with torn leather or a tool that fails on the third punch.
Drive punches are the workhorse. They’re cylindrical steel tubes you strike with a mallet. They come in diameters from 1mm for tiny rivets up to 10mm or more for belt tongues. The Kevin Lee drive punch set covers the range most leatherworkers need. The punch’s diameter is your hole size, full stop.
Pricking irons are for sewing. They don’t remove a plug of leather; they create a slit for your needle. They give you perfectly spaced, aesthetically pleasing stitching holes. For a wallet or bag seam, they are essential.
Rotary or handheld punches are convenient for pre-made holes within about 1.25 inches of a leather edge. The Tandy mini punch set is a classic here. The heads are cheap to replace if they bend, which they will if you push them past their designed thickness.
An awl is for piercing, not punching. It’s a pointed tool you rotate to create a guide hole. It’s precise, slow, and perfect for marking or starting a hole for stitching. It’s a companion, not a primary hole-maker.
Here’s the practical takeaway: For hardware (rivets, snaps, buckles), use a drive punch. For sewing, use pricking irons. For quick adjustments near an edge, a rotary punch is fine. Trying to use a pricking iron for a rivet hole is like using a butter knife to cut steak – it might work, but you’ll fight it the whole time and the result will be messy.
A drive punch struck squarely with a mallet onto a proper punching block produces a clean, round hole by shearing the leather fibers. The tool’s edge must be sharp and the support underneath must be firm yet yielding enough to let the punch penetrate without blunting on a hard surface.
The One Thing Everyone Gets Wrong: Your Punching Surface
I see this weekly. Someone spends good money on a quality drive punch, then ruins it on their first project by pounding it onto a granite slab or a self-healing craft mat.
Where this goes sideways: Punching onto a self-healing mat. The punch tip embeds in the soft plastic, which then grips and twists the steel on the upstroke. Within a dozen holes, the cutting edge is rolled over and dull. Your next punch compresses the leather instead of cutting it, leaving a torn, ugly hole.
A craft mat is for knife work. It is not a punching surface.
You need a dedicated punching block. Magnus from Hideout Craft uses an OKA punching block with a 5mm vinyl pad on top – that combination gives the right balance of support and give. In a pinch, a thick stack of scrap leather can work, but it compresses over time and changes your striking feel.
An arbor press is the upgrade. It’s a bench-mounted mechanical press that applies controlled, even pressure. For heavy leather or doing fifty identical holes in a production run, it’s the difference between consistent success and thumb-bruising frustration. It also solves the “bounce” problem instantly.
| Surface | Best For | What Happens If You Use It Wrong |
|---|---|---|
| Punching Block (e.g., OKA block) | All general punching | Nothing – this is its job. |
| Arbor Press Bed | Heavy leather, repetitive work | You’re already doing it right. |
| Thick Leather Scrap Stack | Emergency backup | Compresses unevenly, causing off-center holes. |
| Self-Healing Craft Mat | Knife cutting only | Ruins punch tip within 10-20 uses. |
| Granite/Metal Slab | Tooling & Stamping | Chips or rolls the punch edge on first strike. |
Step-by-Step Process for a Perfect Hole
Follow this sequence and the hole will be clean, round, and right where you need it.
- Mark the spot. For a single rivet or snap, use a scratch awl or a silver pen. For a line of stitching holes, a wing divider set to about 4mm from the edge is your best friend. It scribes a perfect, consistent guideline. Not marking is how you get a zig-zag stitch line that looks like you did it in the dark.
- Set up your station. Leather on the punching block, mallet in your dominant hand, punch in the other. Have your hardware nearby to test the fit after.
- Position the punch. Place the cutting edge squarely on your mark, holding the punch perfectly perpendicular to the leather. Any angle will produce an oval hole and wedge the punch.
- The positioning tap. Give the punch a light, tentative hit with the mallet. This indents the leather and locks the punch in place without cutting through. Check your alignment. This is your last chance to adjust. If it’s off, wiggle the punch out and re-mark.
- The commitment strike. With the punch settled in its indent, deliver one firm, controlled blow. Don’t wind up like you’re driving a tent stake. A crisp, focused hit from the wrist and elbow does the work. Listen for the pop as the leather plug shears free. If it doesn’t go through, strike again without moving the punch. Chasing the hole by tilting the tool is what tears the surrounding leather.
- Clear the plug. Often, the leather disc stays inside the punch barrel. Use the punch’s tip or a thin awl to push it out from the back before your next hole. A clogged punch doesn’t cut cleanly.
A client of mine, all thumbs with tools, thought they’d never get a clean hole. They’d smash away with a metal hammer, marring the punch and the leather. I handed them a rawhide mallet and an OKA block. Their first clean, crisp hole for a belt buckle was a revelation. The right foundation changes everything.
Punching Holes for Different Purposes
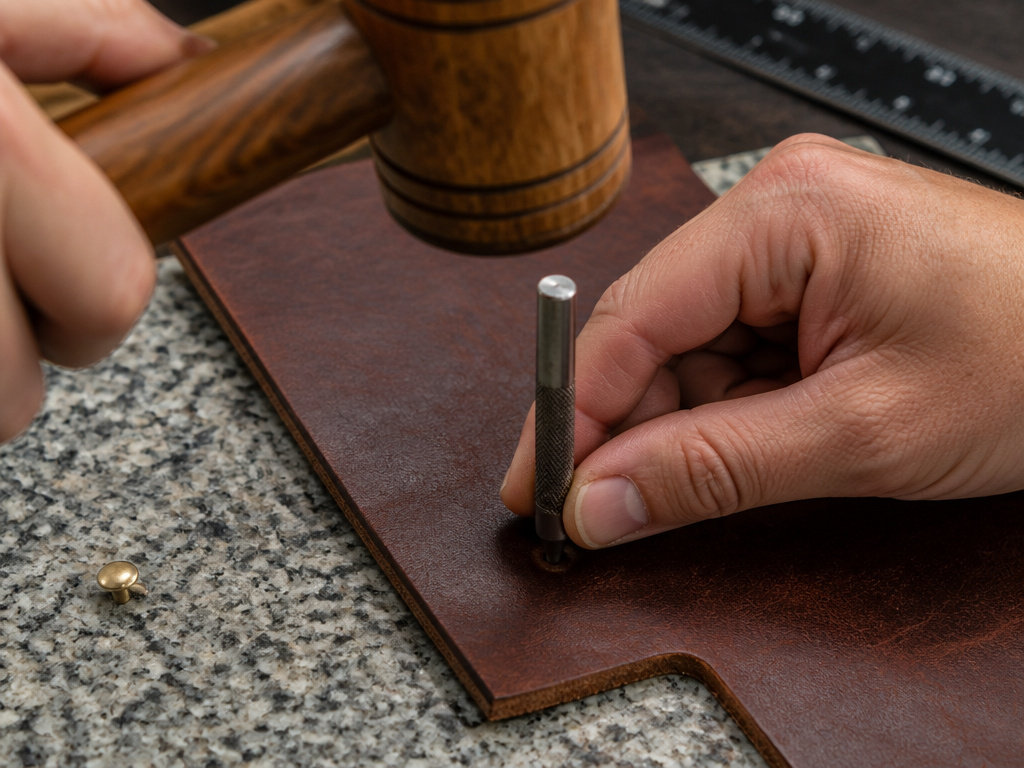
The “best” method shifts depending on whether you’re setting hardware or sewing.
For Hardware (Rivets, Snaps, Buckles)
This is drive punch territory. Match the punch diameter to your hardware’s post. Test on a scrap first – the hole should be snug, not sloppy. For heavier leather (8oz and up), consider the arbor press. The consistent pressure prevents the punch from deflecting, which is a real risk when you’re swinging a mallet at thick, dense material.
For Hand Stitching
This is where pricking irons shine. You’re not removing material; you’re creating a slit for the needle. The iron’s teeth spacing determines your stitch length. Mark your stitch line with a wing divider, align the pricking iron, and strike. The holes will be perfectly straight and evenly spaced. Trying to do this with an awl freehand is a recipe for a wobbly seam.
Common mistake: Pulling each stitch too tight after using a pricking iron. The holes are precise, but if you yank the thread, you can still pucker the leather. Let the thread lay snug, not strained.
The difference in final appearance is night and day. A machine-sewn lockstitch on leather can look industrial and neat, but a hand-saddled stitch using holes made with pricking irons looks crafted. It’s also stronger and easier to repair if a stitch breaks. Which is why I always reach for my Ritza Tiger Thread and John James needles when the project calls for sewing.
For Belt Holes & Adjustments
A rotary punch or a dedicated belt punch is the tool here. These are often “rocket” or rotary-style punches that index multiple hole sizes. They’re fantastic for adding a new hole to a finished belt. The limitation is reach – you can’t punch a hole in the center of a wide belt panel with one. For that, you’re back to a drive punch and mallet. The process for adding a hole to a belt is the same: mark, support, tap, commit.
Punch Care and When to Replace
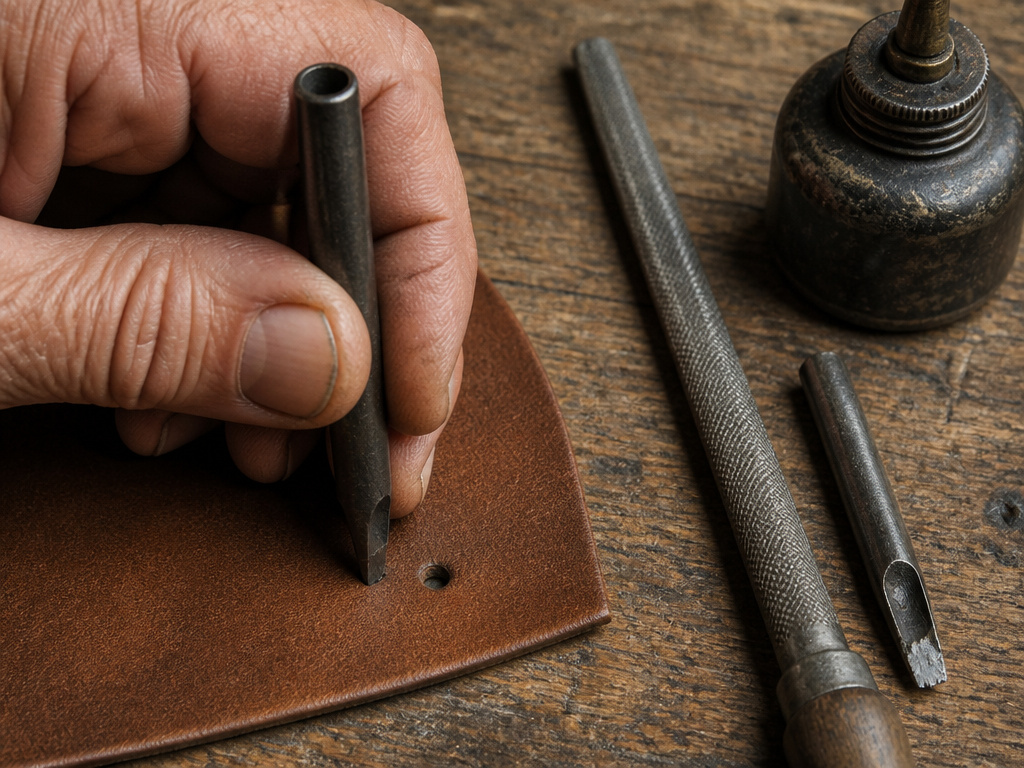
A punch is a consumable. It doesn’t last forever.
After each use, wipe it clean. Leather contains moisture and tannins that can promote rust on the high-carbon steel of good punches. A light coat of oil on the cutting edge and inside the barrel prevents this.
Sharpen a drive punch by honing the inside bevel with a round needle file or a dedicated punch sharpener. You’re maintaining the inner cutting edge, not the outside of the tube. Do this when the punch starts to require more force or leaves a ragged edge.
Replace the punch when it’s nicked, chipped, or visibly dulled beyond a quick hone. The Hideout Craft guide states it plainly: punches that are “notched, chipped, or significantly dull” should be retired. Sharpening can’t restore missing metal. A new punch is cheaper than ruining a piece of finished leather.
This logic applies to your entire toolkit. Understanding the limits of your leather punch or when to switch to an awl for leatherworking is part of the craft. It’s also how you develop a feel for the material itself, which is the first step in learning how to test leather quality by hand.
Troubleshooting Common Problems
- The hole is torn or ragged. Your punch is dull, or you’re punching onto an unsupportive surface. Check the cutting edge and switch to a proper punching block.
- The punch sticks in the hole. You’re not clearing the leather plug from the barrel, or the inside of the punch is gummed up with residue. Clean it out.
- The hole is oval, not round. You struck the punch at an angle, or it shifted during the commitment strike. Use the positioning tap to seat it squarely.
- The leather is cracking around the hole. The leather is too dry or the punch diameter is too small for the thickness of material. Condition the leather before working it, and consider a larger hole or skiving the area thinner.
- Can’t punch through heavy leather. You’ve hit the limit of hand tools. This is the moment for an arbor press. The mechanical advantage makes clean work of thick vegetable tanned leather or dense bridle leather.
Frequently Asked Questions
What can I use if I don’t have a leather punch?
For a one-time emergency hole, you can use a sharp, small-diameter screwdriver or a nail, heated with a flame to help it pierce. It will not be clean. It will tear. For anything you care about, invest in the proper punch tool. It’s a fundamental piece of kit.
How do I punch a hole in the middle of a large piece of leather?
Handheld punch won’t reach. You need a drive punch and mallet, or an awl if the hole is for stitching. Place the leather so the target area is over your punching block, position the punch, and proceed with the standard tap-and-strike method.
Can I use a drill to make holes in leather?
You can, but you shouldn’t for most fine work. A drill bit tends to grab and spin the leather, especially if it’s thin, resulting in a mangled hole or a dangerous slip. It also creates heat that can burn and harden the leather fibers. For large, non-critical holes in thick leather, a drill with a sharp wood or brad-point bit on slow speed can work. For everything else, use a punch.
How do I keep my holes evenly spaced?
For stitching, use pricking irons – the spacing is built in. For a line of hardware or belt holes, use a stitching spacer or mark equal intervals with dividers before you start punching. Consistency looks intentional; irregular spacing looks like a mistake.
What’s the difference between punching and stitching holes?
Punching removes a plug of leather to create a clear hole for a rivet post or buckle tongue. Stitching (with pricking irons or an awl) creates a slit or small guide hole for a needle to pass through, without removing material. The techniques for hand stitching leather rely on these slits, not full holes.
Before You Go
The leather will tell you what it needs. A sharp, well-supported punch and a controlled strike are a conversation, not a fight. If you’re sweating and the leather is tearing, stop. You’re using the wrong tool, the wrong technique, or both.
One rule most guides skip: if you’re punching holes for a critical project and your only surface is a hard table, stop. Go find a phone book, a stack of magazines, anything that will give and not rebound. A bad foundation guarantees a bad hole every single time. Everything above assumes you have that foundation – a proper block, a sharp tool, and the patience for a light tap before the final blow.
And if you do tear a hole? Well, that’s what leather repair and patching leather techniques are for. Even a mistake isn’t the end of the story.
