
How to Round Leather Corners | Methods & Common Mistakes
This post contains affiliate links. As an Amazon Associate, we earn from qualifying purchases.
To round leather corners, you have three proven paths: use a corner punch and mallet for perfect consistency, guide a sharp knife around a template for control, or dock and sand the corner by hand for total flexibility. The method hinges on your leather’s thickness and the precision you need, a punch is foolproof for thin to medium stock, while a knife demands skill but handles curves no punch can match.
That “rounded” look isn’t just an aesthetic choice. A sharp 90-degree corner is a stress point. It’s the first spot to catch, fray, and wear through, especially on items like wallets, belts, and bag flaps. Rounding it removes that weak link and gives the subsequent edge finishing steps, beveling, sanding, burnishing, a curved profile to work on, which is how you achieve that glassy, professional finish.
What follows is a breakdown of each method, the exact tools that make them work, and the tactile cues that separate a clean round from a ragged mess. By the end, you’ll know which technique to reach for based on the leather on your bench.
Key Takeaways
- A corner punch delivers perfect, identical rounds every time but is limited to its set radius and struggles with leather over 3mm thick.
- Knife-cutting around a template offers unlimited radius control and works on any thickness, but requires a sharp blade and steady hand to avoid jagged lines.
- Docking and sanding is the most flexible, freehand method, ideal for one-off projects or correcting mistakes, but it’s easy to over-sand and lose symmetry.
- Skipping the sanding step between cutting and burnishing leaves a rough, rounded edge that no amount of wax can polish to a shine.
- The grain direction of the leather dictates your cutting direction; going against it will tear the fibers and leave a fuzzy, uneven corner.
The Three Methods, Side-by-Side
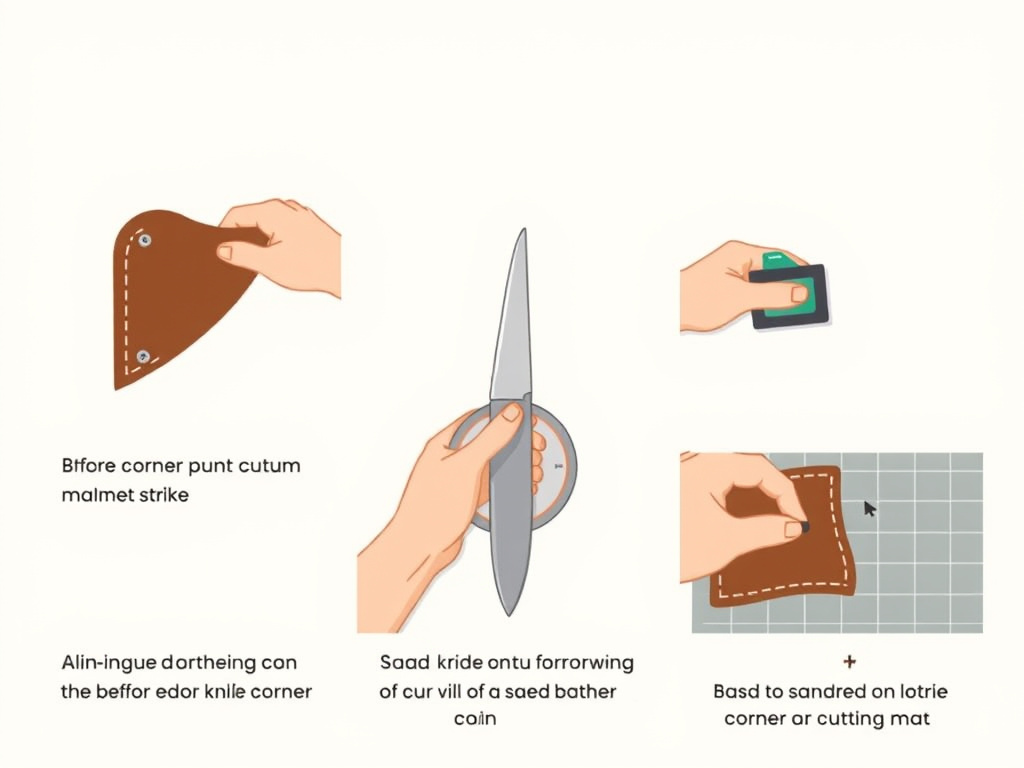
Your choice isn’t about which is “best.” It’s about which solves the problem in front of you with the least friction. A production run of card wallets calls for a different tool than a single, thick belt end.
| Method | Best For | The One Tool You Need | Risk If You Rush |
|---|---|---|---|
| Corner Punch & Mallet | Batch work, perfect consistency on thin-to-medium veg-tan. | A steel corner punch (e.g., 1/4″, 3/8″, 1/2″ radius). | Misaligned punch marks that cut into your project’s face. |
| Knife & Template | Custom radii, thick leather, or curves a punch can’t match. | A sharp round knife or head knife (C.S. Osborne style). | Jagged cuts from a dull blade or forcing the turn. |
| Dock & Sand | One-off projects, correcting other methods, or soft leathers. | A sharp utility blade and a sanding block with 120-grit paper. | Asymmetric rounds from uneven sanding pressure. |
Method 1: The Corner Punch – For Repeatable Precision
This is the method I recommend to anyone making more than one of something. A steel corner punch, struck with a poly mallet, removes a perfect quarter-circle of leather in one hit. The result is perfectly consistent, which is critical when the left and right corners of a wallet need to be mirrors.
The process is simple, but two details make it work: 1. Alignment is everything. Place the punch exactly on your intersecting cut lines. If it drifts, you’ll nick into the body of your piece. 2. Mind the thickness. Standard punches work cleanly on leather up to about 2.5mm (6-7 oz). For thicker stock, you need a heavy-duty corner punch with a deeper blade, or the leather will simply compress and tear instead of cutting.
Common mistake: Using a rawhide mallet on a steel punch. The soft face can deform, causing the punch to tilt at impact and creating a skewed cut. A poly or nylon mallet transfers the force straight down.
After punching, you’ll have a sharp, punched edge. This is the blank, not your finished round. You must now bevel and sand this new curved edge just as you would a straight one.This is the step most people miss. They punch, then try to burnish, and wonder why the curve still looks rough. The punch does the shape; your hand finishes the surface.
Method 2: The Guided Knife – For Ultimate Control
When you need a radius that doesn’t exist as a punch, or you’re working with leather too thick for one, the knife-and-template method is your answer. This is where your skill with a blade pays off.
You need three things: a sharp blade (a round knife or head knife is ideal), a rigid template (a coin, a lid, a dedicated acrylic template), and a cutting mat. The technique is about guiding, not forcing. – Hold the template firmly. – Position your knife blade vertically, 90 degrees to your bench. – Take multiple light scoring passes, rotating the leather against the template, rather than trying to cut through in one go.
The sound tells you everything. A sharp blade on veg-tan makes a quiet, crisp slicing sound. If you hear a tearing or grating noise, your blade is dull, or you’re pushing too hard. Stop and strop.
This method connects directly to mastering other fundamental skills. Clean curved cuts are impossible without understanding your material, which starts with knowing the leather grain and how it affects the blade. Similarly, the confidence to make these cuts comes from knowing you’re working with good material, which is why I always stress testing leather quality before the blade ever touches an expensive hide.
Method 3: The Dock & Sand – The Freehand Fix
This is the most accessible method, and the one I used for years before investing in punches. It’s also the easiest to mess up. You’re not cutting a round shape directly; you’re cutting away the sharp corner (docking it) and then sanding the resulting flat into a curve.
- Dock the corner: With a sharp utility blade or knife, slice off the 90-degree corner at a 45-degree angle, creating a small flat triangle.
- Sand to round: Using a sanding block wrapped in 120-grit paper, sand that flat facet into a smooth curve. Keep the block square to the leather face and use even, alternating strokes.
The risk here is asymmetry. It’s very easy to apply more pressure on one side, creating a lopsided round. The fix is to constantly check your work from multiple angles and sand less than you think you need to. You can always remove more leather; you can’t put it back.
Why a Sharp, Dedicated Tool Wins
You can round a corner with scissors, a rotary cutter, or even a laser. But each of those tools introduces a compromise that shows in the final edge.
A dedicated round knife (like those from C.S. Osborne) or a head knife works because of its geometry. The curved blade rocks through the cut, following the template with less resistance than a straight blade. It’s designed to be stropped back to razor sharpness in seconds. A utility knife blade has a brittle factory edge that shatters on dense veg-tan, leaving a microscopic serration that tears the leather fibers. You’ll feel the difference as a gritty drag during the cut, and you’ll see it as a fuzzy, white line along the rounded edge that no amount of sanding fully erases.
This principle of using the right tool extends to all of leatherworking. The quest for a perfect edge is part of the broader pursuit of quality, which is rooted in the material itself. Understanding the entire journey from hide to finished good, the leather making and tanning process, shows you why a sharp blade on full-grain veg-tan behaves so differently than on a cheap, coated split leather.
The Non-Negotiable Next Steps: Bevel, Sand, Finish
A rounded corner is simply a shaped corner, now with two new curved edges that need the same treatment as any straight edge. This is the sequence that turns “homemade” into “handcrafted.”
- Bevel the New Curve. This is the most overlooked step. You must run an edge beveler along the fresh, rounded edges. Match the beveler size to your leather thickness: a #1 or #2 for most small goods. The tool shaves off the sharp top corner, creating a rounded profile. If your beveler chatters and produces dust instead of a thin curl, it’s dull. A few passes on a strop brings it back.
- Sand Through the Grits. Start with 180-grit to smooth out any tool marks from the beveler, then progress to 400, and maybe 800. This isn’t just about smoothness; it’s about compressing the leather fibers. Each finer grit lays them flatter in preparation for burnishing.
- Apply Finish and Burnish. Dampen the edge slightly with water or a product like Tokonole. Using a wood slicker, canvas cloth, or the back of a spoon, apply rapid friction. The heat and pressure melt the natural gums in the leather (or the adhesive in the Tokonole), fusing the fibers into a hard, polished surface.
Skipping straight from rounding to burnishing is like painting over unsanded wood. The wax has nothing smooth to adhere to, and the edge remains porous and rough. The rounded shape is there, but it lacks the signature glassy look of professional work.
This finishing stage is where leather truly comes to life. The colors deepen and blend, a process that continues as the piece ages and develops its own leather patina. The dye you choose here becomes part of that story, and knowing how leather gets its color helps you pick a compatible finish.
Frequently Asked Questions
What household item can I use to round leather corners?
Coin is a perfect template. A quarter gives roughly a 1/2″ radius, a dime about 3/8″. Hold it firmly on your corner, trace around it lightly with an awl or pencil, and then use a very sharp knife or razor blade to cut just outside that line. Finish by sanding right up to the line for a clean curve.
Can I use a rotary cutter to round corners?
You can, but I don’t recommend it for precision work. A rotary cutter excels at long, straight cuts on thinner leather. On a tight curve, the round blade wants to roll in its own previous cut path, making it hard to control the exact radius. For a one-off, quick job on soft leather, it’s fine. For a crisp, repeatable curve on firm veg-tan, a knife is superior.
How do I fix a ragged, uneven rounded corner?
Stop cutting. Let the leather be. Grab your sanding block with 120-grit paper and carefully sand the uneven curve into symmetry. You’ll lose a small amount of material, but it’s the only reliable fix. This is why the dock-and-sand method exists, it’s essentially correcting a ragged cut by design. Once the shape is even, resume the standard bevel-sand-burnish sequence.
Does the type of leather affect how I round corners?
Absolutely. Firm vegetable-tanned leather cuts cleanly and holds a defined edge, making it ideal for all three methods. Soft, chrome-tanned leather or suede can compress and drag under a punch or knife. For these, the dock-and-sand method is often safest, as it removes material abrasively rather than relying on a clean slice.
Why do my rounded corners look different after dyeing and finishing?
This usually traces back to incomplete sanding. If the leather fibers at the edge aren’t uniformly compressed, they absorb dye at different rates, creating a blotchy or darker line. The solution is to spend more time sanding through progressively finer grits before any dye touches the edge. A perfectly sanded edge accepts finish evenly.
The Bottom Line
Rounding a corner is a small operation with an outsized impact on your project’s professionalism. Start by matching the method to your leather’s thickness and your need for precision. Remember that the rounding itself is just step one, the real magic happens in the systematic beveling, sanding, and burnishing that follows.
If you’re new to this, practice the dock-and-sand method on scrap first. It’s forgiving and teaches you the feel of shaping leather by abrasion. Once that feels natural, invest in a single, common-sized corner punch (a 1/4″ radius is incredibly versatile) for your batch work. That one tool, more than any other, will make your multiple pieces look like they came from the same bench.
And let me share what I’ve learned: the goal is a corner that feels smooth to the thumb, reflects light evenly, and promises to wear in, not out. That’s the detail that separates a craftsperson from a hobbyist.
