
Learn What a Leather Strop Is & How It Refines Blade Edges
This post contains affiliate links. As an Amazon Associate, we earn from qualifying purchases.
This post contains affiliate links. As an Amazon Associate, we earn from qualifying purchases.
A leather strop is a finishing tool, typically made of leather mounted on a paddle or hanging strap, used to realign, burnish, and polish a blade’s edge after sharpening. It does not sharpen a dull blade but refines a sharp one, removing microscopic burrs and creating a smoother, more durable edge that stays sharp longer. The process, called stropping, involves pulling the blade edge-trailing across the leather, often with a fine abrasive compound.
That distinction, polishing versus sharpening, is where most of the confusion starts. A sharpening stone grinds away metal to create a new edge. A strop works on an edge that already exists, bending minuscule imperfections back into line and smoothing the steel at a microscopic level. Getting this wrong means you’ll be stropping a butter knife and wondering why it’s still dull.
What follows is a breakdown of the strop’s anatomy, the simple physics of how it actually works, and the specific choices, leather type, compound, paddle or hanging, that determine whether you’re maintaining an edge or just rubbing metal on cowhide.
Key Takeaways
- A strop polishes; it does not sharpen. Use it only on a blade that is already sharp from a stone or rod.
- Always strop with the edge trailing (spine leading) to avoid cutting the leather and to correctly burnish the steel.
- The standard working angle is about 15 degrees per side. Inconsistent angle pressure rounds the edge over.
- Never use a flexible hanging strop with a folding knife. The pull-back motion can disengage the lock.
- A loaded strop (with compound) removes a tiny amount of metal; a bare strop primarily realigns and burnishes.
What a Leather Strop Actually Does
Think of a freshly sharpened blade under extreme magnification. The edge isn’t a perfect V; it’s a jagged, microscopic landscape with tiny peaks (burrs) and valleys. A strop doesn’t grind those peaks down like a stone. Instead, it burnishes them, it pushes and folds the ultra-fine steel at the very edge back into alignment. This creates a smoother, more consolidated apex.
Stropping realigns the steel, burnishes the edge to fill in microscopic nicks, and, when used with compound, abrasively polishes away fine imperfections. It’s a three-part finishing process, not a one-step sharpening solution.
The result is an edge that cuts cleaner and resists rolling or chipping longer because the metal at the very tip is more uniform. You’re not making it sharper in the traditional sense; you’re making the existing sharpness more effective and durable. This is why a few strokes on a strop can restore the “bite” to a blade that’s starting to drag, but it won’t fix a truly dull edge.
How a Leather Strop Works (The Burnishing Principle)
The magic is in the drag. Quality stropping leather, especially vegetable-tanned cowhide, has a unique composition. It’s firm yet slightly yielding, and it contains natural silicates. When you pull a blade across it with the edge trailing, you create friction that heats and moves the metal at a molecular level.
Here’s the thing. That trailing direction is mandatory. Leading with the edge will slice the leather fibers. Trailing with the spine allows the leather to rub against and compress the steel’s microscopic surface. This burnishing action is what straightens out the tiny bends and folds in the edge.
You can feel when it’s working. A properly loaded strop develops a shiny, blackened streak from transferred metal after a dozen passes. That’s not dirt; it’s proof the strop is engaging with the blade’s surface. If your strop stays pristine, you’re either using a blade that’s too dull or you’re not maintaining the correct angle.
Anatomy of a Strop: More Than Just a Strip of Leather
Not all strops are created equal, and the design dictates its best use. The core components are the backing, the leather, and often a secondary material.
| Component | Primary Function | Common Materials |
|---|---|---|
| Backing / Handle | Provides rigidity and a secure grip. | Wood (paddle), hanging hook, metal/wood loom. |
| Primary Leather Surface | The main stropping surface for burnishing and polishing. | Vegetable-tanned cowhide (most common), horsehide, bison. |
| Secondary Fabric Surface | Used for initial cleaning or with a coarser compound. | Linen, canvas, denim. |
| Abrasive Compound | Adds a fine polishing grit to the leather’s surface. | Chromium oxide (green), diamond paste, aluminum oxide. |
The leather side is the star. The flesh side (suede) is slightly abrasive and great for holding compound. The smooth grain side is for final, bare-leather polishing. Many commercial strops, like the MISAKI leather strop, come pre-loaded on one side, the green side has compound for refreshing sharpness, the smooth side is for the final finish.
The backing changes everything. A solid paddle gives you maximum control for detailed work on tools like chisels. A flexible hanging strop is for quick maintenance of longer blades. Your choice here should match your proper stropping technique.
The Critical Role of Stropping Compounds
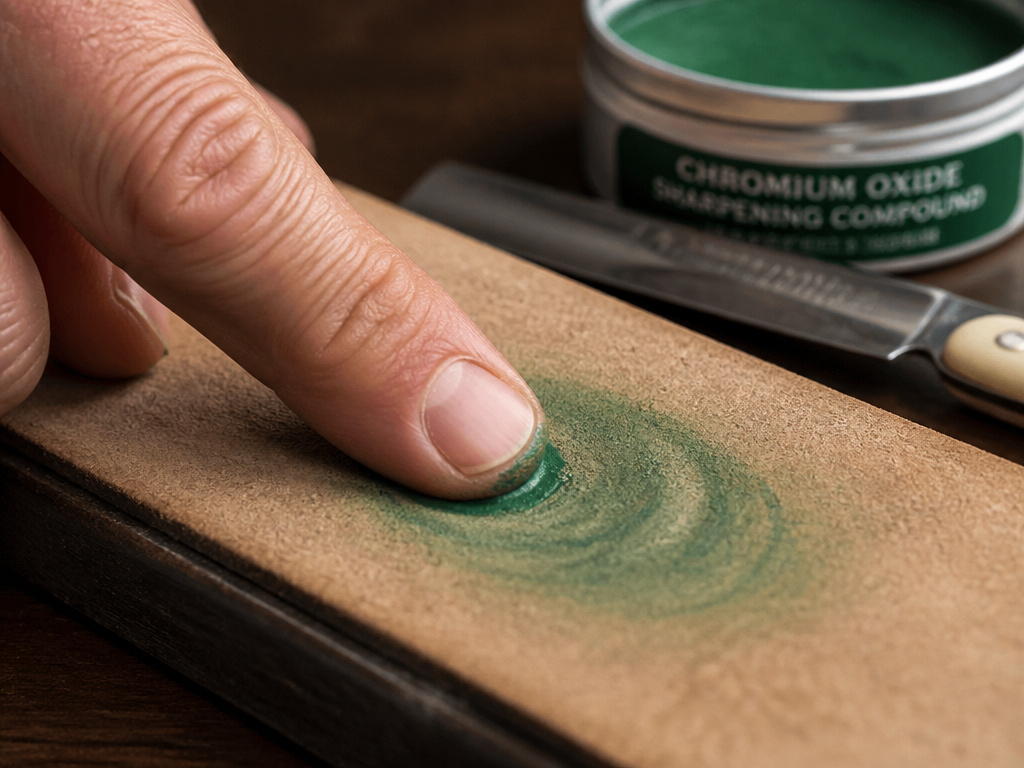
A bare leather strop realigns. A loaded strop polishes. Compounds are fine abrasives suspended in a waxy or oily binder. They add a controlled, microscopic cutting action to the burnishing process.
- Chromium Oxide (Green): The most common fine polishing compound. It leaves a mirror finish and is excellent for straight razors and fine kitchen knives.
- Diamond Paste: Available in various grits (e.g., 1 micron, 0.5 micron). It’s more aggressive than chromium oxide and cuts faster.
- Aluminum Oxide (White): A general-purpose, fine abrasive. Good for all-around knife maintenance.
Apply compound sparingly. Rub a small amount onto the leather (usually the suede side) until it forms a faint, even haze. Overloading gums up the leather and reduces its effectiveness. The compound embeds into the leather, creating a surface that’s part abrasive, part burnishing tool.
This is where understanding leather grain matters. The porous flesh side holds compound far better than the sealed grain side.
Flexible vs. Paddle Strop: Choosing Your Tool
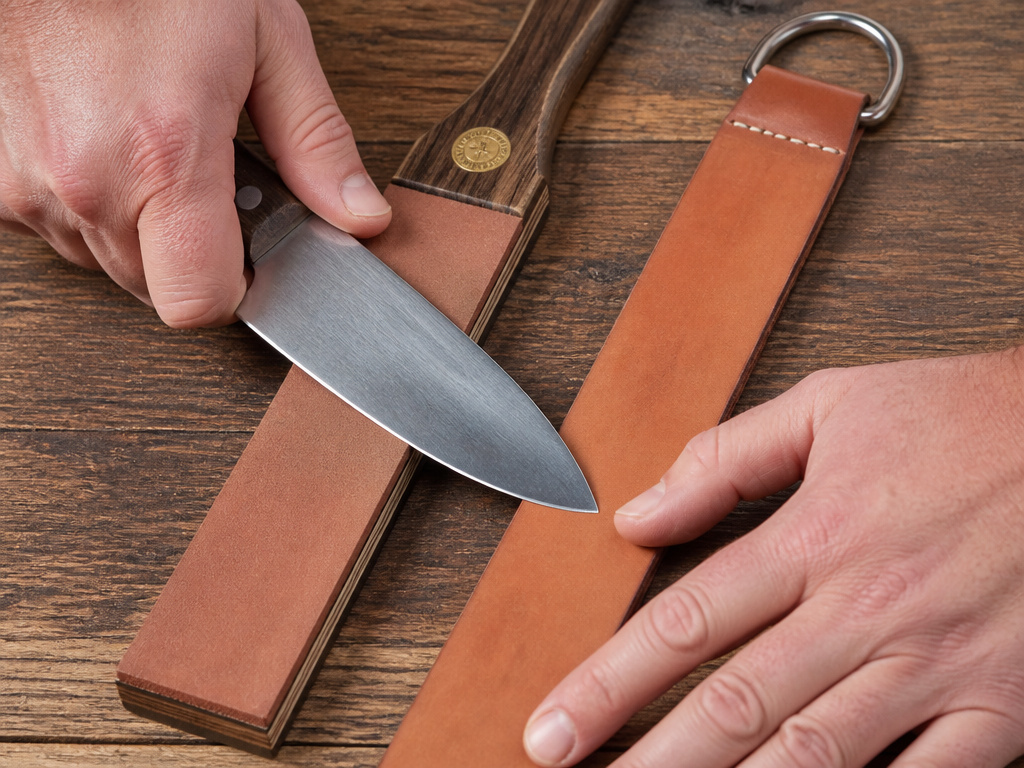
This isn’t just about looks. The form dictates function, safety, and the type of edges you can maintain effectively.
A flexible hanging strop is the classic barber’s tool. You anchor one end and pull it taut. The give in the leather provides a specific kind of draw and is fantastic for the long, sweeping strokes needed for straight razors or machetes.
Common mistake: Using a flexible strop with a folding knife. The pull-back motion can overcome the lock mechanism, causing the blade to close on your fingers. Use flexible strops only with fixed blades.
A paddle strop is a piece of leather fixed to a rigid wooden block. It offers zero flex, which means ultimate control. This is the go-to for woodworking tools (chisels, plane irons) and detailed work on small knife blades where angle consistency is everything. You can easily have multiple compounds on different sides of a single paddle.
For most people starting with pocket and kitchen knives, a paddle strop is the safer, more versatile choice. It’s the one I reach for first. If you later get into straight razors, you can add a hanging strop to your kit.
Step-by-Step: How to Strop a Blade Correctly
The process is simple, but the details make the difference. Here’s the sequence that works, whether you’re using a paddle strop or a hanging strop held taut.
- Start with a Sharp Edge. Confirm your blade is sharp from a stone or honing rod. A strop cannot fix a dull edge.
- Apply Compound (Optional). If using compound, apply a tiny amount to the leather’s suede side and rub it in thoroughly.
- Establish Your Angle. Place the blade’s spine on the strop, then lift the spine until the edge just contacts the leather. For most knives, this is about 15 degrees. A MISAKI strop, for example, explicitly recommends this 15-degree angle.
- Stroke with the Edge Trailing. Pull the blade toward you, spine leading, maintaining light, even pressure. Keep the angle absolutely consistent from tip to heel.
- Flip and Repeat. After one stroke, flip the blade over to the other side (keeping the spine leading) and pull it back. Some people prefer a flipping motion at the end of each stroke; do what keeps your angle steady.
- Repeat. Perform 5-15 strokes per side. More isn’t always better. Over-stropping can round the edge.
- Finish on Bare Leather. If you used a compounded side, give the blade 3-5 final, very light strokes per side on a clean, smooth leather side for a refined burnish.
The goal is a polished, sticky-sharp edge. You can test it by gently slicing a piece of printer paper. It should cut cleanly with almost no pressure.
Maintaining and Storing Your Strop
A strop is a tool, not a trophy. It needs basic care to work well.
Keep it clean. Occasionally wipe the leather with a dry cloth to remove metal dust and old compound. If the surface gets glazed or uneven, you can lightly sand it with very fine (400+ grit) sandpaper to refresh it. Store it flat in a climate-controlled space. Damp sheds cause mold; arid heat cracks leather.
Think of it like any other quality leather good. The principles for assessing leather apply here too. Good vegetable-tanned leather, like the kind used in the best leather for a strop, will last for years with minimal care.
Frequently Asked Questions
Does stropping actually sharpen a knife?
No. Stropping polishes and aligns an edge that is already sharp. It is the final step after sharpening on a stone. If your knife is dull, you must sharpen it first.
Which side of the leather should I use?
Typically, use the rough “flesh” or suede side for applying abrasive compound. Use the smooth “grain” side for final burnishing without compound. Many commercial strops designate sides, like a green compound side and a bare leather side.
How often should I strop my knife?
It depends on use. For a kitchen knife used daily, a few strokes on a strop once a week can maintain peak performance. For a woodworking chisel, you might strop every 15-20 minutes of heavy use to maintain the edge.
Can I make my own leather strop?
Absolutely. You need a piece of flat, rigid wood for a paddle and a strip of quality vegetable-tanned leather. Glue the leather flesh-side up to the wood, let it cure, and you have a serviceable DIY strop. It’s a great project to understand leather types and construction.
What’s the difference between a strop and a honing steel?
Honing steel is for light realignment of an edge between sharpenings and is used with the edge leading. A strop is for fine polishing and burnishing after sharpening and is used with the edge trailing. They serve different purposes in the edge-maintenance cycle.
Before You Go
A leather strop is the craftsman’s secret for turning a sharp edge into a refined, lasting one. It’s not a substitute for a sharpening stone, but it is the essential partner. Remember the core rule: it polishes, it doesn’t sharpen.
Invest in a decent paddle strop, keep your angle at 15 degrees, and use the edge-trailing stroke. Start with a simple green chromium oxide compound on one side and bare leather on the other. That combination will handle 90% of your edge maintenance needs.
The real test is in your hand. After a proper strop, a blade should feel stickier on your thumbnail and glide through material with less resistance. That’s the burnish at work. Once you feel it, you’ll never go back to just sharpening.
