
The Complete Guide on How to Repair Torn Leather Effectively
This post contains affiliate links. As an Amazon Associate, we earn from qualifying purchases.
This post contains affiliate links. As an Amazon Associate, we earn from qualifying purchases.
To repair torn leather, you need three things: a correct classification of the damage, the right repair for its stress profile, and patience with the adhesive’s cure time. The process isn’t about finding the strongest glue; it’s about matching the fix to the fibers. A clean cut can be stitched or glued; a ragged tear needs a patch; a tear in a “load path” like a bag strap demands stitching to spread stress. Cement reaches full cure in about two hours, that’s your decision window.
Let me share what I’ve learned. That two-hour window is why so many rushed repairs fail. You apply the glue, it sets in minutes, and you think you’re done. But the full chemical bond that determines whether the patch will hold under stress doesn’t happen until the two-hour mark. You can still change your mind before then, but after that, you’re committed to a result that might creep open in a month.
What follows is a straightforward guide that starts before you touch the tear. We’ll look at how to read the damage, when glue is a mistake, and how to choose between a patch, a stitch, or a panel replacement. The goal is a repair you won’t see again in six months.
Key Takeaways
- Classify the tear first. A clean cut, a ragged tear, and a split seam are three different problems with three different solutions. Misreading this is the most common reason a repair fails twice.
- Resist glue in a load path. Any tear that sits where leather is pulled, folded, or hung, like a bag strap root or a belt tongue, needs stitching. A glued bond will creep under repeated stress even if it feels strong on day one. The backing patch rule is mandatory.** For tears larger than ¼ inch, a backing fabric or leather patch must extend at least 1 inch (25 mm) beyond the damage on all sides. Anything smaller concentrates stress on the tear edge.
- Cement needs its full cure. Leather repair cement reaches full strength in about two hours. Using the item or stressing the repair before that point risks a weak bond that fails later.
- Test dye compatibility on a hidden scrap first. A finish that seems to match in the bottle can peel or refuse to bond if it’s incompatible with the leather’s existing topcoat. I learned this the hard way.
The Leather Will Tell You What It Needs
You can’t fix what you haven’t named. The worst thing you can do to a torn leather panel is reach for the glue first. Cement is the right answer maybe a third of the time, it’s the wrong answer for anything that carries load, and on a bag gusset or a strap fold it turns a repairable tear into a stiff, cracked mess that no one can fix cleanly afterwards.
Classify the damage before you touch it. This is based on years of practical experience watching repairs succeed or fail based on this single step.
A clean cut has clean, matching edges and lies flat when closed; a ragged tear has stretched, thinned edges and will not close without puckering the surrounding leather; a split seam has failed stitching along an original join with both leather edges intact. Misreading the category is the most common reason a repair fails twice.
Here’s the practical takeaway for each:
| Damage Type | The Fibers | The Right Fix | If You Choose Wrong |
|---|---|---|---|
| Clean Cut | Severed, not displaced. Edges meet neatly. | Stitching or bonding with a flexible leather glue and backing. | Stitching without a backing on a thin leather can pull through. |
| Ragged Tear | Stretched and thinned around the opening. | Requires a patch or backing to add sound material. Glue alone fails. | Glue creates a stiff spot; the thinned edges tear again next to the repair. |
| Split Seam | Leather is usually sound; thread or original holes have failed. | Re-stitching with fresh holes. This is a stitching problem, not a leather problem. | Gluing the seam shut makes future re-stitching impossible and creates a hard ridge. |
One quick test: pinch the edges of the tear together gently and watch the surrounding surface. If it puckers and lifts, the leather has lost structure around the damage. That tells you the repair needs reinforcement behind it, a patch, not just edge-to-edge glue.
Clean Cuts, Ragged Tears, and Split Seams
Ever wondered why a glued repair on a jacket elbow fails after a few weeks, but a stitched one on a bag handle holds for years? It comes down to fiber displacement.
A clean cut through leather is like a surgical incision. The fibers are severed cleanly, but they haven’t been pulled out of position. This means you can bring the edges together and they’ll align. Your job is to hold them there. A flexible adhesive like Tear Mender, combined with a backing patch for cuts over ¼ inch, works well. So does a simple saddle stitch.
A ragged tear is different. The leather around the opening has been stretched. Those fibers are longer and thinner now. Trying to glue those weakened edges directly together is like trying to join two pieces of over-chewed gum. The bond is only as strong as the weakest, thinnest point. This is where a backing patch isn’t just recommended; it’s mandatory. The patch provides a sound layer for the torn fibers to anchor to.
A split seam is the easiest to misdiagnose. The leather itself is fine. The thread broke, or the stitching holes ripped out. Your fix isn’t adhesive, it’s a needle and thread. Re-stitch the seam, using fresh holes slightly offset from the old ones to grab fresh leather. Gluing a split seam shut is a permanent mistake; it prevents any proper repair later and creates a hard, inflexible line that cracks.
Why Layers Matter (And Why Rushing Doesn’t)
A repair is only as strong as its foundation. For any tear, especially a ragged one, that foundation is a backing patch. The rule from Lexus forums for their 2004-2014 models is solid: the backing material should be a minimum of 1 inch (25 mm) larger than the tear on all sides. That gives the adhesive enough surface area to distribute stress away from the damaged edge.
The process feels slow. Clean the area with a degreaser like rubbing alcohol. Let it dry. Cut your patch, use scrap leather from an unseen interior area for perfect compatibility in temper and finish. Apply a thin, even layer of flexible contact adhesive to both the patch and the back of the damaged area. Let it become tacky. This waiting period is crucial; it’s when the adhesive develops its grab.
Where this goes sideways: Pressing the patch down before the adhesive is tacky. The glue squeezes out, leaving a starved bond that fails under the first real flex. Wait until it feels dry to a light touch but still transfers to your finger.
Now, press the patch into place. Work from the center outward to push out air bubbles. Then, you have to wait again. A product like the 3M Leather & Vinyl Repair Kit specifies a four-hour dry time for its vinyl adhesive before you can apply filler or color. Leather-specific cements reach full cure in about two hours.
That two-hour window is your last chance to change your mind. After that, the chemical bond is set. Stressing the repair before then, like bending a repaired shoe toe, risks creating micro-fractures in the curing adhesive. The repair might hold initially, but it will fail faster.
When Glue Is the Wrong Answer
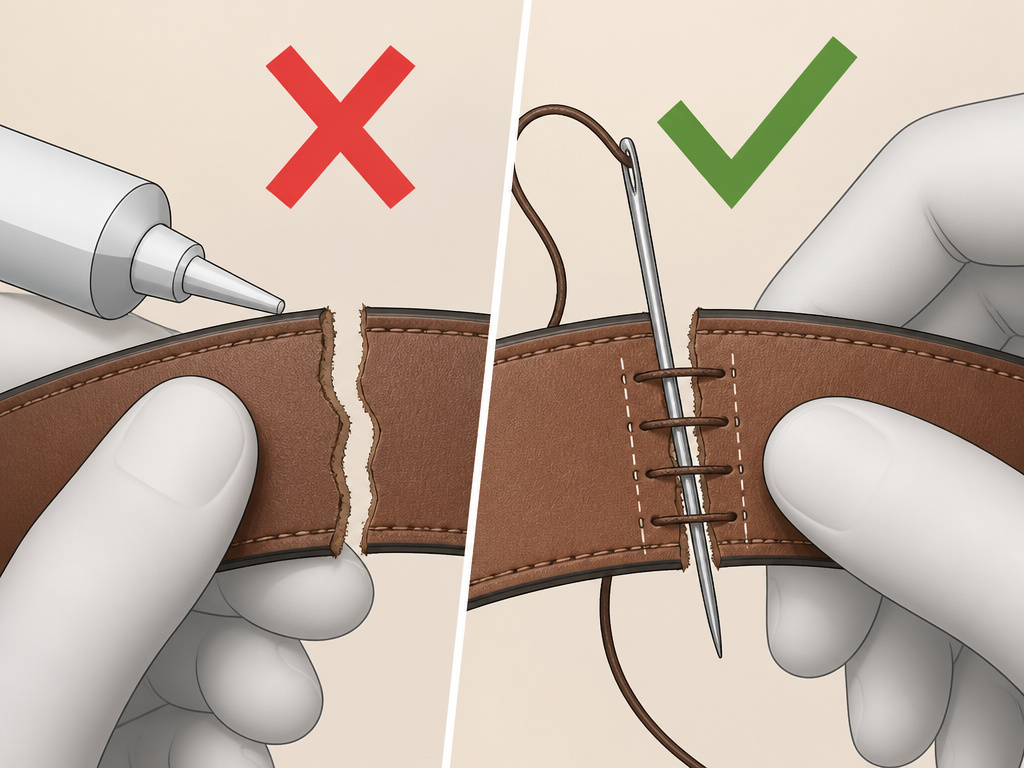 Let’s be clear about one thing. I keep a variety of adhesives in my workshop. But I reach for them less than half the time. Glue has one critical weakness: it concentrates stress at a single, brittle bond line.
A “load path” is any part of a leather item that is pulled, folded, hung, or regularly stressed. Think bag straps, belt tongues, wallet folds, or the corners of a sofa cushion. A tear in one of these locations is under constant, repetitive stress.
Common mistake: Gluing a tear in a load path. The bond feels strong on day one, but under repeated flexing, the adhesive will creep. The tear slowly reopens. A stitch line, by contrast, spreads the stress across dozens of individual thread points.
Stitching is the fix for load-path damage. It’s more work. It requires the right needle, the right thread, and the right stitch (a saddle stitch is king for strength). But it’s repairable. A glued mess is often a dead end. If you can’t stitch it properly, maybe you can’t access the back of the panel, then the honest answer might be panel replacement, not a compromised glue job.
This is why a good guide to repairing leather car seats or how to repair a leather couch will emphasize reinforcing high-stress areas. The principles are the same whether it’s a jacket or a Jaguar seat.
The Color Match Trap
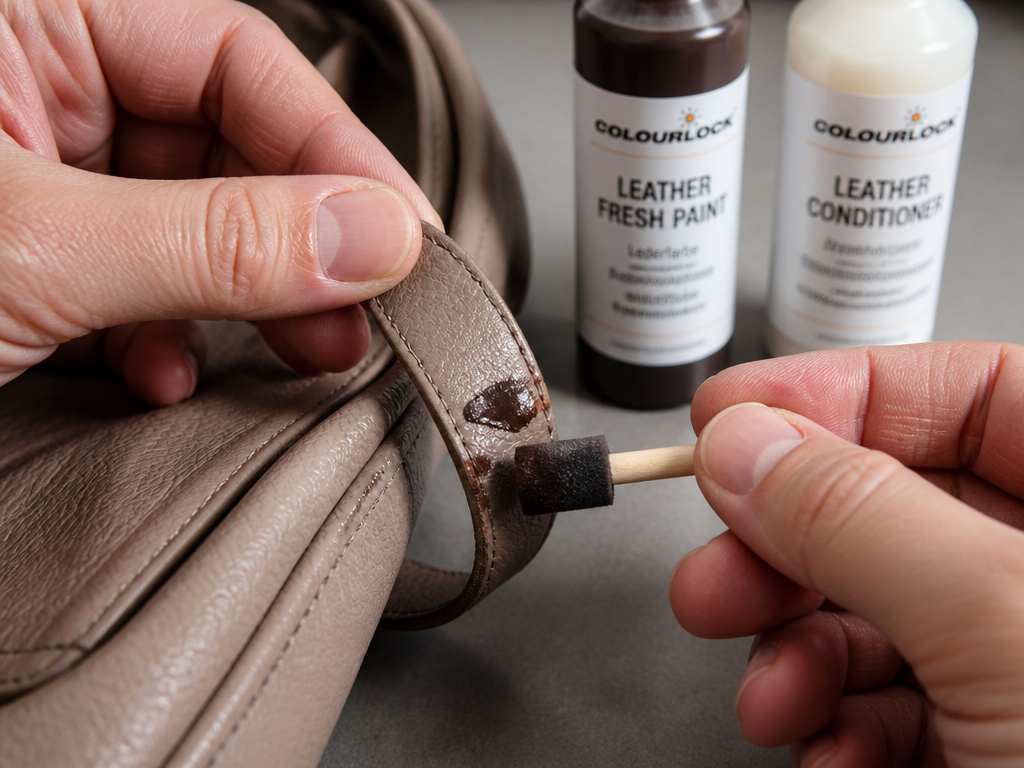 The structural repair is the hard part. The color match is where most people get impatient and ruin it. Here’s the practical takeaway from a mistake I own: test first.
I once had a beautiful bag with a scuff I wanted to touch up. The dye color looked perfect in the bottle. I didn’t test it. I applied it to the scuff, and within an hour, the new finish was peeling away from the old in a wrinkled sheet. The chemistries were incompatible. The bag needed a full strip-and-redye job that cost more than the touch-up was worth.
Now, my rule is non-negotiable. Mix your color according to the kit instructions. Colourlock Leather Fresh Paint is excellent for this, and then apply a dab to a hidden area. The inside of a strap, the underside of a cushion. Let it dry fully. Does it bond? Does it peel? Does the color actually match under your lighting? This ten-minute test saves a disaster.
Apply your matched color in light, thin coats with a sponge or airbrush. Heavy coats look obvious and can crack. Let each coat dry completely. After the final coat, protect the repair with a light application of a compatible leather conditioner, working it into the surrounding area to blend the finish.
Tools and Kits: What Actually Works
You don’t need a workshop, but you do need the right tools for your tear type. A generic “leather repair kit” from a hardware store often contains a wax-based filler paste. That’s fine for a stationary scratch on a couch arm, but it’s useless for a moving part like a shoe or bag. It will crack.
For clean cuts and small ragged tears, a dedicated kit like the Fiebing’s Leather Repair Kit or a 3M-style kit is a good start. Look for one that includes: * A flexible adhesive (not super glue) * Backing fabric * A filler compound (for leveling after the patch) * Color-mixing pigments
For split seams or load-path tears, your kit is different: needles, heavy-duty thread (like linen or bonded polyester), an awl, and a stitching pony if you have one. The art of re-knotting stitches is an underrated skill that beats a full panel replacement.
Sometimes, tape is a legitimate temporary fix or clamp. A quality leather repair tape can hold a torn car seat seam closed while you source the right thread, but it’s not a permanent solution. The adhesive will eventually migrate and stain.
Understand leather better to make confident choices. If you’re staring at a tear and feel unsure, pause. Ask the three questions: Is it a cut, a tear, or a split seam? Is it in a load path? Can I access the back? The answers will point you to the right techniques for gluing leather or the right stitching tutorial.
Frequently Asked Questions
Can you repair torn leather without a patch?
For a clean cut under ¼ inch (6 mm) where the edges meet perfectly, you can use a flexible adhesive alone. For anything larger or any ragged tear, a patch is non-negotiable. The patch spreads stress away from the damaged edge, which is the only way to prevent an immediate re-tear.
What is the best glue for torn leather?
The “best” glue depends on the job. For flexible, non-load-bearing repairs, a flexible fabric cement like Tear Mender is excellent. For bonding patches or laminating leather, a contact cement like that found in many DIY repair kits is the standard. Never use cyanoacrylate (super glue), it dries brittle and will crack.
How long does a leather repair last?
Properly executed repair, correctly classified, reinforced, and finished, can last the remaining life of the item. A rushed repair, especially one using glue in a load path, may fail within weeks or months. Longevity hinges on the strength of the structural fix, not the cosmetic topcoat.
Can you repair torn faux leather?
The process is similar, but the materials differ. Faux leather (PU or PVC) often requires solvent-based adhesives designed for synthetic materials. Patching is more common, as the “grain” is a printed layer that’s hard to replicate. The core principle of reinforcing from behind still applies.
Is it worth repairing an old leather jacket?
Absolutely, if the leather itself is still sound. Look at the areas around the tear. If the leather is thin, cracked, or powdery, the material is failing and any repair will be temporary. If the panel is solid aside from the tear, a professional repair can add years of life and preserve the character of the jacket.
Before You Go
One rule I’ve learned the hard way governs every repair: if the leather around the damage is unsound, stop. A patch applied to rotten leather is just a plug in a sinking ship. The next stress point will be right next to your beautiful repair.
So here’s your first step this week. Find that torn bag or scuffed shoe. Don’t clean it yet. Just look at the damage for a full minute. Classify it. Is it a clean cut? A ragged tear? A split seam? Pinch the edges. Does the surrounding leather pucker? That minute of diagnosis is worth more than any bottle of glue.
The rest, choosing glue, mixing color, applying a patch, is technique you can learn. But deciding whether the leather can even hold a repair? That’s the judgment call that separates a lasting fix from a wasted afternoon. And it costs nothing but your attention.
