How to Choose Leather for Your Project | A Practical Guide
This post contains affiliate links. As an Amazon Associate, we earn from qualifying purchases.
To choose leather for a project, you must get three things right first: the tannage (vegetable vs. Chrome), the weight (thickness in ounces), and the temper (stiffness). For a belt, pick a firm-tempered, vegetable-tanned leather around 9–11 oz. For a tote bag, a medium-tempered, chrome-tanned leather around 5–6 oz works. For a wallet, a firm-tempered leather at 3–4 oz, vegetable or chrome, is ideal. The right combination depends entirely on what the item needs to do.
That’s the framework. The rest is details, but they’re important details. A belt that stretches defeats its purpose. A bag that’s too stiff fights you every time you reach inside. A wallet that’s too thick feels like a brick in your pocket.
What follows is a breakdown of those three essential variables, followed by a map of which leather goes where. By the end, you’ll be able to look at a piece of leather and know both what it is and what job it’s built for.
Key Takeaways
- Tannage decides function. Vegetable-tanned leather is firm, molds, and patinas; it’s for belts, saddles, and tooling. Chrome-tanned leather is softer, water-resistant, and comes in colors; it’s for bags, shoes, and everyday items.
- Weight is thickness, not heaviness. One ounce equals 1/64th of an inch. A 3–4 oz leather is credit-card thin for wallets; 9–11 oz is belt-thick.
- Temper is stiffness, independent of thickness. A 5 oz leather can be floppy or rigid. Firm temper holds shape (wallets, belts), soft temper drapes (bags, clothing).
- Ignore the term “genuine leather.” It’s a misleading marketing term for the lowest-quality split, often bonded. Look for “full-grain” or “top-grain.”
- Start simple. Your first project should use affordable, forgiving leather. A vegetable-tanned key fob teaches cutting, stitching, and finishing without the fear of wasting expensive hide.
The First Three Variables You Can’t Ignore
Let’s be clear about one thing. Choosing leather means matching three specific properties, tannage, weight, and temper, to your project’s mechanical needs. Get this match wrong, and the most beautiful hide in the world will make a frustrating, failed product.
Leather weight refers to thickness, measured in ounces, where 1 oz equals 1/64th of an inch. Tannage refers to the chemical process that preserves the hide, primarily vegetable or chrome. Temper describes the stiffness or drape of the leather, independent of its thickness.
1. Tannage: Vegetable vs. Chrome – It’s a Chemistry Problem
This is where most beginners get tripped up by marketing. The two main types aren’t just different colors; they’re different materials with different rules.
Vegetable-Tanned Leather
This is the traditionalist’s choice. Hides are soaked in vats of natural tannins from tree bark for weeks. The process is slow, which makes it more expensive, but it creates a leather that’s firm, moldable, and ages with a story. – Best for: Belts, straps, saddles, holsters, and any project where you want to carve, stamp, dye, or wet-mold the leather. It’s a blank slate. – Feels like: Stiff and dry out of the bag. It has a natural, pale tan color that darkens to a rich amber over years. – The why-layer: The natural tannins bond deeply and evenly with the collagen fibers, creating a dense, compact structure. This is why it holds tooling impressions and resists stretching. – One caution: Unfinished vegetable-tanned leather isn’t great with repeated water exposure. It needs a protective finish if it will see the elements.
Chrome-Tanned Leather
About 80% of the leather you encounter daily is chrome-tanned. It uses chromium salts in a process that takes days, not weeks. The result is a softer, more pliable, and water-resistant leather available in every color imaginable. – Best for: Bags, jackets, shoes, upholstery, and any item where softness, color, and water resistance are priorities. – Feels like: Supple and often waxy or oily to the touch. Many chrome-tanned leathers have a “pull-up” effect, where pulling or bending it lightens the color temporarily. – The why-layer: The chromium tanning is faster and less expensive, and it leaves the fibers more loosely packed and lubricated. This gives the leather its stretch and water resistance but makes it unsuitable for holding fine tooling details. – The visual tell: Look at the edge. A greyish or bluish line in the cross-section is a hallmark of chrome tanning, where the dye hasn’t fully penetrated.
| Tannage | Best For Projects Like | Key Property | Not Ideal For |
|---|---|---|---|
| Vegetable-Tanned | Belts, watch straps, tooled items, saddlery | Holds shape, accepts tooling & dye | Frequently wet environments (unfinished) |
| Chrome-Tanned | Bags, clothing, shoes, general crafts | Soft, water-resistant, wide color range | Carving, stamping, wet molding |
Common mistake: Using vegetable-tanned leather for a slouchy bag. You’ll fight its stiffness every time you try to turn it right-side-out or reach inside. Conversely, using chrome-tanned leather for a belt gives you a strap that stretches an inch within a month.
2. Weight: It’s Just Thickness (But Say “Ounces”)
When a supplier says “5 oz leather,” they are telling you it’s 5/64ths of an inch thick. This is the single most practical spec for choosing leather.
Here’s a quick conversion and where those weights typically land: – 1–2 oz: Lining leather, delicate pouches. Thin enough to see light through. – 3–4 oz: The sweet spot for wallets, card holders, and small accessories. About as thick as a credit card. – 5–6 oz: Ideal for the body of tote bags, journal covers, and lighter-weight belts. Substantial but still pliable. – 7–8 oz: Good for satchels, heavier bags, and gun holsters. This is where leather starts to feel robust. – 9–11 oz: Standard belt leather. Anything thicker is for saddles, heavy-duty straps, or soling.
The guide to leather thickness for projects dives deeper into these conversions and includes millimeter equivalents, but thinking in ounces is the craft standard.
3. Temper: The Stiffness That Weight Doesn’t Tell You
Here is the part most guides gloss over. You can have two pieces of 5 oz leather that feel completely different in your hand. One might stand up on its own; the other might drape like cloth. That difference is temper.
Temper is determined by the tannage, the type of hide, and how it’s processed and stuffed with oils and waxes. – Firm Temper: Wants to stay flat and rigid. Use this for items that need to hold their structure without support, wallets, belts, rigid boxes. – Medium Temper: A balance. It has body but will bend and shape with use. Perfect for structured bags that still need to flex. – Soft Temper: Drapes and flows. This is for slouchy bags, clothing, linings, or moccasins where comfort and drape are key.
You can’t see temper on a spec sheet. You have to ask your supplier, or better yet, feel a sample. A soft-tempered leather for a wallet will feel flimsy and won’t protect your cards. A firm-tempered leather for a soft bag will fight you at every seam.
Leather Quality: Cutting Through the Marketing
Before you even look at tannage or weight, you need to filter out the noise. The biggest source of confusion is the term “genuine leather.”
In a factory, a thick cowhide is sliced horizontally like a layer cake. The top layer, with the tight, strong grain pattern, is full-grain leather. The next layer down is top-grain leather (often sanded and finished). Everything below that is splits, which are often ground up, glued to a mesh, and stamped with a fake grain pattern to become bonded leather.
“Genuine leather” is a legal term meaning “contains some leather,” most often applied to those lowest-quality bonded splits. A bonded leather purse will peel and crack like plastic within a year.It’s the sawdust particle board of the leather world.
For any project meant to last, insist on full-grain or top-grain leather. The surface is dense, durable, and will develop a patina, a unique sheen and character from use, instead of just wearing out.
Where this goes sideways: Buying a “genuine leather” belt for $25. It feels plasticky, cracks at the bend within six months, and you realize you’ve purchased a very expensive disposable item. A full-grain vegetable-tanned belt from a maker like Weaver Leather Supply costs three times as much but will outlive your car.
Project-Specific Recommendations
Now, let’s apply the framework. Here’s what to reach for when you’re at the bench, ready to buy.
| Project | Recommended Tannage | Ideal Weight | Best Temper | Why This Combo Works |
|---|---|---|---|---|
| Wallet / Card Holder | Veg-tan or Chrome-tan | 3–4 oz | Firm | Needs to be thin to avoid bulk, firm to protect cards, and durable. Chrome-tan offers colors; veg-tan offers customization. See our guide on selecting leather for a wallet for more. |
| Belt | Vegetable-tanned | 9–11 oz | Firm | Must resist stretching to hold pants up. Veg-tan’s density and firm temper provide lifelong stability. |
| Tote Bag | Chrome-tanned | 5–6 oz (body), 9–11 oz (straps) | Medium (body), Firm (straps) | Body needs to be pliable for shaping and use; straps need to be thick and non-stretching for strength. |
| Watch Strap | Vegetable-tanned | 2–3 oz | Firm | Thinness conforms to the wrist; firmness keeps the buckle area from deforming. The guide to leather watch straps covers sizing and finishing. |
| Key Fob / Lanyard | Vegetable-tanned (tooling) | 4–5 oz | Medium to Firm | A perfect beginner project. Thick enough to be forgiving, veg-tan accepts stamps and dyes for personalization. |
The logic here is mechanical, not mystical. A bag strap is a weight-bearing tensile member; it needs the same properties as a belt. A wallet is a compact, abrasion-prone container; it needs to be thin and tough. Let your project’s function lead you to the specs.
A Note on Tools and Technique
Your leather choice dictates your tools. Trying to hand-sew 11 oz belt leather with a regular needle is an exercise in frustration. You’ll need a stitching awl or pricking irons. For bonding layers, a contact cement like Barge is stronger than white glue. The right adhesives for leather and the correct thread for leatherworking are not afterthoughts; they are part of the material system.
And if you’re sewing, learn the saddle stitch. It’s a hand-sewn lock stitch that won’t unravel if a thread breaks, and it’s stronger than most machine stitching for all but the thinnest leathers. It looks clean and professional, and it’s a skill that pays off on every project.
How to Buy Leather Without Getting Burned
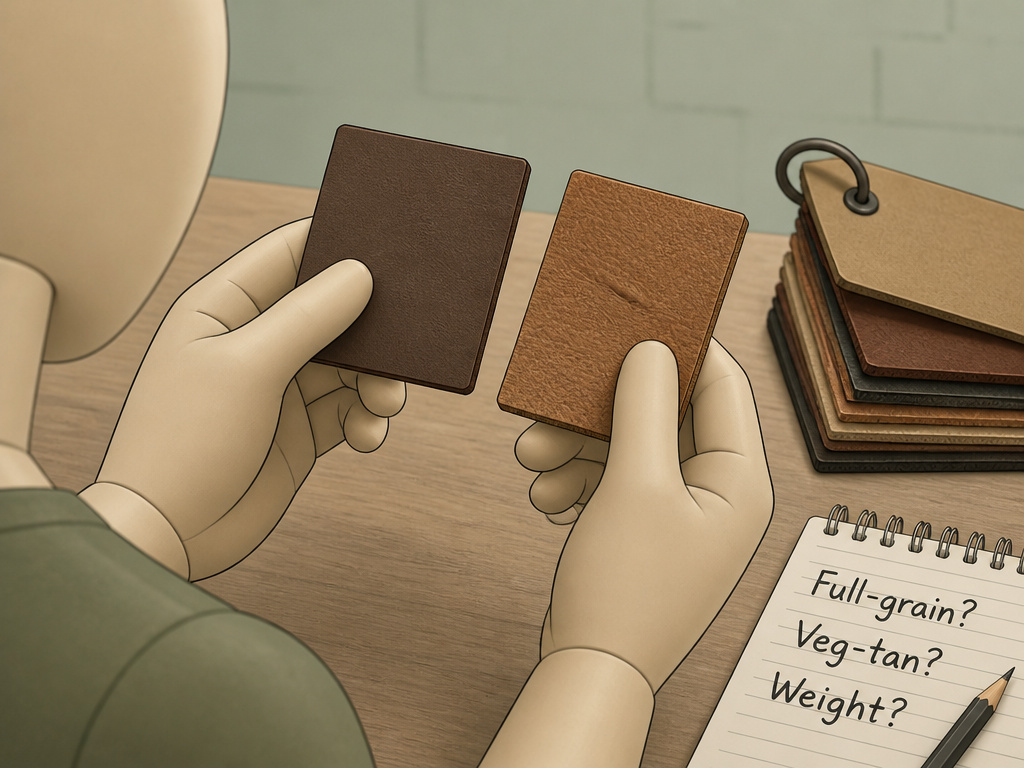 You have the theory. Now for the practice of actually purchasing a hide. Here are four steps to take before you spend a dime.
- Buy Samples First. Any reputable supplier (like Springfield Leather Company or Tandy Leather) sells swatch packs. For a few dollars, you get to feel the temper, see the true color, and test how it cuts, bends, and finishes. This is non-negotiable for your first few projects.
- Ask the Right Questions. Don’t just ask for “brown leather.” Ask: “Is this full-grain? Is it vegetable or chrome-tanned? What is the weight and temper? What is the finish (aniline, semi-aniline, pigmented)?” A knowledgeable seller will have these answers.
- Start with a “Shoulder.” A full cowhide is big, expensive, and intimidating. A “shoulder” is a smaller, cheaper portion of the hide, perfect for wallets, belts, and small bags. It lets you practice without the fear of a costly mistake.
- Embrace Imperfections in Full-Grain. Full-grain leather has natural marks: bug bites, stretch lines, minor scars. This isn’t a defect; it’s proof of authenticity and adds character. If you need a perfectly uniform look, you’re looking for a corrected-top-grain (sanded and printed), not full-grain.
Following a structured methodology like the one outlined in the Analytical Hierarchy Process study on material selection formalizes these steps, weighing factors like durability, cost, and workability for complex decisions.
The Leather Will Tell You What It Needs
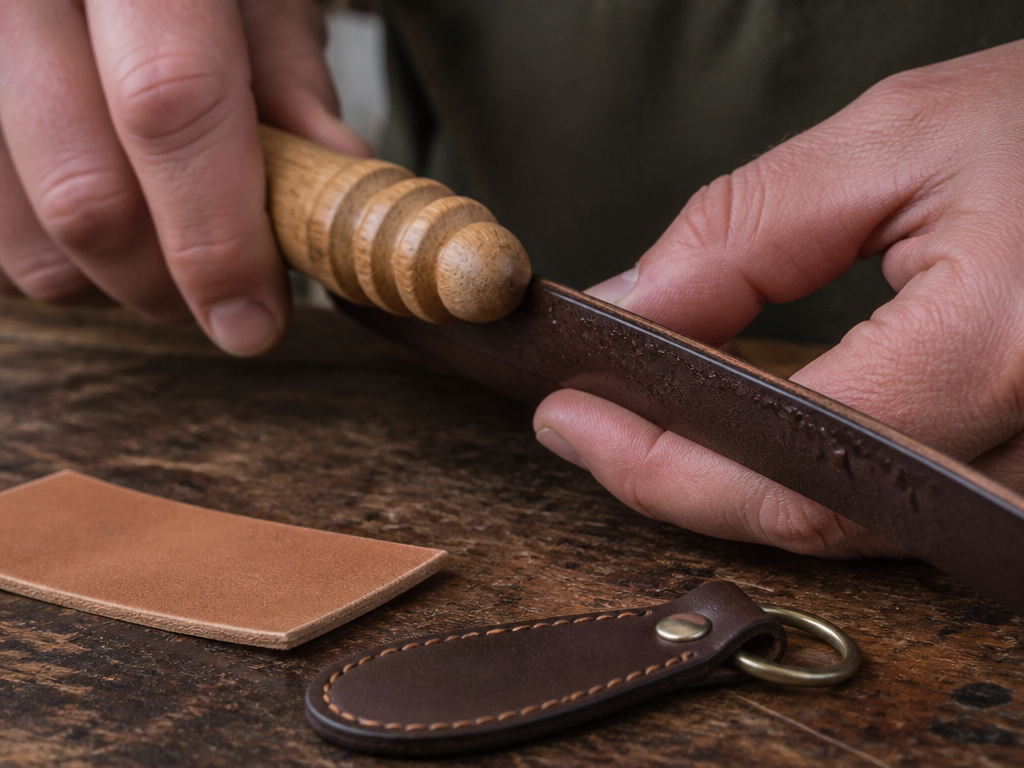 I’ve stuck with a simple wooden slicker for burnishing edges for years. It’s inexpensive, gives me perfect control over the pressure and angle, and consistently produces a glassy, professional finish. I’ve tried motorized wheels and fancy compounds, but they often overheat the edge or gum it up. The wood, some water, and patience get the job done every time.
That’s the final lesson here. The flashiest tool or the most exotic leather isn’t the answer. Understanding the fundamental variables, tannage, weight, temper, lets you make a confident choice. Then, the right basic tools and techniques let you execute it.
The leathercraft basics are about this marriage of material knowledge and skill. Start with a simple project in an appropriate leather. Make a key fob, a card holder, a simple belt. Let the material teach you.
Frequently Asked Questions
What does “oz” mean when buying leather?
“Oz” stands for ounce and refers to the thickness of the leather, not its weight. One ounce equals 1/64th of an inch. So, a 4 oz leather is 4/64″ (or 1/16″) thick. Suppliers measure this with a calibrated gauge, and it’s the standard way to specify how substantial the leather is.
Is vegetable-tanned leather better than chrome-tanned?
It’s not better; it’s different. Vegetable-tanned leather is better for projects that need to hold a shape (belts, straps) or be customized (tooling, dyeing). Chrome-tanned leather is better for projects that need to be soft, water-resistant, and colorful (bags, jackets, shoes). Choose based on your project’s requirements, not a vague notion of “quality.”
Can I use the same leather for a bag and a wallet?
You can, but you probably shouldn’t. A bag needs a softer, more pliable leather (5-6 oz, medium temper) to be usable. A wallet needs a firmer, thinner leather (3-4 oz, firm temper) to avoid bulk. Using bag leather for a wallet makes a floppy, oversized wallet. Using wallet leather for a bag makes a stiff, unforgiving bag.
Why is “genuine leather” a bad sign?
In the leather industry, “genuine” is a technical term for the lowest-quality split of the hide, often bonded with glue and embossed with a fake grain. It’s not durable and will crack and peel. When used in marketing, it’s a deliberately vague term to make a cheap product sound acceptable. Always look for “full-grain” or “top-grain” instead.
How do I know if leather is good quality before I buy it?
First, check the description for the terms “full-grain” or “top-grain.” Second, ask about the tannage, weight, and temper. Third, and most importantly, buy a physical sample before purchasing a whole hide. Feel its density, bend it to check temper, and examine the grain pattern. Good leather feels dense and substantial, not spongy or plasticky.
Before You Go
One rule I see beginners break every time: picking a first project that needs skiving, complex pattern drafting, and five specialized tools. The frustration leads to a poorly fitting piece and a half-finished project in the corner.
Your first project should be a key fob or a simple card holder. Use an affordable, forgiving vegetable-tanned tooling leather from a supplier like Tandy Leather. This teaches you the fundamental sequence, cutting, punching, stitching, finishing, on a scale where mistakes are cheap lessons, not disasters. The leather for upholstery or a leather watch strap can come later.
Understand the three variables, ignore the marketing gloss, and start simple. The confidence you build from a single, well-made item is the only tool you really need to get started.
