
What Thickness of Leather to Use: A Simple Three-Number Guide
This post contains affiliate links. As an Amazon Associate, we earn from qualifying purchases.
This post contains affiliate links. As an Amazon Associate, we earn from qualifying purchases.
The correct leather thickness for any project hinges on three measurable things: the leather’s weight in ounces and its corresponding millimeter thickness, the ISO 14931:2015(E) standard that caps apparel leather at 0.15 mm for coating, and a simple chart matching weight ranges to common items like wallets (3-4 oz), belts (8-10 oz), and bags (5-6 oz).
Let me share what I’ve learned. The most common question from anyone holding a piece of hide isn’t about tanning or stitching, it’s about picking the right thickness from the start. Get it wrong, and a wallet turns into a brick, a bag sags like wet cardboard, or a belt stretches like a cheap rubber band. The difference between a polished project and a frustrating waste of good material often comes down to these three numbers.
What follows is a straightforward guide that translates the vague “ounce” measurement into practical millimeter specs, shows you the industry’s own limits, and gives you a direct cheat sheet for over a dozen common projects. You’ll understand leather better to make confident choices, whether you’re buying your first side or planning a complex layered build.
Key Takeaways
- Leather “weight” in ounces directly converts to thickness: 1 oz ≈ 0.4 mm (or 1/64th of an inch). A 4 oz leather is roughly 1.6 mm thick.
- Apparel leather has a formal limit: The ISO 14931:2015(E) standard recommends a maximum coating thickness of 0.15 mm for clothing-grade leather.
- The beginner’s sweet spot is 3-4 oz (1.2–1.6 mm): This weight is thick enough for structure but thin enough to fold, stitch, and tool without advanced skills or special tools.
- Thickness needs change with layering: A wallet made from three un-skived layers of 4 oz leather will be nearly half an inch thick after stitching.
- The leather will tell you what it needs: Stiffness (temper) and stretch vary by tannage, meaning two pieces at the same weight can behave completely differently.
The Three Specs to Know First
Before you match a thickness to a project, you need to speak the language. Leather thickness is almost universally described in ounces, a holdover from how much a square foot of the hide weighs. A 5 oz leather means a square foot weighs about 5 ounces. Heavier weight equals greater thickness.
The first practical conversion is ounces to millimeters. One ounce of leather thickness translates to approximately 0.4 mm. This is based on years of practical experience cross-referencing supplier charts. It’s not a perfect science, a hide has natural variations, but it’s the working rule every craftsperson uses.
A 4 to 5 oz leather, the sweet spot for small goods like wallets and card holders, measures between 1.6 mm and 2.0 mm thick. This range provides enough body for structure while remaining flexible enough for folding and hand-stitching without requiring a machine.
Here’s the quick reference table you’ll use constantly:
| Leather Weight (oz) | Approx. Thickness (mm) | Approx. Thickness (inches) | Primary Character |
|---|---|---|---|
| 1–2 oz | 0.4–0.8 mm | 1/64″ – 1/32″ | Very thin, lining weight |
| 2–3 oz | 0.8–1.2 mm | 1/32″ – 3/64″ | Thin, flexible |
| 3–4 oz | 1.2–1.6 mm | 3/64″ – 1/16″ | Beginner sweet spot |
| 4–5 oz | 1.6–2.0 mm | 1/16″ – 5/64″ | Sturdy, versatile |
| 5–6 oz | 2.0–2.4 mm | 5/64″ – 3/32″ | Heavy-duty, structured |
| 8–10 oz | 3.2–4.0 mm | 1/8″ – 5/32″ | Belt & strap territory |
The second spec is a formal limit. For apparel leathers, think jackets, gloves, lightweight bags, the international standard ISO 14931:2015(E) references a maximum coating thickness. The relevant part isn’t the total leather thickness, but the finish applied to it. The standard recommends that coating not exceed 0.15 mm. Why does this matter to you? A heavily coated “corrected grain” leather at 3 oz might meet this spec, but the actual fibrous part of the hide underneath could be much thinner, affecting durability. The government leather specification document for automotive interiors often references similar material standards, which is why car seat leather feels consistent.
The third spec isn’t on a chart; it’s in your hands. Leather temper, its innate stiffness or softness, varies wildly. A 4 oz vegetable-tanned shoulder might stand up on its own, while a 4 oz chrome-tanned cowhide drapes like cloth. Always ask for the temper when ordering. For structured items like a holster leather, you want a firm temper. For a soft bag or a leather cuff, a softer temper at the same weight works better.
Common Project Thickness Cheat Sheet
Now, let’s apply the numbers. This is where most guides stop at vague categories. I’ll give you the weight ranges I use, the why behind them, and what happens if you stray too far.
Wallets, Card Holders, Key Fobs
- Ideal: 3–4 oz (1.2–1.6 mm)
- Why: Thin enough to stay slim in a pocket, thick enough to develop a nice patina and resist tearing. This is the perfect weight to learn basic wallet making process techniques like folding, gluing, and saddle stitching.
- > Common mistake: Using 5-6 oz leather for a bifold. Three layers of 5 oz leather stack to 15 oz total, over 6 mm thick before you add cards. The result is a wallet thicker than a paperback book.
Belts, Dog Collars, Watch Straps
- Ideal: 8–10 oz (3.2–4.0 mm) for adult belts; 6–7 oz (2.4–2.8 mm) for crafting a leather dog collar for medium-sized dogs.
- Why: Belts need to resist stretching and hold their shape under tension. A weight under 8 oz will begin to distort and soften with daily wear. For a dog collar tutorial, you balance durability with comfort.
- > Where this goes sideways: Using 4-5 oz leather for a belt. It feels sturdy off the roll, but after three months of daily wear, the buckle area will stretch and crease permanently, looking worn-out instead of broken-in.
Bags, Totes, Duffels
- Ideal: 5–6 oz (2.0–2.4 mm) for the main body; 2–3 oz (0.8–1.2 mm) for linings and pockets.
- Why: The body needs structure to hold the bag’s shape when loaded, but not so much it becomes rigid and difficult to sew. Linings and gussets need to be flexible and add minimal bulk.
- The part nobody mentions: The handle or strap attachments need to be reinforced. If your bag body is 5 oz, double that leather at the stress points or use a woven nylon strap instead.
Notebook Covers, Clutches, Small Purses
- Ideal: 4–5 oz (1.6–2.0 mm)
- Why: These items need to hold a folded shape but aren’t load-bearing like a bag. This weight is easy to tool or stamp if you want decoration, a key step if you’re learning basic leather tooling.
- Skip this if: You plan to use hard internal frames. In that case, a thinner leather (3-4 oz) wrapped over the frame is often better.
Layered Projects and the Skiving Imperative
This is the moment that separates a tidy project from a bulky one. Any time you stack pieces, like a wallet with multiple card slots, the thickness multiplies. Let’s be clear about one thing: no one wants a wallet that feels like a brick.
If you’re making a wallet with a front, back, and two interior pockets, that’s four layers. At 4 oz per layer, you’re at 16 oz of stacked material, over 6 mm thick before stitching or glue. Your selection criteria for leatherworking threads won’t matter if the thread can’t even pull through that sandwich.
The solution is skiving: thinning down the edges of the leather pieces where they overlap. I abandoned using cheap, plastic-based edge burnishers after the friction melted one onto a project. The heat from rapid burnishing can actually gum up the edge. Now I use a wooden slicker or canvas for a friction burnish, but the critical step happens before that, with a sharp skiving knife.
Worth knowing before you start: Skive the overlapping edges of interior wallet pockets down to 1-2 oz (0.4-0.8 mm). This reduces the stacked edge by more than half, resulting in a clean, tapering profile instead of a sudden cliff.
Most reputable suppliers like Rocky Mountain Leather Supply offer “dry splitting,” a service where they machine-split the entire hide to your specified thickness. If you know you’ll need 3 oz for a main piece and 1.5 oz for linings, order a 4 oz hide and have it split. It’s more cost-effective than buying two separate hides and guarantees consistency, which is crucial when creating leather patterns for production.
How to Buy the Right Thickness Every Time
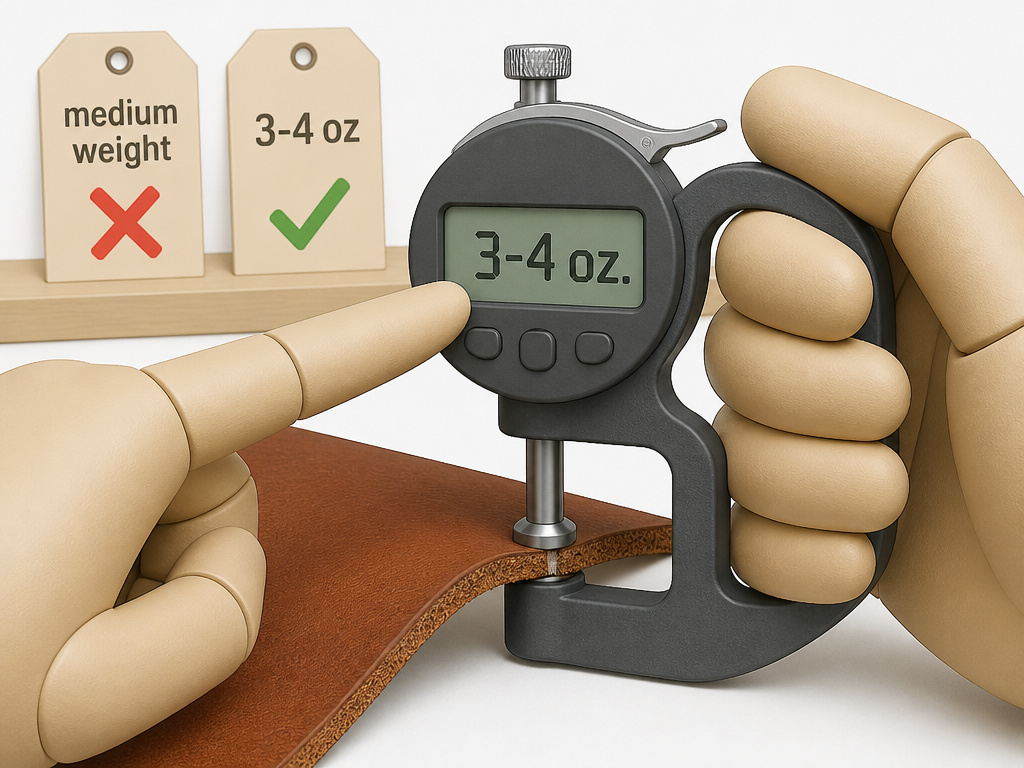 Understanding the theory is one thing. Walking away from a supplier with the right hide is another. Here’s the practical takeaway for your next purchase.
First, ignore the marketing copy on “medium” or “heavy” weight. Demand the number: “Is this 3-4 oz or 4-5 oz?” If they can’t tell you, be skeptical. Brands I reach for, like Weaver Leather Supply and Springfield Leather Company, always list weight ranges.
Second, consider the tannage. For a first project, I strongly recommend vegetable-tanned leather in the 3-4 oz range. It’s firmer, holds edges better, and is more forgiving for tooling and decorative leather carving. Chrome-tanned leather at the same weight will be much softer and stretchier, better for bags and clothing. The factors for selecting wallet leather often come down to this choice between structured veg-tan and supple chrome-tan.
Third, do a physical test before committing to a big project. If you’re planning a layered build, stack scrap pieces of your intended leather in the exact order and punch your holes. Try to set a rivet or Chicago screw through your chosen leather thread. You’ll instantly see if the hardware fits and if the stack is manageable. This five-minute check has saved me from dozens of bad decisions, and it’s a habit documented in formal federal procedure for materials.
Frequently Asked Questions
What does “7-8 oz leather” mean?
It means the leather is in the 7 to 8 ounce weight category, which translates to a thickness of approximately 2.8 to 3.2 mm. This is a common weight for heavy-duty items like work belts, knife sheaths, and some bags. The range accounts for natural variations across a single hide.
Is thicker leather always better?
No. Thicker leather is harder to cut, fold, stitch, and tool. It can be unnecessarily stiff and heavy for the application. Using 8 oz leather for a wallet would be overkill, just as using 2 oz leather for a belt would be ineffective. Match the thickness to the item’s structural demands and desired flexibility.
How do I measure leather thickness at home?
Use a leather gauge or a calibrated caliper. Place the measuring jaws perpendicular to the leather’s edge, avoiding any raised grain or finish. Do not compress the leather. For the most accurate reading, condition the leather to standard atmosphere (around 23°C and 50% humidity) as defined in government automotive standards report to account for material expansion.
Can I make a belt from 4-5 oz leather?
You can, but you shouldn’t if it’s for daily wear. A 4-5 oz belt will initially feel substantial, but the constant stress from the buckle and hip movement will cause it to stretch and deform within a few months. For a durable belt, 8-10 oz leather is the standard. This aligns with the durability thresholds often cited in regulatory thickness standard publication for load-bearing components.
How much does thickness vary within one hide?
It can vary by 1-2 oz (0.4-0.8 mm). The back (along the spine) is generally the thickest and firmest part of the hide. The belly and neck areas are thinner and looser. This is why leather is always sold in a range (e.g., 3-4 oz) and why it’s important to inspect your specific piece when choosing thread for a project, as thicker areas require heavier thread.
My project requires both thick and thin leather. Do I need two hides?
Not necessarily. You can buy a single hide at the thicker weight you need and then have the supplier “dry split” it, machine-skiving the entire hide to a uniform thinner weight. Alternatively, you can learn to skive down sections yourself for parts like card slot linings. This is a core skill for efficient crafting a leather wallet.
Before You Go
The most confident choice you can make starts with three numbers: the ounce-to-mm conversion, the ISO limit for coatings, and the project-specific weight from the cheat sheet. Ignore the rest until those are locked in.
If you’re buying tools for the first time, skip the all-in-one kit. Get a sharp utility knife, a self-healing cutting mat, and a stitching awl. Then, buy a single side of 3-4 oz vegetable-tanned tooling leather from Tandy Leather Eco-Flo or Springfield Leather Company. Make a simple key fob or card holder. Feel how the leather cuts, folds, and accepts dye. That hands-on experience with a known thickness teaches you more than any chart ever could.
Everything above assumes you’re working with real, full-grain leather. If your material is a synthetic-bonded “genuine leather,” all these rules change, the plastic coating dominates the behavior, not the fibrous base. In that case, the leather won’t tell you what it needs; it’ll just fail on its own schedule.
