
Learn How to Paint Leather to Prevent Peeling in Months
This post contains affiliate links. As an Amazon Associate, we earn from qualifying purchases.
To paint leather so it lasts, you must remove the factory finish, apply 4-6 thin coats of acrylic leather paint, and seal it with an acrylic finisher. Skipping the prep step, cleaning and deglazing, is why most DIY jobs crack and peel at flex points within three to six months.
That timeline is what happens when paint sits on top of a polyurethane or oil coating instead of bonding to the collagen fibers underneath. The leather moves; the rigid acrylic film can’t, so it fractures.
What follows is the method that sidesteps that. We’ll cover the five prep steps that are 80% of the work, the real difference between dye and paint, and the sealing mistake that causes rub-off on car seats and jacket cuffs. By the end, you’ll know which projects are worth the effort and which ones you should walk away from.
Key Takeaways
- Prep is 80% of the job. If you skip deglazing a factory-finished piece, the paint will delaminate within months, guaranteed.
- Acrylic leather paint sits on the surface; alcohol-based dye penetrates it. Use paint for opaque color changes and creative designs, dye for restoring faded color with a more flexible finish.
- Apply at least four thin coats, flexing the leather between each one. One thick coat will crack at the first bend.
- Always seal acrylic paint with a dedicated acrylic finisher (matte, satin, or gloss). Conditioner alone isn’t a sealant and will cause premature wear.
- Never paint over structurally compromised leather. If it’s already cracking or delaminating, paint will accelerate the failure.
The First Decision: Should You Even Paint This?
Not every leather piece is a candidate. Painting over a problem is cosmetic masking, not restoration, and it always fails faster.
If the leather surface is cracked, peeling, or delaminating, common in old bonded leather, painting it is a waste of materials. The paint cannot adhere to a failing substrate. It will peel off in sheets within weeks, taking more of the damaged surface with it. That kind of damage needs professional assessment, not a coat of paint.
You also can’t paint certain leather types with standard acrylics. Suede, nubuck, and patent leather have surface structures that reject liquid acrylics, leading to immediate blotching and poor adhesion. For full-grain, top-grain, and corrected-grain leathers, the process works. But the finish on those pieces is your first obstacle.
Where this goes sideways: Painting over cracked leather. The paint bonds to the flaking surface layer, not the stable leather beneath. The first flex pulls the entire painted crust away, making the damage worse.
The 5 Non-Negotiable Prep Steps
The difference between a paint job that lasts five years and one that fails in five months happens here. Rushing prep is the most common and costly mistake.
1. Deep Clean
Remove all surface dirt, grease, and oils. Use a pH-neutral leather cleaner and a soft cloth. Pay extra attention to high-touch areas: shoe toe boxes, bag handles, couch armrests, and jacket cuffs. Skin oils and hand creams create a barrier nothing will stick to. Let the leather dry completely, any trapped moisture causes adhesion failure.
2. Remove Hardware
Take off anything you don’t want to paint. For shoes, remove the laces. For bags, detach straps if possible. For furniture, unscrew legs. This gives you a clean working area and prevents paint from gumming up functional parts.
3. Deglaze the Surface
This is the critical step most tutorials understate. Nearly all mass-produced leather goods have a factory-applied polyurethane or acrylic finish. Your paint cannot stick to that plastic coating.
Apply a leather deglazer (like Angelus Leather Preparer) with a lint-free cloth or cotton pad. Rub in a circular motion until the surface loses its sheen and feels slightly tacky. You’re not sanding it down; you’re chemically removing that topcoat to expose the raw collagen fibers. No deglazer? Acetone-free nail polish remover works in a pinch, but it’s harsher and can over-dry the leather.
4. Sand? Maybe.
Here’s where pros disagree. Some kits, like Leather Magic, advise against sanding, warning it damages the leather. Others, like Vintage Leather Sydney, recommend a very light pass with 400-grit sandpaper on exceptionally smooth areas (like shoe toe boxes) after deglazing to create more texture for the paint to grip.
My take: if the deglazer has done its job and the surface feels uniformly matte, skip sanding. If a spot remains slick and glossy, a single, gentle pass with 400-grit can help. The goal is a uniform, matte surface, not to remove material.
5. Final Wipe-Down
Use a tack cloth or a slightly damp lint-free cloth to remove every speck of dust created from deglazing or sanding. Any debris left on the surface will be sealed under the paint, creating a visible bump.
Choosing Your Paint: Acrylic vs. Dye
This color choice is a decision between a surface coating and a penetrating stain, and each has a different lifespan and feel.
| Type | How It Works | Best For | Feel When Dry |
|---|---|---|---|
| Acrylic Leather Paint | Forms a flexible plastic film on the leather’s surface. | Opaque color changes, creative designs, painting over dark leather with a light color. | Can feel slightly plastic-like; stiffness depends on number of coats. |
| Alcohol-Based Dye | Penetrates and stains the leather fibers themselves. | Restoring faded color, tinting veg-tan leather, achieving a deep, translucent finish. | Maintains the natural leather feel and flexibility. |
Acrylic paint cannot form a chemical bond with unprepared polyurethane-coated or oil-rich leather surfaces. This is grounded in material science, the 2025 Scientific Reports paper on leather surface reactivity shows why prep is non-negotiable.
If you want to completely change a black couch to white, you need acrylic paint. If you want to refresh the rich burgundy on a faded leather jacket, an alcohol-based dye like Fiebing’s Pro Dye is the better tool. For most restoration work, I prefer dye. For customization and art, I reach for paint.
Remember, the leather dye vs leather paint debate comes down to this: dye becomes part of the leather; paint sits on top of it. Your project’s goal dictates the tool.
The Tools That Actually Matter
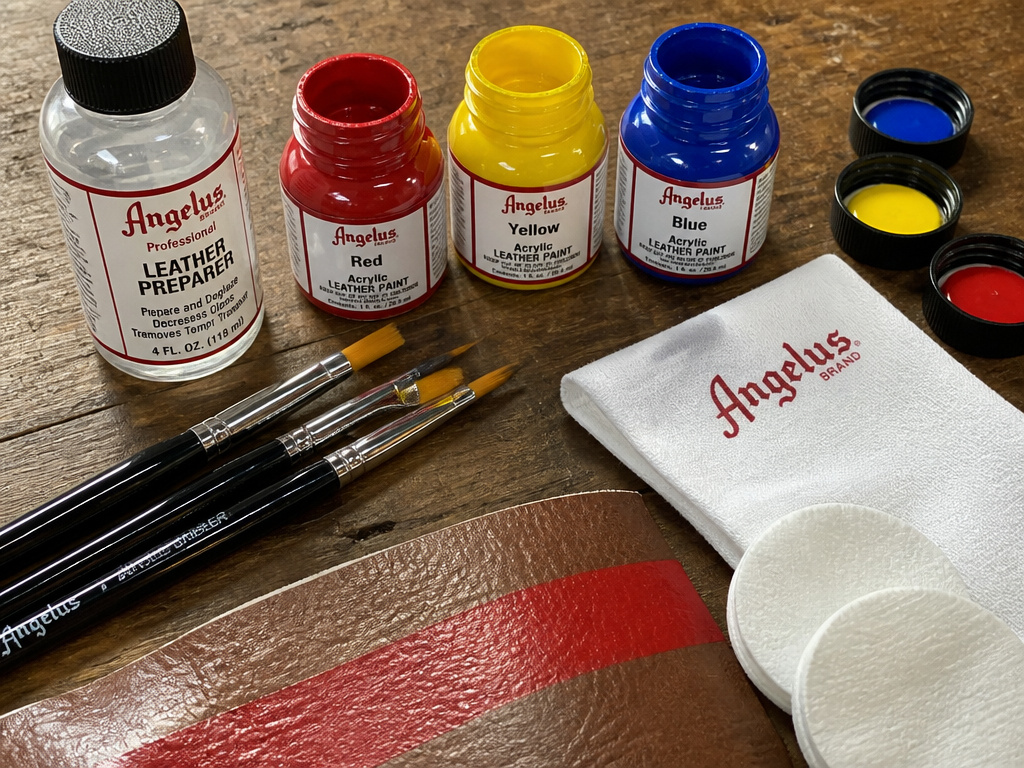
You don’t need a huge kit, but you do need the right items. Here’s what I keep on my bench:
- Deglazer: Angelus Leather Preparer or equivalent.
- Brushes: High-quality synthetic artist brushes in multiple sizes (round #2 for details, flat #6 for broad areas). Cheap brushes shed bristles into your work.
- Paint or Dye: For acrylics, Angelus Leather Paint is the industry standard for a reason. For dye, Fiebing’s Pro Dye or Eco-Flo Gel Antique.
- Palette & Mixing Cups: For blending custom colors and thinning paint.
- Sealant: An acrylic finisher (Angelus makes good ones in Matte, Gloss, and Satin). This is not optional.
- Lint-Free Cloths & Cotton Pads: For application and cleanup.
A note on additives: Angelus sells “2-Soft” to make paint more flexible and “Duller” to kill shine. For items that flex constantly, like a leather jacket or shoes, a few drops of 2-Soft mixed into the paint can prevent early cracking at stress points.
Application: Thin Coats Win

The instinct is to glop on paint to cover everything in one pass. Fight it. Thick paint cracks because the outside skin dries and shrinks while the wet core underneath stays bulky. The stress pulls it apart.
Step 1: First Coat – The Adhesion Layer
Thin your first coat of paint slightly with a few drops of water (for acrylics) or the recommended thinner. Apply it in even, straight strokes. This coat will look streaky and awful. That’s fine. Its job isn’t to cover but to lock onto the prepared surface.
Step 2: Flex and Dry
Before the first coat is fully dry, tacky but not wet, bend the leather at its natural flex points. Fold the shoe vamp, bend the jacket elbow. This creates micro-cracks in the paint film so subsequent coats can bridge them, building a flexible matrix instead of a solid shell. Let it dry completely (30-60 minutes).
Step 3: Build Coverage
Apply your second coat, un-thinned this time. You’ll see better coverage. Repeat the flex-while-tacky step. Let dry. Apply third and fourth coats the same way. For a solid color over a dark base, you might need five or six. The rule is: stop when you can’t see the original color beneath it, and not one coat sooner.
Step 4: Mind the Edges soak up paint and wear quickly. For a durable edge, the process is closer to edge paint leather techniques, building up layers carefully. On a bag or shoe, apply an extra coat to any cut leather edges.
Common mistake: Applying the next coat before the previous one is fully dry. Trapped solvent creates a weak bond between layers, and the entire film can peel off like a sticker.
Sealing and Finishing: The Layer That Determines Longevity
You haven’t finished painting until you’ve sealed. An unsealed acrylic paint job is fragile. It will scuff, absorb stains, and the color will rub off on clothes.
1. Choose Your Sheen
Acrylic finishers come in Matte, Satin, and Gloss. Matte preserves a natural look, Satin gives a soft glow like conditioned leather, and Gloss is for a high-shine, lacquered effect. For most recolor leather projects, Satin is the safest, most authentic choice.
2. Apply Two Thin Coats
Using a clean, soft brush or cloth, apply the finisher in the same thin-coat method as the paint. One even coat, let it dry for an hour, then apply a second. Two thin coats are more durable and even than one thick one.
3. Cure, Don’t Just Dry
Here’s the timeline nobody mentions: paint dries to the touch in hours, but it cures (fully hardens) over days. Keep the item in a well-ventilated, room-temperature area for at least 72 hours before subjecting it to stress.
This is critical for car interiors. A dashboard can hit 80°C (176°F) in summer sun. If the acrylic film isn’t fully cured, that heat will soften it, causing imprints from clothing or sticking. Wait the three days.
How Long Will It Last? Realistic Timelines
With perfect prep and sealing, here’s what you can expect: – Shoes (daily wear): 2–5 years, with touch-ups at flex points after 18 months. – Leather Jacket: 2–5 years; elbows and cuffs will show wear first. – Car Seats: 2–4 years; the driver’s seat side bolster wears faster. – Couch: 3–8 years; seat cushions wear before backs and arms.
Without proper prep and seal? Cut those times by 75-90%. Shoes peel in 3–6 months. A jacket cracks at the elbows in one season.
The driver’s seat is the ultimate test. The constant entry/exit abrasion and body heat will find any weakness in your prep work. If you can make a painted car seat last two years, you’ve done the job right.
Frequently Asked Questions
Can I use regular acrylic paint on leather?
You can, but you shouldn’t. Craft acrylics are formulated for rigid surfaces like canvas or wood. They become brittle and will crack and flake off flexible leather. Leather-specific acrylics (like Angelus) have plasticizers that allow the paint film to flex with the material.
How do I fix a mistake or remove paint?
For wet paint, blot immediately with a dry cloth. For dried acrylic, use an acetone-free nail polish remover on a cotton swab, test in a hidden area first. For oil-based paints, use mineral spirits. Aggressive removal can damage the leather’s original finish, so proceed with caution.
Do I need to condition the leather after painting?
Yes, but not immediately and not with a heavy oil. After the final finisher has cured for a full week, you can apply a tiny amount of a non-oil, water-based conditioner to restore slight suppleness. Heavy conditioners like mink oil will break down the acrylic sealant over time.
Can I paint a leather steering wheel?
I don’t recommend it. Steering wheels endure constant friction, UV exposure, and heat from your hands. Even professional-grade paints struggle here. The risk of the finish becoming tacky or wearing through quickly is high. For steering wheels, professional finish leather edges and recoloring services are a better investment.
What’s the best way to paint intricate designs?
Use an artist’s brush and practice on scrap first. For super-fine lines, leather paint can be thinned and used almost like ink. For solid backgrounds, use a sponge or airbrush for even coverage. Always seal the design afterward.
Before You Go
The single biggest lever you have is patience. Rushing the deglazing step or applying the next coat too soon is how projects fail.If you remember one thing, let it be this: prep is everything.
Your first project shouldn’t be a vintage car interior. Start with something small and low-stakes, like a burnish leather edges practice piece or a simple belt. Get the feel for how the paint flows, how it dries, and how the sealant changes the hand.
And if you’re working on a prized pair of best paints leather shoes, practice on the tongue first, where mistakes are hidden. That’s the straightforward guide, understand the material, respect the steps, and the leather will tell you what it needs.
