
How to Carve Leather: Avoid This Critical Beginner Mistake
This post contains affiliate links. As an Amazon Associate, we earn from qualifying purchases.
This post contains affiliate links. As an Amazon Associate, we earn from qualifying purchases.
To carve leather, you need three things matched perfectly: vegetable-tanned leather, dampened to the point it feels cool to the touch but not soggy, and a sharp swivel knife held vertically. The cut should be about half the leather’s thickness. Chrome-tanned or dry leather will not hold a clean impression.
That “cool to the touch” spec is where most projects fail first. It’s not a guess. It’s the point where the leather fibers have swollen enough to be cut cleanly but haven’t become mushy. Get it wrong, and your knife will drag, your stamps will sink too deep, and the entire design goes fuzzy.
What follows is the breakdown of that single, critical variable, moisture, and the six tools that turn a flat hide into a dimensional design. This isn’t about artistic talent. It’s about controlling a physical material.
Key Takeaways
- Carve only vegetable-tanned leather. Chrome-tanned leather is too soft and water-resistant to hold cuts.
- The leather must be cased, dampened until it feels uniformly cool to the touch, a state that lasts 5-10 minutes before drying out.
- A sharp swivel knife, held perfectly vertical, should cut about half the leather’s depth in one fluid motion.
- Tooling is a sequence: cut first with the knife, then bevel to create depth, then texture with veiners and shaders.
- The mallet matters. A solid maple or poly mallet (like a Barry King) gives consistent, vibration-free strikes; a cheap hardware-store hammer will fatigue your hand and blur impressions.
- Practice every new stamp or technique on a scrap piece of the same leather you’re using for the project.
The Leather, The Moisture, The Cut
Your foundation isn’t the pattern. It’s the material itself. You must start with vegetable-tanned leather. This isn’t a preference. Chrome-tanned leather, which is most of what you find in stores, is tanned with metallic salts. That process makes it soft, stretchy, and water-resistant. When you try to carve it, the blade pushes fibers aside instead of slicing them, and any stamp impression will spring back.
Vegetable tanning uses natural tannins from bark and leaves. It leaves the leather firm, porous, and ready to accept water and hold a shape. This is the canvas for all traditional leather carving. The process of turning a raw hide into this workable material is a story of chemistry and patience, detailed in any guide to leather making.
The Leather Casing Rule: Dampen the leather until it feels cool to the touch across its entire surface. The moisture should penetrate about one-third of the way through the thickness. This is the “cased” state, the fibers are swollen and soft, like modeling clay, but the surface is not shiny-wet.
The Montana Extension leathercraft manual is precise on this point. You achieve this by blotting, not soaking, the leather with a damp sponge. If you see dark, soggy spots, you’ve gone too far. Let it sit until the surface color returns to normal but the back of your hand still feels a distinct coolness. That’s your window. It’s typically 5 to 10 minutes long in average room conditions.
If the leather dries while you’re working, re-wet it from the back. Adding water directly to the carved front can darken and distort your existing cuts. And never use a metal container to hold your water; the contact can cause permanent dark stains on the leather.
Carving is a Three-Stage Job
Think of leather carving as sculpture. You start by drawing the outline in the clay, then you carve out the basic depth, and finally you add the fine textures. In leather, that’s cut, bevel, and texture.
Stage 1: The Swivel Knife Cut
This is the defining line. Everything else follows it. Your knife must be sharp. I strop mine before every session and again if I feel the slightest drag. Hold the knife with your index finger in the saddle, perpendicular to the leather. You guide it with your thumb and middle finger on the barrel, not your wrist. The tip should slice into the leather at a consistent depth, aim for about half the thickness.
A dull blade doesn’t cut. It tears. You’ll see fuzzy, ragged edges on your lines instead of a clean, sharp channel. That fuzziness telegraphs through every subsequent stamping step.
The pressure should be firm and even. Don’t stop and start in the middle of a curve if you can help it. A confident, continuous pull gives a smoother line. If your design has a line you don’t want to cut all the way through (maybe for a background element), trace it as a dotted line during the transfer phase.
Stage 2: Beveling for Depth
Once your lines are cut, you create the illusion of depth with a beveler. This is a stamp with a sloped face. You place it so its edge sits inside the cut you just made. A firm tap with the mallet pushes the leather down on one side of the cut, making the other side appear raised.
| Beveler Type | Best For | If You Skip It |
|---|---|---|
| Standard Beveler | Creating basic depth along straight or gently curved cuts. | The design looks flat, like an ink drawing instead of a relief sculpture. |
| Undercut Beveler | Lifting petals or leaves in floral patterns (also called a “petal lifter”). | Curved elements lack that rounded, three-dimensional pop. |
| Background Beveler | Pushing down the field around the design to make it stand out. | The main motif doesn’t separate visually from the leather around it. |
Walk the tool along the cut, overlapping each impression slightly. The goal is a smooth, graded slope, not a staircase. The choice between vegetable tanned leather and chrome tanned leather becomes obvious here, the veg-tan holds this displaced shape permanently; chrome-tan would slowly creep back.
Stage 3: Texturing and Shading
Now you add life. This is where the toolkit expands, but you can start with just two tools: a veiner and a shader.
A veiner creates a narrow, lined texture, perfect for suggesting the veins in a leaf or the fold in a scroll. A pear shader (or a similar seeder) has a smooth, rounded face for creating soft, shaded areas, like the concave center of a flower. You don’t hammer these straight down. You often tilt them, use partial impressions, and bounce them lightly to blend the effect.
The force here is finesse, not power. You’re coaxing the leather, not pounding it. This stage is where a quality mallet proves its worth. A Barry King mallet delivers a dead blow, all the force goes into the tool, not into vibrating your arm. A cheap hardware mallet will make your hand ache and give you inconsistent strikes.
Your Toolkit, Simplified
You can spend a fortune on specialized stamps. Don’t. Start with a core set and add tools for the specific patterns you want to create. Here’s the shortlist.
- Swivel Knife: The essential tool. A sharp, well-balanced knife like those in a Craftool Pro set.
- Solid Mallet: 16-24 oz. Maple, poly, or rawhide. This is your most important “feel” tool.
- Beveler: A #A888 or similar general-purpose size.
- Veiner: A small to medium width (#A902 or #A904).
- Pear Shader/Seeder: For shading rounded areas.
- Modeling Spoon/Stylus: Underrated. This smooths tooled areas and blends seams without leaving a stamp pattern.
Where this goes sideways: Buying a giant set of 100 stamps before mastering these six. You’ll waste money and overwhelm your bench. Each stamp has a learning curve for angle and strike force. Learn your core tools on scrap leather until the impression is crisp every time.
A note on power tools: The Silhouette Leather Carving Knife (Model CURIO-TOOL-LCK) exists for machine-assisted work. Its manual specifies a Blade Depth of 1, Speed of 1, and a single pass for vegetable-tanned leather. It’s precise but removes the hand-tool feel. It also highlights a key truth, the manual warns that natural leather varies in thickness, so you must test and adjust. That principle applies tenfold to hand tooling.
The Two Failure Modes (And How to Fix Them)
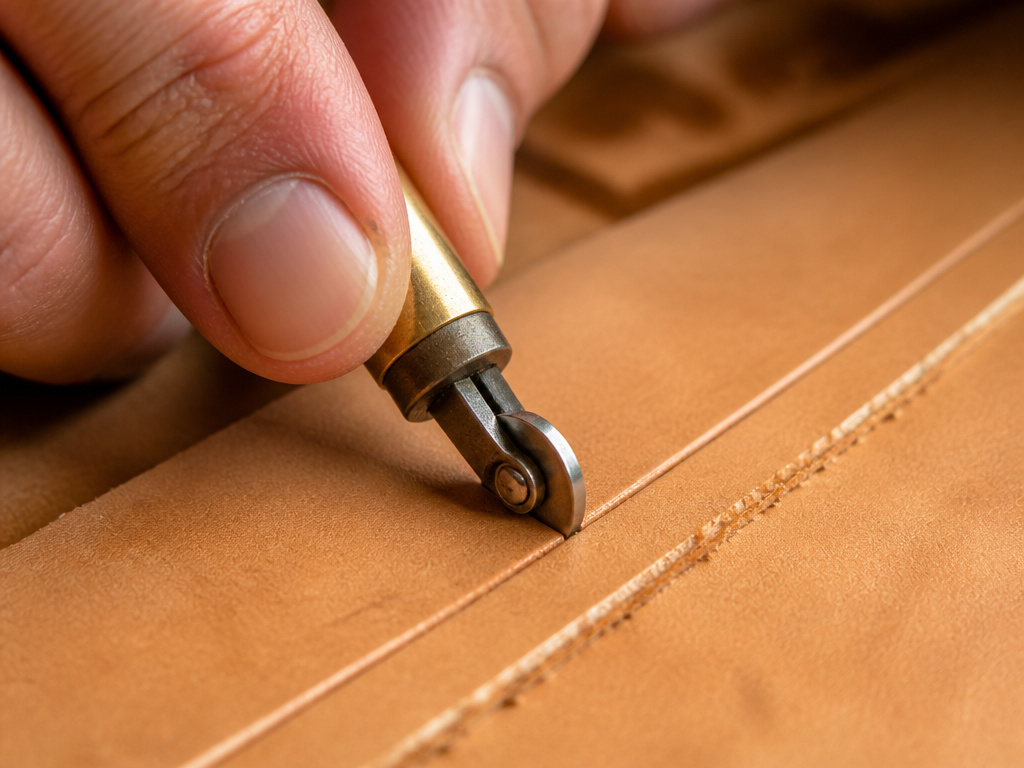 Leather tells you when you’re off. You just need to know how to listen.
Problem: Fuzzy, torn cut lines.
- Cause: A dull swivel knife blade, leather that’s too dry, or trying to carve chrome-tanned leather.
- Fix: Stop. Strop or replace your blade. Check your leather’s moisture, it should feel cool. If it’s dry, re-case it from the back. If you’re not using veg-tan, you cannot fix this; you need the right material.
Problem: Stamps sink in too deep, creating dark, blob-like impressions.
- Cause: Leather is too wet (“over-cased”). The fibers are mushy and offer no resistance.
- Fix: Let the piece dry completely. Then re-case it correctly, aiming for that “cool to the touch” state, not a damp one. You may have to live with the darkened, deep spots or incorporate them into the background.
Thin and thick leather are their own edge cases. Thin leather stretches more as you work it, so anchor it well. Thick leather needs more moisture to case properly throughout. For both, the solution is more test strikes on a scrap piece from the same hide. This is part of testing leather quality before you commit a tool to it.
Let me share what I’ve learned about mistakes. I once thought a deep scratch on a tooling project was a total loss. I tried to over-carve it to hide the flaw, which just made it worse. The real fix was to let the leather dry, then carefully sand the area smooth and re-case it before gently re-tooling the affected spot. The scratch became invisible. Many errors are only surface-deep if you address them patiently.
Frequently Asked Questions
What’s the best leather for beginners to carve?
Vegetable-tanned leather in a medium weight (4-5 oz). It’s firm enough to hold detail but not so thick it requires excessive force. Avoid any leather that feels soft or spongy, or has a painted-on surface finish.
Can you carve leather without a swivel knife?
Not for traditional Western-style carving. The swivel knife creates the clean, deep channel that defines the pattern. You can do embossing or stamping without one, but that’s a different technique for creating embossed leather designs without cutting.
How do you transfer a design onto leather?
Trace your pattern onto tracing film or parchment paper. Case your leather. Tape the traced design over the damp leather and go over every line with a stylus or dull pencil. The pressure will leave a faint indentation on the leather surface to guide your knife.
Why does my tooling look flat and uneven?
This usually points to inconsistent casing or an uneven striking force. The leather must be evenly damp. Your mallet strikes should be practiced, consistent, deliberate taps, not wild swings. A heavy, solid mallet helps tremendously with control.
How do you finish carved leather?
After tooling, let the leather dry completely for 24-48 hours. Then you can apply dye (if desired), followed by a conditioner like neatsfoot oil. The final step is a topcoat, such as a resin-based acrylic finish (like Resolene) or a natural wax, to protect the surface and the tooled details.
Before You Go
The real secret isn’t in your tenth specialty stamp. It’s in the first minute of prep. If you take one thing from this, let it be the “cool to the touch” test for casing leather. Every problem I’ve ever had in tooling, fuzzy lines, poor stamp definition, uneven depth, traces back to getting that step wrong.
Start with a small piece of good veg-tan, a sharp knife, one beveler, and a decent mallet. Practice cutting straight lines, then curves. Practice beveling them. Make a mess on scrap leather. That’s how you learn what the material can do. The difference between vegetable vs chrome tanned leather will become physically obvious in your hands. The leather will tell you what it needs. Your job is to listen.
