
Defining Leather Embossing & The Critical Overlooked Rules
This post contains affiliate links. As an Amazon Associate, we earn from qualifying purchases.
This post contains affiliate links. As an Amazon Associate, we earn from qualifying purchases.
Leather embossing is a mechanical decoration process that uses heat and pressure to permanently deform the grain surface into a raised pattern or design. It mimics exotic skins, applies logos, or creates decorative textures, and its durability depends on three controlled parameters: temperature, pressure, and dwell time. The process works best on unfinished, vegetable-tanned leather at least 2mm thick, as the fibers must expand under moisture to hold the new shape.
That requirement for specific leather is where most home projects go wrong before they start. You cannot treat embossing like a sticker you apply on top; you are permanently rearranging the collagen structure inside the hide. The pattern’s permanence isn’t a guarantee, it’s a product of the right chemistry meeting the right mechanics.
What follows: the machinery that makes it possible, the exact settings that decide if a pattern lasts for years or washes out, and the clear line between embossing that adds value and embossing that hides flaws. By the end, you’ll read any embossed item and know whether it was built to endure or just to sell.
Key Takeaways
- Embossing requires unfinished, vegetable-tanned leather over 2mm thick; the fibers must absorb moisture to expand and lock the pattern in place.
- The pattern’s durability hinges on three settings: temperature (150–200°C), pressure (adjusted per leather type), and dwell time (seconds to minutes).
- Corrected grain leather is the industry’s most common embossing substrate because the sanding process creates a uniform, receptive surface.
- Blind embossing uses only heat and pressure for a subtle, natural look, while color embossing adds pigments or foils during the press. An emboss with a gauge depth of at least 0.5mm feels crisp and deep to the touch; a shallow, fuzzy pattern signals weak pressure, low heat, or an incorrect leather type.
The Machinery Behind the Mark
Modern embossing doesn’t happen with a hammer and a stamp. It happens inside a machine where a hide gets sandwiched between two critical parts: an engraved metal roller or plate, heated to a precise temperature, and a counter-pressure roller that dictates the force. The old method uses a flat, engraved plate in a hydraulic press. The leather sits on the plate, the press closes, and heat and pressure transfer the pattern. The risk is a slight overlap if the leather shifts, creating a tell-tale double image.
The rotary press solved that. Here, the leather feeds continuously between a heated, engraved cylinder and its rubber-coated partner. The rotation is constant, so the pattern repeats without interruption across a whole hide. “Unlike plate presses, with rotary presses there is no risk of overlapping the design,” explains Leonardo Bergozza of machinery maker Bergi in an industry article. The result is the uniform python or crocodile texture you see on bags from a single, endless roll.
The engraving on that metal cylinder is the other half of the equation. It can be cut by hand for unique, artisan designs, but laser engraving is the standard for consistency and cost. Even with an identical digital file, the final texture can vary between manufacturers, the depth of the cut, the polish on the metal’s edges, the alloy’s heat retention. This is why two belts with the same “crocodile” pattern can feel different under your thumb. The machine’s settings are a recipe, and the roller is the pan it’s cooked in.
The three fundamental parameters for a quality print are the impression time, the temperature of the metal roller, and the pressure, essential for a high definition of the pattern to be printed.
What Makes an Embossed Pattern Permanent?
This is not a surface coating. When you emboss leather correctly, you are permanently deforming its internal collagen fiber network. Think of it like setting a memory in the material itself. Three factors control whether that memory holds or fades: heat, force, and time.
Temperature (typically 150–200°C / 300–390°F) does the work of plasticizing the leather’s surface. It makes the fibers temporarily malleable. Too low, and the fibers resist the new shape, springing back. Too high, and you risk scorching the proteins, creating a burnt smell and a brittle, discolored surface. The sweet spot is high enough to allow permanent deformation without chemical damage.
Pressure is what pushes the softened fibers into the engraved cavities of the roller or plate. It must be high enough to drive the pattern deep into the grain layer. On a rotary press, this is adjusted by the gap between the engraved roller and the counter-pressure roller. A “contact” setting applies full force for a deep, dramatic emboss. A “thickness” setting just kisses the tips of the grain for a subtle texture. Under-pressure is the most common cause of a weak, blurry pattern that wears off with use.
Time is the duration the leather spends under heat and pressure. In a fast-moving rotary press, this is seconds. In a slower plate press, it can be minutes. The dwell time allows the heat to penetrate and the pressure to fully seat the new shape. Rushing it means only the topmost fibers get set, and the pattern will relax and shallow out over time. A peer-reviewed study in CoatingsTech on vegetable-tanned leathers confirmed that higher temperatures and extended embossing durations directly improved the durability of the embossed patterns.
The leather’s own condition is the fourth, silent variable. This is where my own lesson fits. The common warning is to keep leather dry. Yet, for embossing, controlled moisture is the whole game. A study on grain-side decoration notes that higher humidity makes the collagen structure more permanently deformable. In practice, that means dampening the leather before it enters the press. The water expands the fibers, giving them the physical space to rearrange and lock into the new, pressed shape as they dry. A bone-dry hide will resist, resulting in a faint, temporary mark. It’s the difference between bending a green twig and trying to bend seasoned oak.
The Right Leather for the Job
Not all leather can be embossed. Trying to force a pattern onto the wrong type is how you get disappointing results and assume the process is at fault. The ideal embossing leather has two essential characteristics: it must be unfinished, and it must be thick enough.
Unfinished leather, specifically vegetable-tanned, is receptive. Its fibers are open and ready to absorb moisture and expand under pressure. The moment you add oils, waxes, or a plastic topcoat (the “finish”), you seal those fibers. The pressure then just slides across the surface or, worse, cracks the finish. This is why craftsmen always use unfinished veg-tan for hand tooling, the same principle applies at an industrial scale. A finish can be applied after embossing to protect the new pattern, but never before.
Thickness matters because embossing needs material to work with. The recommendation from leatherworking suppliers is a minimum of 2mm. Thinner leathers lack the body to hold a deep impression; the press can easily cut through or overly compress them, weakening the hide. Thicker leathers, like the 3-4mm used for belts, can accept very deep, crisp patterns that become a permanent part of their structure.
This is where corrected grain leather enters the story. It is the industry’s workhorse for embossing. This leather starts with minor surface flaws, bug bites, light scars. It is sanded down to remove those flaws, creating a perfectly uniform, napped surface. That sanded surface is like a blank canvas, incredibly receptive to accepting a deep, even emboss. The process literally creates the leather specifically for embossing leather. When you see a perfectly consistent pebble or lizard texture on a mid-range bag or shoe, you are almost certainly looking at corrected leather that has been sanded and then embossed.
The Difference Between Blind and Color Embossing
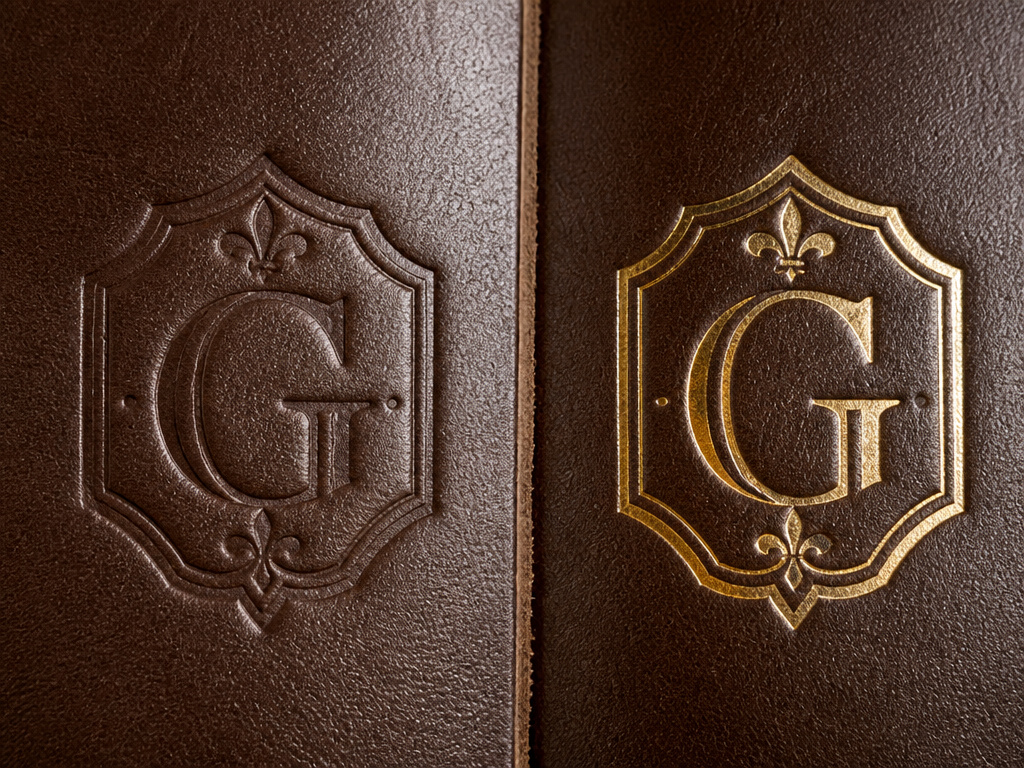 These two terms describe the end result, not the machine. The same press can do both, depending on what you feed into it.
Blind embossing uses only heat and pressure. No pigment, foil, or additional color is added during the stamping process. The result relies purely on the shadow and light play of the three-dimensional shape. It’s subtle, elegant, and feels inherently natural because it lets the leather’s own color and character show through. You often see this on high-end stationery, subtle logos, or the textured backgrounds on luxury bags.
Color embossing (sometimes called foil stamping or pigment embossing) adds color during the impression. A thin film of pigment or metallic foil is placed between the leather and the engraved die. The heat and pressure transfer that colored layer onto the raised portions of the pattern. This is how you get gold-lettered logos or a green paisley pattern on a brown belt. It’s more decorative and graphic, but it adds a surface layer that can crack or wear with heavy flexing over time.
| Embossing Type | Process Additive | Best For | Durability Consideration |
|---|---|---|---|
| Blind Embossing | Heat & pressure only | Logos, textures, natural finishes | Excellent; the pattern is part of the leather structure. |
| Color Embossing | Heat, pressure + pigment/foil | Decorative designs, metallic logos | Good; the color layer may wear or crack with extreme flex. |
The choice isn’t about quality but purpose. A blind-embossed Saffiano leather wallet gets its famous cross-hatch durability from the depth of the press. A color-embossed logo on a pebbled leather handbag aims for immediate visual pop.
Embossing as a Finish, Not a Mask
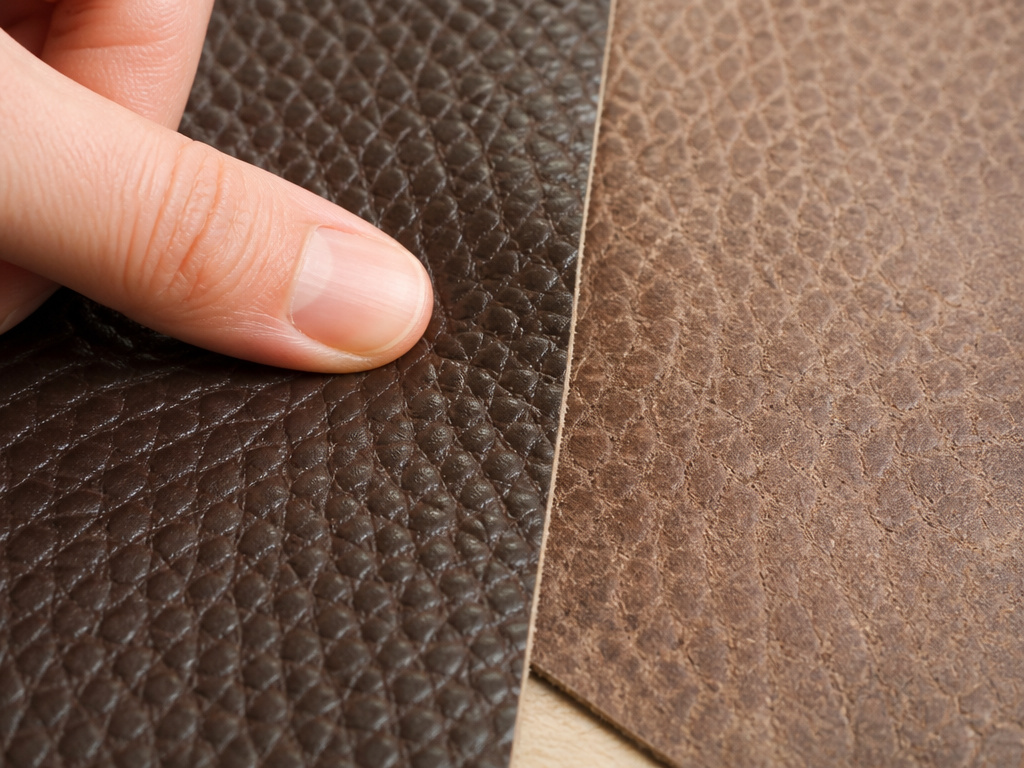 This is the critical line. Embossing can be a legitimate, quality-enhancing leather finishing technique, or it can be a disguise. How do you tell?
Value-Added Embossing starts with a sound hide. The pattern is applied to add design, texture, or branding. The leather beneath is still durable and fit for purpose. The embossing might even increase durability by compacting the fibers. You see this with hard-wearing textures like pebble grain or Saffiano.
Masking Embossing is used to cover a low-quality or damaged hide. Deep, busy patterns can obscure numerous natural flaws, thin spots, or poor grain structure. The leather might have been heavily corrected (sanded) to the point of weakness before the emboss was applied. This is a red flag if the leather feels papery, if the pattern has no crisp depth, or if the backside of the leather (the suede) shows evidence of excessive splitting to make it thinner.
Your touch is the best test. Run your finger over an emboss from Horween leather.com/how-to-test-leather-quality/)**. It should feel crisp, with defined edges to the pattern. The valleys should be deep and the peaks smooth. A cheap emboss feels shallow, fuzzy, and uniform in a plastic-like way. It lacks the tactile variation of real leather that has been physically transformed.
The Steps in a Leather’s Life: Where Embossing Fits
To really understand embossing, you need to see where it happens in the leather production process. It’s a late-stage operation, long after the hide is tanned and dried.
- Tanning & Dyeing: The raw hide is processed (vegetable or chrome tanning) and then undergoes leather dyeing to achieve its base color.
- Drying & Conditioning: The dyed leather is dried and may be conditioned with oils or fats for softness.
- Finishing Preparation: For corrected grain, the leather is sanded. For full-grain, it is merely smoothed.
- Embossing: The leather is dampened slightly, then fed through the rotary or plate press with the chosen engraved die.
- Topcoat Application: After embossing, a protective topcoat (lacquer, wax, or oil) is often applied to seal the new surface and add sheen. This is what gives patent leather its iconic glassy finish, though patenting is a specific chemical process beyond just a topcoat.
Embossing is a crossroads. It can be the step that gives a robust hide a unique character, or it can be the step that papers over the cracks in a subpar one. The machinery, from the laser-engraved rollers to the computerized presses, is precise. But the input, the leather itself, dictates the output’s integrity.
Frequently Asked Questions
Can you emboss leather at home?
You can, with significant limitations. Manual arbor presses and metal stamps can produce small, blind-embossed designs on unfinished vegetable-tanned leather. However, replicating the consistent heat, even pressure, and deep penetration of an industrial rotary press is nearly impossible. Home results are often shallower and less durable.
Does embossing weaken the leather?
Proper industrial emboss does not weaken sound leather; it can actually compact and strengthen the grain layer. However, excessive pressure on leather that is too thin, or embossing on heavily corrected leather that has been sanded too thin, can reduce overall tensile strength and lead to cracking along the embossed peaks over time.
Is embossed leather fake?
No. The leather is real. The pattern is artificial. Embossed cowhide printed with a crocodile pattern is genuine leather, not “fake leather.” It is cowhide with a crocodile texture added. The confusion arises when embossing is used on low-quality or synthetic materials, but the process itself is a legitimate decoration for real leather.
How can you tell if leather is embossed?
Look at the pattern’s perfection. Natural animal skins (like alligator, ostrich) have natural variations, scars, and areas where the pattern changes scale. An embossed pattern is perfectly uniform across the entire piece. Also, feel the depth. A very shallow, almost painted-on texture is often a cheap emboss or even a printed pattern, not a true mechanical emboss.
What’s the difference between embossing and debossing?
Embossing raises the design up from the surface. Debossing presses the design down into the leather, creating an indent. The same machines can do both, depending on whether the engraved die is used as the top tool (embossing) or a male/female die set is used to squeeze the leather into a cavity (debossing). Debossing is less common on leather goods as it can collect dirt.
Before You Go
The one rule most guides skip is about moisture. If your leather isn’t slightly damp when it goes into the press, you’re just making a temporary dent, not a permanent shape. That’s the threshold: the fiber expansion from dampness is what locks the deformation in place as it dries under heat and pressure. Everything else, temperature settings, roller engraving depth, pressure calibration, is engineering. The dampness is biology.
So the next time you handle an embossed bag or belt, press your thumb into the pattern. Feel for the crisp edges and the deep valleys. That’s the mark of a process done right, on leather that was chosen for the job. It’s not a surface trick. It’s the hide’s own story, rewritten under a few hundred degrees of heat and several tons of pressure.
