
Learn How to Stamp Leather for Professional, Clear Results
This post contains affiliate links. As an Amazon Associate, we earn from qualifying purchases.
To stamp leather, you need three things aligned: the right leather (vegetable-tanned), the correct moisture level (cased, not soaked), and a controlled strike. The leather must be damp enough to compress but dry enough to hold detail, a state called “cased” that provides a 2 to 2.5-hour working window. Skipping any of these gives you a fuzzy, shallow, or distorted impression.
That “cased” state is the whole game. It’s not about being wet; it’s about the water penetrating just the top third of the leather’s thickness, leaving the bottom half dry for support. Get this wrong, and no mallet or expensive stamp will save your project. The leather turns to mush under the tool or resists it entirely.
What follows is a breakdown of that casing process, the tools that actually matter, and the one striking technique debate that splits experienced crafters. By the end, you’ll know how to read the leather’s feedback and adjust your approach on the fly.
Key Takeaways
- Stamp only vegetable-tanned leather for hand tooling; chrome-tanned and faux leathers require a heated stamp and an arbor press.
- Proper “casing” means dampening the leather so moisture penetrates the top third, creating a 2-2.5 hour window for crisp, clean stamps.
- Always use a non-metallic water container and a stone or poly surface; metal contact stains damp leather permanently.
- For consistent depth, use a solid maple or poly mallet like a Barry King and favor multiple light, controlled taps over a single heavy blow.
- If a project will take days, add a drop of dish soap to your casing water to prevent mold during storage.
The Core Principle: Casing Your Leather
Casing isn’t just getting the leather wet. It’s a specific state of hydration that makes the leather fibers compressible but not mobile. Think of it like tempering chocolate, the goal is a precise physical condition, not just a change in temperature.
The target is for moisture to penetrate about one-third of the way through the thickness from the grain side. The leather should feel cool to the touch, and its color will darken noticeably. This is your signal. The still-dry bottom half of the leather acts as a firm backstop, preventing the stamp from sinking in too deep and blurring.
A properly cased piece of vegetable-tanned leather will give you 2 to 2.5 hours of clear, consistent tooling time before it begins to dry out and resist impressions.
I learned the importance of a solid foundation the hard way. Early on, I tried to set hardware with a standard hammer on a soft work surface. The rivet backs deformed against the give of the bench, leaving a messy, uneven finish. The same principle applies here, your leather needs that unyielding support underneath. A marble slab at least 3/4-inch thick is the classic recommendation for a reason. It doesn’t absorb shock or moisture, and it provides the perfect anvil for your stamp.
Here’s where most beginners go wrong: they either spray a light mist that barely darkens the surface or they soak the piece until water pools. The first gives you a weak, shallow stamp. The second turns your project into a sponge that can’t hold a crisp line.
How to Case Leather Correctly
- Use a sponge or spray bottle with clean water. If your project will take multiple days, add a single drop of clear dish soap to the water to inhibit mold growth.
- Apply evenly. Dampen the entire surface you plan to stamp, even if you’re only working in one corner. This prevents visible water line marks if you later apply dye.
- Watch for the color. The leather will darken as it absorbs the water. Wait until the surface sheen disappears and the color is uniform.
- Test with a scrap piece. Before touching your main project, press a stamp into a cased scrap. It should give firm, even resistance and leave a sharp impression. If it sinks too easily, wait ten minutes for surface water to evaporate. If it fights back, apply a little more moisture.
Tools of the Trade (What Actually Matters)
You can spend a fortune on decorative stamp sets, but your results hinge on three basic tools: the surface, the hammer, and the stamp itself. Prioritize here.
| Tool | Why It Matters | What to Look For |
|---|---|---|
| Work Surface | Provides the solid backstop. A soft surface absorbs strike energy and creates mushy impressions. | A thick marble slab, granite tile, or heavy poly cutting board. |
| Mallet / Maul | Transfers energy cleanly. A light or poorly balanced hammer causes fatigue and inconsistent strikes. | A 12-16oz solid maple or poly mallet (Barry King is the benchmark). Avoid metal-headed hammers. |
| Stamp | The design source. Quality steel holds finer detail and resists deformation from repeated strikes. | Craftool Pro stamps or equivalent from reputable brands. Start with a basic basketweave or geometric stamp. |
The mallet is your most important investment after the leather itself. A cheap, hollow plastic mallet vibrates in your hand and wastes energy. A solid Barry King mallet feels like an extension of your arm, the weight does the work, and your wrist stays relaxed for hundreds of strikes. This is the difference between a consistent border and a wobbly, uneven one.
Your choice of leather is the fourth, essential tool. For traditional hand stamping, you must use vegetable tanned leather. The vegetable tanning process leaves the fibers receptive to compression and able to hold a permanent impression. This is the foundation of all leather tooling.
Chrome-tanned leather, which is softer and water-resistant, won’t hold a cold stamp well. For that material, you need a different approach: hot stamping with a brass stamp and an arbor press.
Common mistake: Using a metal bowl or container for your casing water. The Montana State University leathercraft manual states that even slight contact with metal will produce dark, permanent stains on damp leather. Use glass, ceramic, or plastic.
Step-by-Step: From Damp to Defined
Let’s walk through the sequence for a standard basketweave stamp on a veg-tan belt blank. This is where theory meets the bench.
1. Prepare Your Station.
Gather your cased leather, stamp, mallet, and marble slab. Ensure your lighting is good. This seems obvious, but shadow-free light is how you see the stamp seat perfectly and spot shallow corners.
2. Position the Stamp.
Place the stamp face-down on the leather. For alignment, some crafters give a very light tap to mark the stamp’s outline. Don’t drive it in, just kiss the surface to create a tiny registration groove.
3. The Strike (This is the Debate).
Here, techniques split. Some guides, like Tandy Leather’s, advocate for “a single, firm strike.” Others, like the pros at Weaver Leather Supply, warn that a single heavy blow “can lead to uneven results,” especially on larger stamps. They recommend lighter, controlled multiple taps.
I side with the multi-tap method. A single strike must be perfectly level and perfectly weighted. Multiple lighter taps let you feel the stamp settle, adjust pressure on corners that aren’t biting, and ensure even depth across the whole design. You’re in control, not just hoping.
4. Lift Straight Up.
This is non-negotiable. Any side-to-side motion as you lift will smear the impression. Grip the stamp handle, lift vertically, and set it aside.
5. Evaluate and Move On.
Look at the impression. Is it sharp and deep? Move to the next position. Is it faint? Your leather may be drying. A light touch-up with a damp sponge on that spot alone can reactivate it. Is it blurry? The leather is too wet. Wait five minutes and try again on a scrap.
Stamping Other Materials: Chrome-Tan & Faux Leather
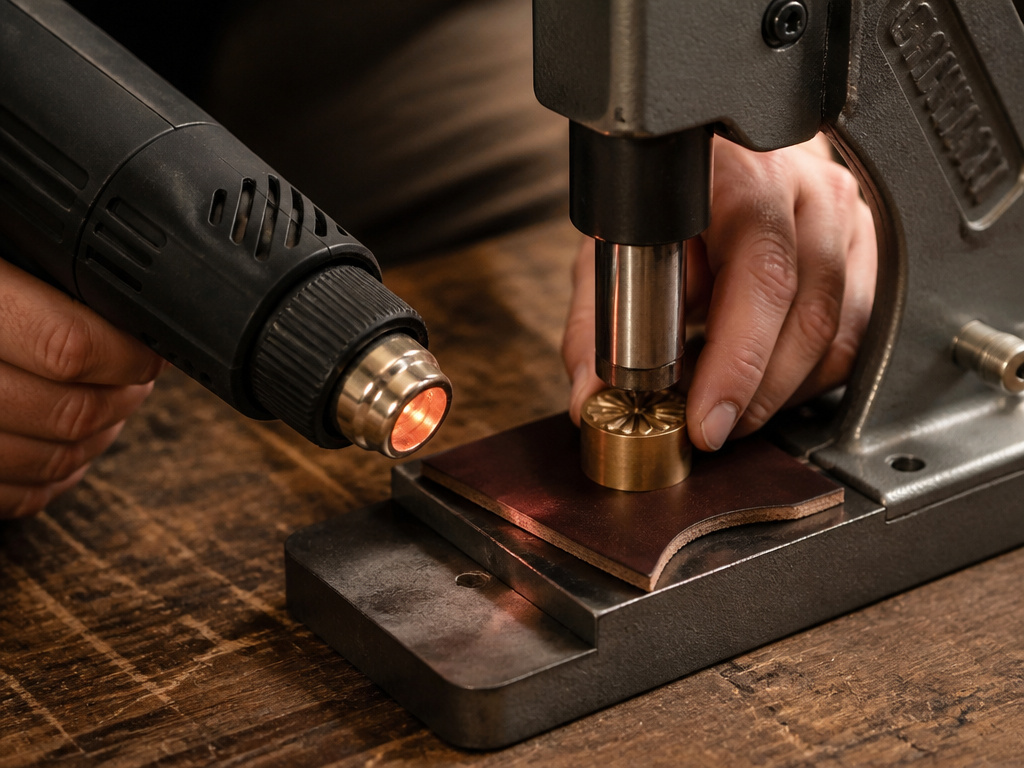 The rules change completely when you leave the world of vegetable-tanned leather. Chrome-tanned leathers and synthetic faux leathers have finishes and fiber structures that repel water and resist cold forming.
For these materials, dampening the leather does little. The effective method is hot stamping. You use a brass stamp, heat it to 70-100°C (slightly too hot to hold comfortably) with a 1000-2000W heat gun, and then press it into the material using a 0.5-1 ton arbor press. The heat softens the surface coating or synthetic material just enough to accept the debossed impression as it cools.
This is a different craft, closer to leather embossing with a press than hand tooling. It’s the only reliable way to mark a chrome tanned leather wallet or a faux leather notebook cover.
Troubleshooting: Why Your Stamps Look Fuzzy
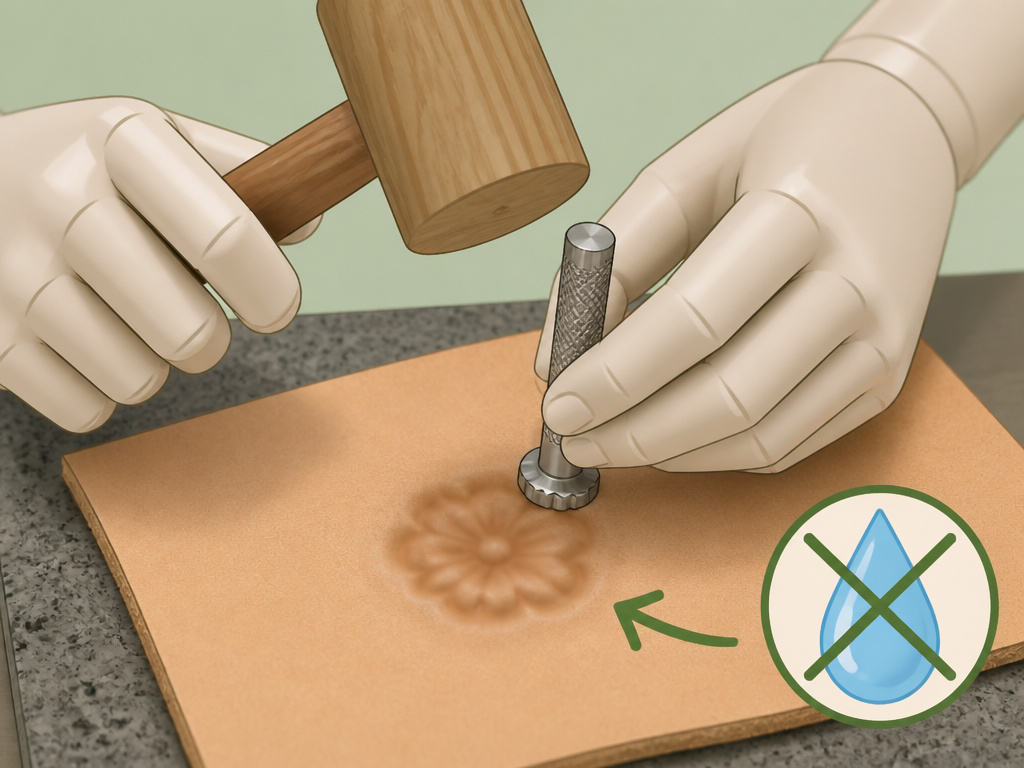 When impressions go wrong, it’s always one of three variables. Use this table to diagnose the issue on your next piece.
| Symptom | Most Likely Cause | The Fix |
|---|---|---|
| Faint, shallow impression | Leather is too dry. | Re-case the entire piece or apply localized moisture with a sponge, then wait for the correct color change. |
| Blurry, “mushy” impression with no sharp edges | Leather is too wet. | Let the piece air dry for 10-20 minutes. Test on a scrap area until the stamp meets firm resistance. |
| Uneven depth (deep on one side, shallow on the other) | 1. Striking surface is uneven (e.g., a warped board). 2. Stamp was not held perfectly vertical during the strike. |
1. Always work on a verified flat, hard surface. 2. Practice holding the stamp straight; consider a stamping press for perfect alignment. |
| Double image or “ghosting” | Stamp shifted after the initial strike (it “bounced”). | Use the light registration tap method to create a seat for the stamp before the main strike. |
A fuzzy stamp is usually a water issue. A crooked stamp is almost always a technique or surface issue. The leather will tell you what it needs, you just have to learn its language.
Frequently Asked Questions
Can you stamp any type of leather?
No. Traditional hand stamping with a mallet is only for unfinished vegetable tanned leather. Other leathers, like chrome-tanned or oil-tanned varieties, require hot stamping with a brass stamp and an arbor press to create a lasting impression. The leather making process fundamentally changes the material’s ability to hold a shape.
How long does cased leather stay workable?
Properly cased piece of veg-tan leather stays in the ideal stamping state for 2 to 2.5 hours. This is your window. If you need to pause for longer, you can loosely seal the damp leather in a plastic bag and refrigerate it to prevent mold for a day or two.
What’s the best surface for stamping leather?
Thick marble slab** (at least 3/4-inch) is the gold standard. It provides a perfectly hard, non-absorbent, and cool surface. Heavy poly cutting boards or granite tiles are good alternatives. Never stamp on wood, rubber, or fabric, they absorb the impact and ruin the impression.
Why did my stamp leave a dark stain on the leather?
You almost certainly allowed the damp leather to contact a metal surface or container. Iron particles react with the tannins in vegetable-tanned leather, creating a permanent blue-black stain. Always use glass, plastic, or ceramic for water and keep your tools clean.
Is it better to hit the stamp once hard or tap it multiple times?
This is a genuine debate. For beginners, I recommend the multiple light tap method. It gives you more control to ensure the entire stamp face seats evenly. A single, perfectly executed heavy blow can work, but the margin for error is high. It’s easier to add a little more force with a second tap than to fix an over-driven, distorted stamp.
Before You Go
The real secret isn’t in a special tool. It’s in the prep. Take the time to case your leather correctly, that single step prevents ninety percent of stamping problems. Remember the 2.5-hour window, and don’t rush it.
If you’re designing a complex pattern, practice the alignment and spacing on a scrap piece first. The process of making a leather stamp is a separate skill, but mastering basic stamping makes every custom design you might create or buy possible.
One final, contrarian take: don’t get lost collecting hundreds of decorative stamps right away. Master a basketweave, a border, and a geometric stamp first. Learn how they interact, how to combine them, and how the leather grain affects their appearance. Depth and consistency will make a simple pattern look professional, while a library of stamps used poorly just looks busy. Now go make a clear, crisp impression.
