
Understand Leather Groovers: What This Essential Tool Is For
This post contains affiliate links. As an Amazon Associate, we earn from qualifying purchases.
This post contains affiliate links. As an Amazon Associate, we earn from qualifying purchases.
A leather groover is a hand tool with a small hooked blade, designed to cut a U-shaped channel into leather. Its primary job is to recess stitching below the surface, protecting the thread from abrasion and creating a clean, professional finish. The blade physically removes a strip of leather fiber, which is why it’s used on thicker projects like belts and holsters, not thin wallets.
That removal of material is the whole point, and it’s irreversible. You can’t put the fiber back. This makes a groover a commitment tool, you use it when you know the stitch line will wear. The alternative, a creaser, just presses a decorative line without cutting. Understanding this distinction saves you from weakening a project that doesn’t need it.
What follows is a breakdown of how a groover actually works, when to use it (and when to skip it), and how to choose one that won’t tear your leather. We’ll cover the specific adjustments, the one maintenance task you cannot ignore, and the common mistake that turns a clean groove into a ragged trench.
Key Takeaways
- A groover cuts and removes leather fiber to recess thread; a creaser only presses a line. Using the wrong one structurally weakens thin leather.
- Blade sharpness is non-negotiable. A dull blade tears instead of cuts, leaving a fuzzy, weak channel that compromises your stitch line.
- Use a groover on thick, hard-wearing items like belts, sheaths, and straps. Avoid it on thin leather (under 5 oz) for wallets and linings.
- The adjustable fence on tools like the Weaver Stitch Groover or Tandy’s Craftool Deluxe lets you set a precise distance from the edge, typically from 1/16 inch up to 1-1/2 inches.
- Casing your leather, making it slightly damp, is essential. Dry leather resists the cut and can tear; properly cased leather lets the blade glide and produces a clean channel.
The Core Mechanics of a Groover
Look at the business end of the tool. You’ll see a small, sharp blade bent into a hook shape, mounted next to an adjustable fence or guide. The fence rides along the edge of your leather, ensuring the cut is parallel. The hooked blade does the cutting, lifting out a tiny strip of material as you pull the tool toward you.
A groover’s small hooked blade cuts and lifts a strip of fibre out, leaving a U-shaped channel with a measurable depth. A creaser’s smooth rounded edge compresses fibre downward and burnishes it, leaving a pressed line with slightly darkened shoulders.
This mechanical difference dictates everything. Because it removes material, grooving reduces the leather’s cross-sectional thickness at the stitch line. On a heavy 8-10 oz belt, that loss is trivial. On a 3-4 oz wallet exterior, it can be the difference between a robust corner and one that starts to tear at the stitch holes. The leather will tell you what it needs. If your project won’t see abrasive wear, you likely want a creaser or a wing divider, not a groover.
Why-Layer: The hooked blade design isn’t just for show. It creates a shearing cut as you pull, similar to a skiving knife. A straight blade would require pushing and could dig in or skip. The hook controls the cut depth and helps curl the waste fiber up and away from the channel, preventing clogging.
Groover vs. Creaser vs. Divider: Choosing the Right Mark
It’s easy to grab the nearest marking tool. I’ve seen students use a modeling spoon thinking it was a creaser. The results were messy. Here’s the quick decoder.
| Tool | What It Does | Removes Material? | Best For |
|---|---|---|---|
| Stitch Groover | Cuts a U-shaped channel. | Yes. | Recessed stitching on belts, holsters, straps. |
| Creaser | Burnishes a compressed line with heat/pressure. | No. | Decorative lines, defining fold lines, finished edges. |
| Wing Divider | Scratches a fine guide line. | No. | Layout. Marking where you will cut, stitch, or groove. |
The wing divider is the most important of the three for accuracy. Its two hardened points scratch a perfectly parallel guide line. You can’t groove straight if you can’t mark straight first. Everything about clean work starts with a reliable leather grain reference and a straight line.
Types of Leather Groovers and What They Do
You’ll find three main designs on the bench. Each has a job, though one is vastly more common for a reason.
Adjustable Groovers are the default. A tool like the Weaver Leather Supply Stitch Groover or Tandy’s Craftool Deluxe has a screw mechanism that moves the guide fence. The Weaver adjusts up to 1-1/2 inches from the edge; the Tandy goes from 1/16 inch to about 1-7/16 inches. This versatility lets you set the stitch line based on the leather’s thickness and your edge treatment, not guesswork. It’s the one I recommend first.
Fixed Groovers have a preset distance. They’re less common now, but useful for production work where you’re making fifty identical belts and want zero chance of the setting slipping. For general work, an adjustable is smarter.
Combination Tools, like the one from Lee Valley, offer interchangeable tips in one handle: a sharp groover tip and a blunt creaser tip. They’re clever for saving space, but the fence is usually smaller (the Lee Valley fence references up to 1/2 inch).
The physical choice matters, but the real secret is in the blade width. Brands like BG Leather sell groovers in specific cut widths: 0.8mm, 1.0mm, 1.2mm. Match the width to your thread size. A 1.0mm groove for a 0.8mm thread leaves a clean recess. A 0.8mm groove for a 1.0mm thread will pinch and abrade the thread. This is the kind of spec that separates a functional groove from a great one.
When to Use a Leather Groover (And When to Put It Down)
Use a groover when the stitched surface will be rubbed, scraped, or worn in daily use. The recessed thread is protected from abrasion. Think about the lifecycle of the object: * Belts rubbing through pant loops. * Holsters and sheaths being drawn and re-holstered. * Dog collars, rifle slings, and bag straps.
These items are typically made from thicker, firmer leathers like 8-10 oz vegetable-tanned leather, which can spare the material. The structural cost is negligible, and the durability gain is massive.
Now, when do you put the groover down?
Where this goes sideways: Grooving thin leather (3-5 oz) for a wallet or card case. You remove a meaningful percentage of the material right where the stitching holes will go, creating a natural weak point. The corner will fatigue and tear long before the stitching fails.
For thin projects, use a wing divider to mark your stitch line and a creaser to finish the edge. The thread will sit proud, but that’s fine, a wallet in your pocket isn’t sanding itself down like a belt loop. This is why understanding how to test leather quality and identify full-grain leather is a prerequisite. Grooving a low-quality split leather lining is a fast track to failure.
Choosing and Using Your Groover
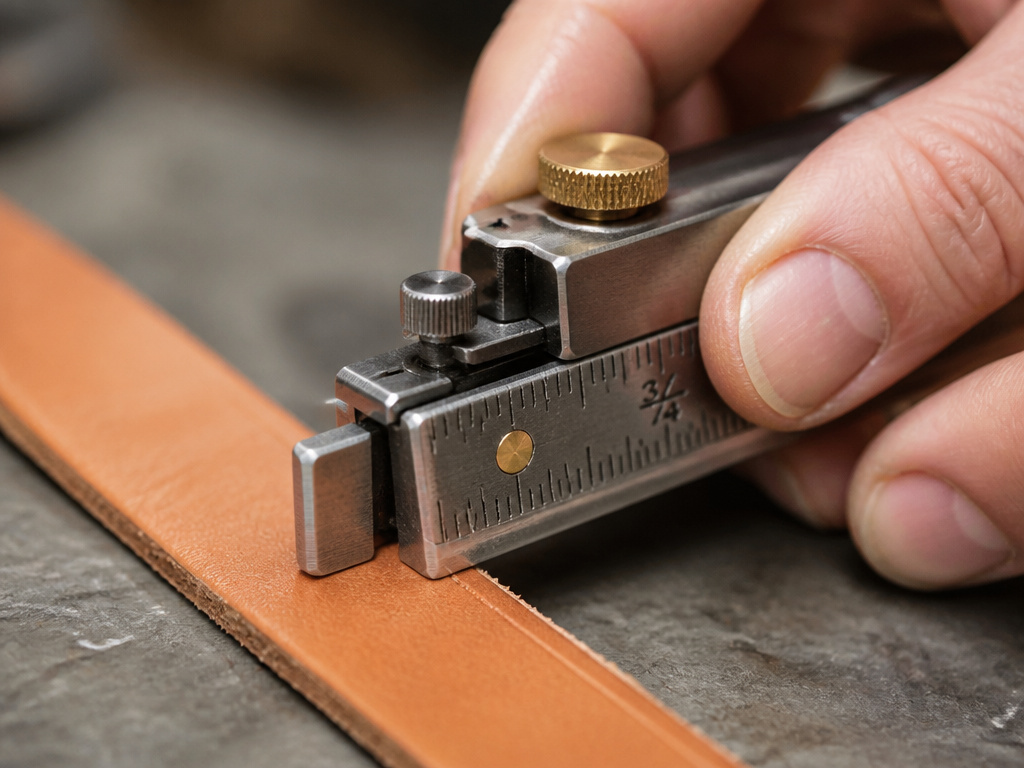
If you’re buying one, get an adjustable model. The Weaver tool is a standard for a reason, it’s well-made, the blade is sharp, and the adjustment is solid. Set your fence distance based on your leather thickness and desired edge look, not a random number. A common starting point is about 1/8 inch to 1/4 inch from the edge for a belt.
Here’s the sequence that works. Skip a step, and the groove shows it.
- Case the leather. Dampen it evenly with a sponge. It should feel cool and pliable, not soggy. Dry leather fights the blade and tears. This is the most skipped step.
- Mark your guide line with a wing divider. The groover’s fence is a guide, but a scratched line is your true reference. It keeps you honest.
- Set and tighten the groover’s fence. Double-check the measurement. A loose fence will slip mid-pull and ruin the line’s parallelism.
- Anchor the fence and pull toward you. Place the fence firmly against the leather edge. Apply firm, consistent pressure and pull the tool smoothly toward your body. Let the blade do the work, don’t force it.
- Make multiple light passes for depth. Don’t try to cut the full depth in one pass. Two or three lighter passes give you control and a cleaner channel. Let the leather recover slightly between passes.
- Clear the waste. Use an awl tip or brush to clear the tiny strip of fiber from the channel before it gets packed in.
The part nobody mentions: Listen to the sound. A sharp blade on cased leather makes a quiet, crisp shhhick sound. A dull blade or dry leather produces a dragging, tearing noise. You’ll hear the problem before you see it.
The Non-Negotiable: Blade Maintenance
A groover is only as good as its edge. A dull blade doesn’t cut, it tears and mashes the leather fibers. The resulting channel has fuzzy walls that offer less support to the thread and look unprofessional.
Sharpen the blade on a fine honing stone or strop, maintaining the original angle of the hook. A few strokes every few projects keep it perfect. This isn’t optional upkeep; it’s core to the tool’s function. Storing it dry and lightly oiled prevents rust, which pits the edge. This focus on maintaining your tools is the same philosophy behind preserving the leather tanning process that gave you the material in the first place, respect the craft at every stage.
Frequently Asked Questions
Can I use a groover on any type of leather?
You can, but you shouldn’t. It’s ideal for firm, thick vegetable-tanned leathers. Avoid it on very thin leathers, overly soft garment leathers, or heavily finished corrected grain where the coating can clog the blade. The leather needs enough body to support the removed channel.
How deep should the groove be?
Aim for a depth that allows your thread to sit just below the leather’s surface. A good rule is to choose a dowel about half to two-thirds the diameter of your thread. For a typical 0.8mm thread, a 0.5mm deep groove is sufficient. Going deeper weakens the leather without added benefit.
My groover is skidding and not cutting. What’s wrong?
Two likely causes. First, the leather is too dry, case it. Second, the blade is dull. A sharp blade on cased leather will bite in immediately. If it’s sharp and still skids, you might be trying to groove a leather with a plastic-feeling top coat, which behaves more like embossed leather with a sealed surface.
What’s the difference between this and leather embossing?
They are opposite actions. Grooving removes material to create a channel. Leather embossing compresses material under pressure (and often heat) to create a raised or recessed pattern without cutting, like stamping a logo. One is structural preparation for stitching, the other is surface decoration.
Is an expensive groover worth it?
For an adjustable groover, yes. The difference between a $15 kit tool and a $30-$40 quality tool is in the blade steel, the precision of the adjustment mechanism, and the overall stability. A cheap fence wobbles and a soft blade dulls after three uses. The Weaver or a similar tier tool is a buy-once purchase.
The Bottom Line
A leather groover solves one specific problem: abrasion on exposed stitching. If your project won’t face that wear, you don’t need it. Reach for the wing divider or creaser instead.
When you do need it, the process is straightforward but unforgiving. Case the leather. Keep the blade sharp. Set the fence accurately. The tool rewards patience and punishes haste with a crooked, torn line that you can’t fix. Your first good groove on a belt blank, a clean, parallel channel that disappears when the thread is seated, feels like a small victory. It’s the moment a functional item starts to look professionally made.
That’s the goal. The rest is just practice.
