
What is a Stitching Pony | The Third Hand for Leatherwork
This post contains affiliate links. As an Amazon Associate, we earn from qualifying purchases.
This post contains affiliate links. As an Amazon Associate, we earn from qualifying purchases.
A stitching pony is a specialized leatherworking clamp that holds your project securely, freeing both hands to manage needles and thread for consistent, tight hand stitching. It typically features an adjustable jaw operated by a screw or lever and a long base you can sit on or clamp to a bench, acting as a vital “third hand” for tasks like saddle stitching belts, bags, and wallets.
Think of it as removing a fundamental constraint. One hand is no longer tasked with pinching the work, fighting to keep it still. That hand is now a full partner in the stitch, which changes the entire rhythm and quality of your sewing.
What follows is a breakdown of why this simple tool is so effective, the specs that matter (jaw width, grip depth), how to use it without marking your leather, and where it fits in a minimalist tool kit. By the end, you’ll know whether you need one and what to look for.
Key Takeaways
- A stitching pony’s primary job is to free both hands for the two-needle saddle stitch, the strongest hand-sewn seam.
- The jaw width (often under 1 inch) determines the thickness of leather it can clamp; the grip depth (around 3 inches) affects stability for longer pieces.
- Using soft jaw liners (leather or cork) prevents the hard wood or metal from compressing or marking delicate leathers. For beginners, a stitching pony with a heavy-duty cast iron base and a stable, adjustable clamp is a higher-return investment than expensive decorative tools, it directly improves fundamental skill execution.
- The tool has historical roots as a saddler’s “clam,” a knee-held version used for long strap work, showing its enduring utility.
The Core Function: Your Third Hand
A stitching pony is a bench-mounted or knee-held clamping device used in leathercraft to immobilize a workpiece during hand stitching. By securing the leather at a consistent height and angle, it allows the craftsperson to employ both hands independently to control needles and thread tension, which is essential for executing even, tight saddle stitches over long distances.
Without it, you’re managing a three-variable problem with two hands. Your left hand pinches the leather to keep it from shifting. Your right hand must then pass a needle, pull thread, maintain tension, and occasionally re-pinch, all while trying to keep each stitch identical to the last. It’s possible, but it’s why early projects often have stitches that start tight and end loose.
The pony removes the “pinch” variable. The leather is locked in place. Now both hands are dedicated to the dance of the saddle stitch: right needle in, left needle through, pull, set, repeat. The consistency jump isn’t marginal. On a forty-stitch belt run, the difference is between a professional-looking line and one that looks handmade in the less flattering sense.
I learned this the hard way on a bag handle. My first attempt, holding the leather in my lap, produced a seam that was tight at the start and visibly sloppy by the end, the fatigue in my pinching hand changed my tension. Clamping the second handle in a stitching pony yielded a uniform, tight stitch line on the first try. The tool didn’t make me a better stitcher; it let the skill I already had show up consistently.
Anatomy and What the Specs Mean
Not all stitching ponies are the same. Three measurements decide whether a pony fits your work: jaw width, grip depth, and overall height.
| Specification | What It Means | Typical Range | Project Fit |
|---|---|---|---|
| Max Jaw Width | How thick a stack of leather it can clamp. | 0.8″ – 1.5″ (20–38 mm) | 0.8″ fits most wallets and panels; over 1″ needed for folded belt ends or bag gussets. |
| Grip Depth | How far back the jaws reach into the workpiece. | 3″ – 4″ (75–100 mm) | A deeper grip (3″+) stabilizes longer pieces like belt blanks, preventing twist. |
| Base Length | The platform you sit on or clamp. | 14″ – 18″ (35–45 cm) | A longer base is more stable when sat upon; a shorter one is for bench clamping. |
The Craftool Stitching Pony from Tandy Leather lists a 0.83-inch jaw width and a 3-inch grip depth. That’s the sweet spot for cardholders, watch straps, and small bag parts. The Lee Valley Tools model is made of beech and steel and measures about 16 1/4″ long, a good, stable sitting length.
The jaw surface matters as much as the size. Hard maple or steel jaws can dent or compress soft vegetable-tanned leather. The fix is simple: line the jaws with scrap leather or cork. This is the kind of detail a manual often omits, but it’s the difference between a tool that serves you and one that damages your work.
Types and Key Specs: Bench vs. Knee
You have two broad categories: the bench-mounted stitching pony and the traditional saddler’s clam.
The bench pony is what most people picture. It has a long, flat base. You either sit on it, using your body weight for stability, or you C-clamp it to your workbench. The jaw is adjusted via a large wing nut or a foot-operated lever on higher-end models like the Kevin Lee Multifunctional Stitching Pony. This is the versatile default for most workshop settings.
The saddler’s clam is a different beast. It’s shorter, designed to be gripped between the knees. This might seem awkward until you’re stitching a six-foot long saddle strap. With a knee clam, you can easily rotate and reposition the leather along its length without ever unclamping and re-clamping. It’s a specialized tool for a specialized job, but it shows the pony’s core purpose: adaptability to the work.
For 90% of leatherworkers, a bench-mounted screw-adjust pony is the right starting point. Look for one with a sturdy screw mechanism, the common failure point on cheap models is the jaw creeping loose mid-stitch because the threads are poorly cut.
Where this goes sideways: Assuming any clamp will do. A standard woodworking vise has parallel jaws that can distort curved leather pieces. A stitching pony’s jaws are often slightly angled or lined to grip without slippage or distortion, a subtle design difference that matters after the tenth stitch.
How to Use a Stitching Pony Correctly
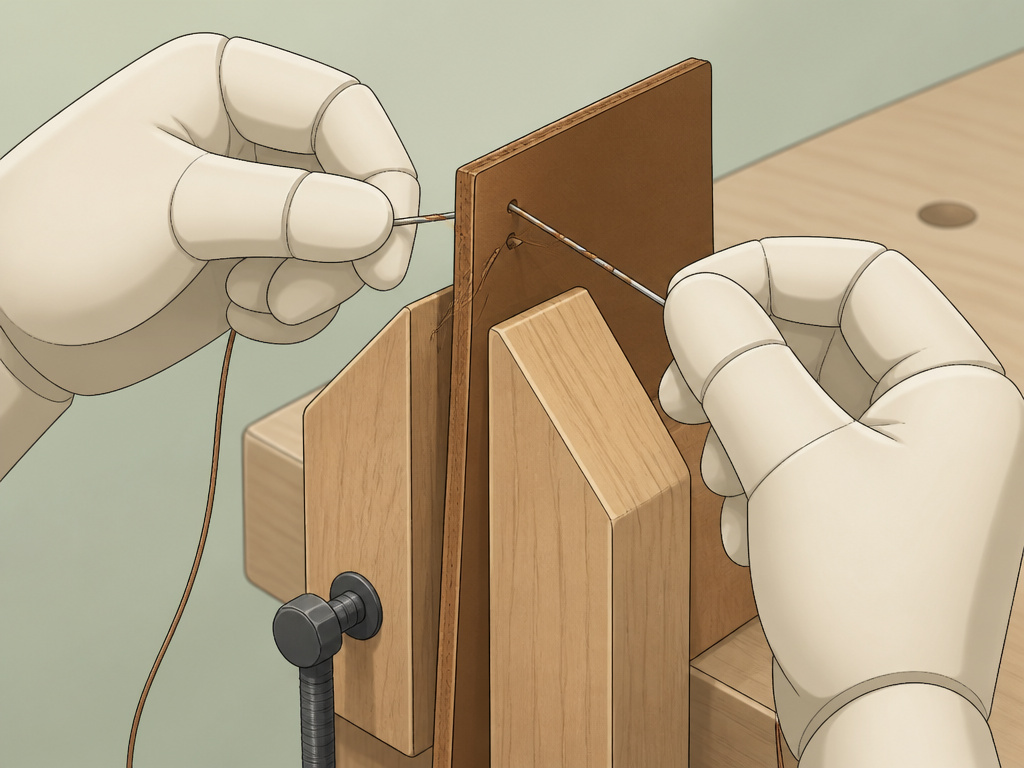
Using a stitching pony is straightforward, but a few deliberate steps prevent frustration. This process assumes you’ve already punched your stitch holes with a pricking iron or awl.
- Secure the Pony. Place it on a stable, flat surface. If you’re sitting on it, ensure it won’t rock. If clamping to a bench, tighten the C-clamp firmly. A wobbly base transfers movement to your hands.
- Prepare the Jaws. If working with delicate or finished leather, take ten seconds to tape thin strips of scrap leather or cork to the inside faces of the jaws. This is your mark-prevention insurance.
-
Position and Clamp. Lay your leather piece between the jaws, aligning the stitch line just above them for a comfortable needle angle. Tighten the wing nut snugly, but don’t crank it with full arm strength, you want to immobilize the leather, not crush its fibers. You should not be able to slide the piece out with a gentle pull.
-
Stitch Two-Handed. With both hands free, execute your saddle stitch or two-needle stitching. You’ll feel the difference immediately. You can focus on the pull of each thread, making them even, without the leather shifting a millimeter.
- Release with Care. When finished, loosen the wing nut completely before removing the leather. Pulling a finished piece out of a tight clamp can distort your last few stitches or scratch the surface.
The goal is to make the tool disappear. You shouldn’t be thinking about the clamp; you should be thinking about the rhythm of the needles. If you’re fighting the pony, you’ve likely over-tightened it or misaligned the work.
Why It Beats a Sewing Machine for Learning
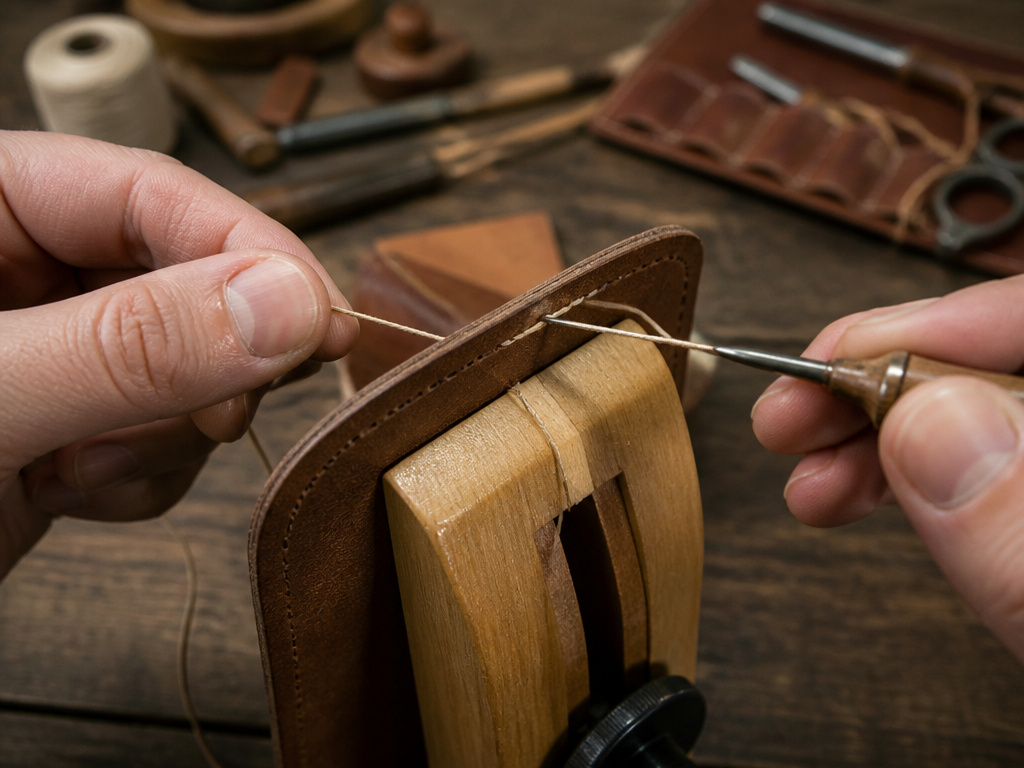
This is a stance I’ll defend: for a beginner building foundational skills, a stitching pony and a hand awl are more important than an electric leather sewing machine. A machine produces a lock stitch, which is strong but difficult to repair if a thread breaks. More critically, it’s a black box, you press a pedal and the stitch happens, which teaches you nothing about tension, thread dynamics, or material behavior.
Hand stitching leather with a pony is the opposite. It’s slow, transparent, and educational. Every variable is under your direct control. You learn what correct thread tension feels like because your hands are doing the pulling. You see how leather behaves when pierced and sewn. The hand stitching process builds a tactile understanding that translates to every other part of leatherwork.
A machine has its place in production, but it’s a terrible teacher. The pony supports the learning. It’s the reason I recommend it before fancy decorative stamps or skiving machines. Master the saddle stitch with a pony, and you’ve mastered the single most enduring seam in the craft.
Essential Partners: The Awl and Pricking Iron
A stitching pony doesn’t work in isolation. It’s part of a system, and its two most important partners are the awl and the pricking iron.
The pricking iron (or stitch chisel) marks and partially creates your stitch holes. It sets the spacing and alignment. The leather awl is then used to open each hole fully, just before your needle passes through. This two-step process, marking with the iron, opening with the awl, creates clean, consistent channels for the thread.
Common mistake: Trying to stitch through holes made only by a pricking iron. The tines compress the leather, and forcing a needle through creates friction, weakens the thread, and often results in uneven stitches. The awl reams the hole clean.
Your stitching pony holds the work rock-steady for this precise awl work, too. When you push the awl through, you want the leather to resist the blade cleanly, not twist away. The pony ensures that. This trio, pony, iron, awl, is a core hand-stitching cell. Investing in a good stitching awl guide makes this technique repeatable and clean.
Choosing Your First Stitching Pony
You don’t need the most expensive model, but avoid the absolute cheapest. The failure mode is always the same: the adjusting mechanism strips or the jaw develops play. Look for solid hardwood (like beech or maple) or steel construction, and turn the wing nut yourself in the store if you can. The threads should feel smooth, not gritty.
For your first pony, prioritize a proven mid-range model like the Craftool or Lee Valley versions mentioned earlier. Ensure its maximum jaw opening fits the thickest project you plan in the next year, usually a folded belt end or a bag handle. A 1-inch capacity is a safe, versatile target.
Remember, this is a “buy it for life” tool. A little more spent here eliminates a point of frustration for years. It’s a more impactful purchase than a third set of decorative stamps you might use twice.
Frequently Asked Questions
What’s the difference between a stitching pony and a stitching horse?
Stitching horse is typically a larger, floor-standing version that might include a seat for the user and often has a treadle-operated clamp. A stitching pony is smaller, designed to be sat upon or bench-mounted. For most hobbyist and small-goods work, the pony is perfectly adequate.
Can I make my own stitching pony?
Absolutely. Many crafters build their first pony from hardwood scraps. The key is ensuring the jaw screw is sturdy and perpendicular to the jaws, and that the base is long enough for stability. It’s a great introductory woodworking project that yields a useful tool.
Do I need one for very small projects?
For a key fob or a single-card holder, you can often manage by weighting the leather under a book or holding it in a hand vise. The value of the pony increases with stitch count and project size. For anything with more than ten stitches or requiring even tension, it starts to pay for itself in reduced frustration.
How do I maintain my stitching pony?
Keep the screw threads clean and occasionally rub them with a dry lubricant like paraffin wax. Wipe down wood surfaces to remove dust and grime. Check the jaw alignment periodically; if the jaws no longer meet evenly, the clamp pressure will be uneven and can distort your work.
Is a stitching pony only for leather?
While designed for leather, it can be used for any pliable material that requires two-handed stitching, heavy canvas, multiple fabric layers for bags, or even some types of thick felt. The principle of a third hand applies wherever you need stable, two-handed sewing.
The Bottom Line
A stitching pony isn’t a magic wand. It won’t fix poorly spaced holes or inconsistent pulling technique. What it does is remove the single biggest physical variable, workpiece movement, so you can focus on developing those other skills. It turns a difficult, one-handed balancing act into a stable, two-handed craft.
If your stitch lines are inconsistent or your hands fatigue quickly on longer projects, the problem likely isn’t your skill. It’s your setup. Adding this simple clamp changes the equation. Start with a Tandy or Weaver mid-range model, line the jaws for your good leather, and give your hands the freedom they need. The quality of your stitching will speak for itself.
