
What Is Leatherworking? The Simple, Three-Step Craft
This post contains affiliate links. As an Amazon Associate, we earn from qualifying purchases.
This post contains affiliate links. As an Amazon Associate, we earn from qualifying purchases.
Leatherworking is the craft of transforming tanned animal hides into durable, functional items through a sequence of cutting, shaping, assembly, and finishing. It relies on hand tools and specialized techniques to cut patterns, join pieces, and apply final finishes for strength and appearance. The process begins with the correct selection of leather for the project.
What follows are the three specs that define leather, the five steps that make up the craft, and the one common mistake that scares people away within the first month. By the end, you’ll be able to read a leather’s label, pick a first project that fits its thickness, and know exactly which three tools you should buy first.
Key Takeaways
- Leatherworking isn’t magic; it’s a methodical craft based on predictable material behavior.
- Your first tool purchase should be a cutting mat, a sharp utility or round knife, and a stitching awl, a “starter kit” will just give you junk you’ll replace.
- Always match leather weight (thickness) to your project: 4-5 oz for a wallet, 10-11 oz for a belt.
- Vegetable-tanned leather is your best first material; it’s predictable, toolable, and ages with character.
- The strongest, most repairable seam you can make is a hand-sewn saddle stitch; no sewing machine compares for most thicknesses.
Leather Isn’t Raw Skin. It’s a Manufactured Material
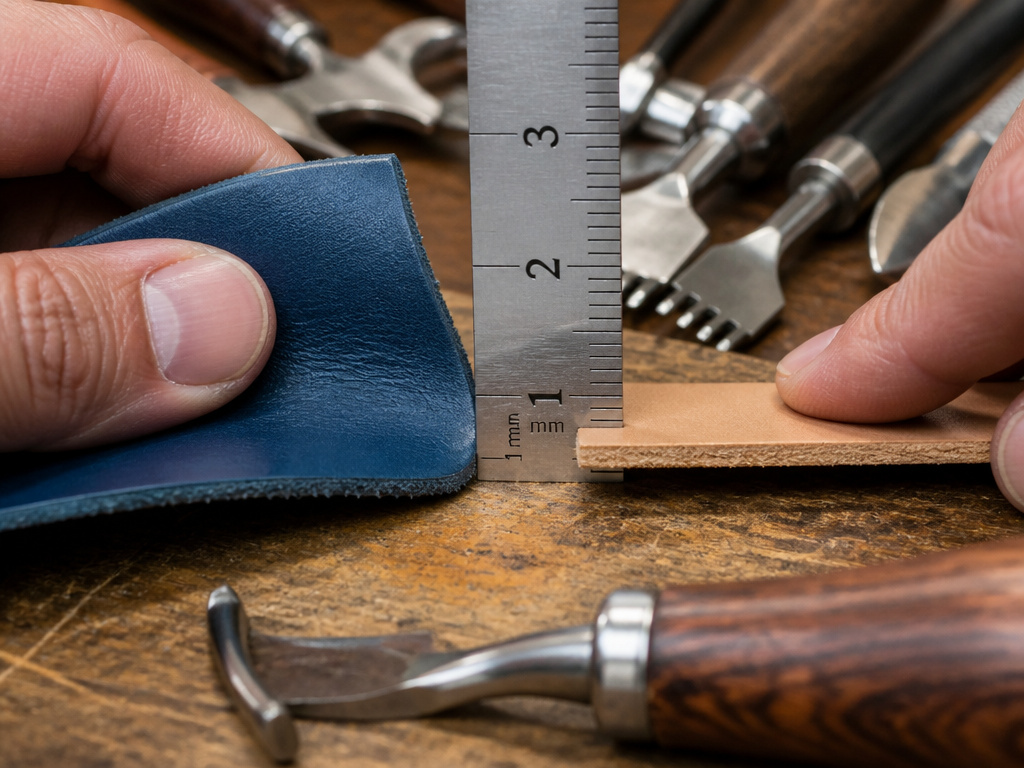
Most beginners picture a piece of leather as a ready-to-use skin. It isn’t. The hide that arrives at a crafter’s bench is already a manufactured product. It has been stabilized, transformed, and given specific properties by an industrial tanning process. You can’t work with rawhide the same way you work with leather, the chemistry is different.
Tanning makes the hide resistant to rot and pliable. The most common method uses chromium salts, producing what the industry calls “wet blue” leather. This chrome-tanned leather is stable, water-resistant, and good for items like boots and jackets where flexibility and weather resistance matter. Vegetable tanning, which uses tree bark extracts, gives you a firmer, more sculptable leather that darkens beautifully with age and is my default for any item meant to last a lifetime and develop a patina. Think of the difference between chrome and vegetable tanning as the difference between a flexible nylon backpack and a stiff, structured waxed canvas duffel. Both are useful, but they serve different jobs.
One ounce of leather equals 1/64th of an inch in thickness. A 4-5 ounce leather, common for wallets, is about 1/16th of an inch thick, while a 10-11 ounce belt leather is closer to 5/32nds of an inch. Thickness isn’t uniform; it’s expressed in a range because a hide varies from shoulder to belly.
Your project starts here, with this decision. You wouldn’t build a bookshelf with balsa wood, and you shouldn’t make a belt with 2-ounce lining leather. Pick the material for the job.
The Five Steps of Leatherworking
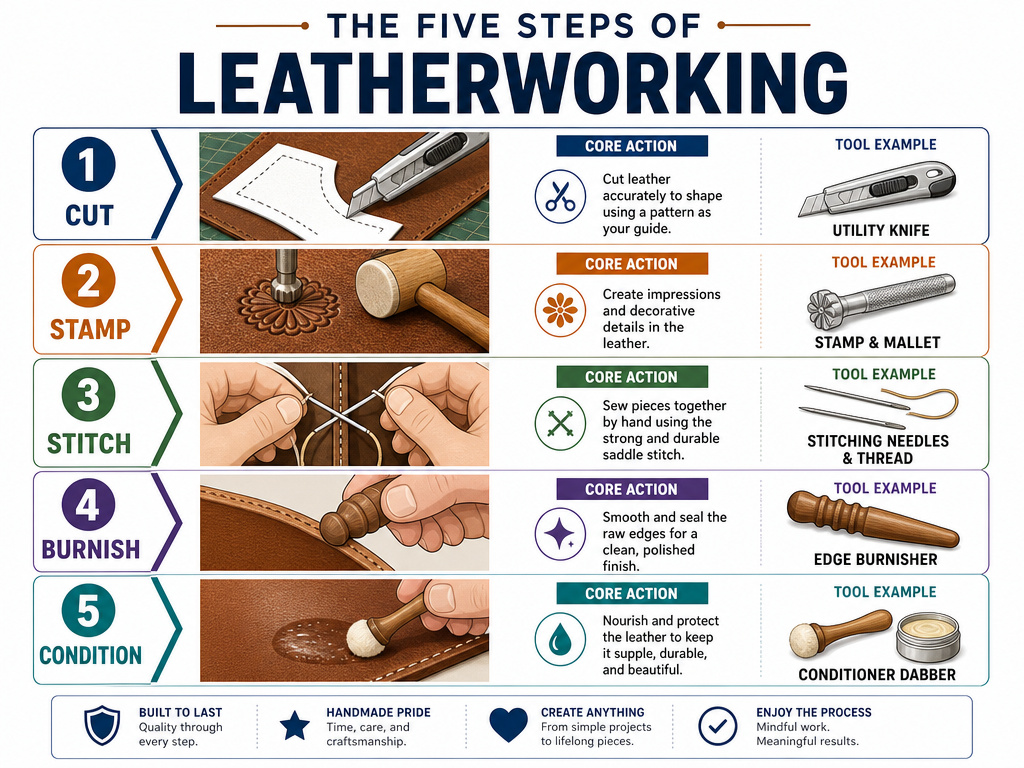
Think of the craft as a production line in your own workshop. You take a flat sheet of material and progress it through stages until it becomes a three-dimensional object. The order matters. You don’t dye leather after you’ve stitched a complex seam.
A Leather Panel self-training guide developed with the United Nations Industrial Development Organisation frames leather manufacturing in four stages. The craftsperson’s work mirrors the final stages: introducing new materials (dyes, conditioners) and applying finishing touches.
Here is the sequence, and what happens if you skip a step.
- Pattern Making & Cutting. You transfer a design onto the leather and cut it out with a sharp blade. This is your foundation. A jagged cut or mis-measured pattern throws off every step that follows. A dull knife will tear the grain instead of slicing it, leaving a fuzzy edge that never finishes cleanly.
- Tooling & Shaping (Optional). This is where you add decoration or form the leather. Using stamps, carving knives, or mallets, you create patterns or mold the dampened leather over a form. Skip dampening the leather (called “casing”) for tooling, and your stamps will bounce off, leaving shallow, indistinct impressions. The leather will tell you it’s ready when it’s cool to the touch and holds a fingerprint without water beading on the surface.
- Assembly. You join the cut pieces. This usually means punching holes and stitching, but can also involve rivets, snaps, or gluing. Use a stitch meant for paper on leather, and the first real pull will snap the thread. A saddle stitch using two crossed needles locks each stitch independently. It’s the saddle stitch technique that gives heirloom strength.
- Edge Finishing. Raw cut edges are rough and will absorb dirt and moisture. You burnish them smooth with gum tragacanth or wax, or coat them with edge paint. An unfinished edge frays over time, visibly aging a piece long before the rest of it shows wear. It’s the mark of a rushed job.
- Final Dressing & Protection. You apply oils, conditioners, or waxes to nourish the leather and protect the surface. Use the wrong dressing here, saddle soap on a dress shoe, for instance, and you’ll either gum up the pores or dry the leather out. Most commercial conditioners contain more silicone filler than nourishing oil; they sit on top and can eventually clog the leather’s ability to breathe.
| Step | Core Action | Tool Example | Risk If Skipped |
|---|---|---|---|
| 1. Pattern & Cut | Transfer design, cut shapes | Utility knife, steel ruler | Jagged edges; mis-sized parts |
| 2. Tool & Shape | Decorate/form damp leather | Stamping tools, mallet | Faint, blurry impressions |
| 3. Assemble | Join pieces with thread/rivets | Stitching awl, pricking irons | Weak seams that fail under load |
| 4. Finish Edges | Smooth & seal cut edges | Burnisher, edge paint | Edges fray and discolour quickly |
| 5. Dress & Protect | Apply oils/waxes | Dabber, soft cloth | Leather dries out or becomes sticky |
That’s the framework. Now let’s fill it with the specifics that turn a framework into a craft.
The Three Tools to Buy First (Ignore the Starter Kits)
Let me share what I’ve learned about tools. A pre-packaged “beginner’s kit” is a trap. You’ll get a plastic mallet that cracks, a cheap skiver that can’t hold an edge, and a dozen stamps you’ll never use. It’s a false economy. You’ll replace 80% of it within six months. Instead, invest in three quality items that serve multiple purposes across any project.
First, a self-healing cutting mat. It protects your table and your blade tip. Second, a sharp cutting tool. A standard utility knife with replaceable blades is fine for straight lines on thinner leather; a round knife is better for curves and thicker stock. Third, a stitching awl. This one tool lets you punch holes and hand-stitch. With just these three, you can complete a simple card holder start-to-finish. Everything else, specialized punches, slickers, fancy stamps, you add later, as you need them for specific projects.
Common mistake: Buying a tool for every technique you see in a single video. Master the cut, the hole, and the stitch first. Everything else is a variation on those three skills.
I reach for brands like Tandy Leather and Springfield Leather Company for these basics because their economy lines are still serviceable. Weaver Leather Supply makes excellent higher-end tools when you’re ready to upgrade. The brands matter less than the philosophy: buy for longevity, not for the box it comes in.
Leather Weight: The Decoding Guide
You’ve picked vegetable-tanned leather. Great. Now you face a label that says “4-5 oz.” or “8-9 oz.” This isn’t the weight of the piece; it’s the thickness. One ounce equals 1/64th of an inch. Since a hide isn’t a uniform slab, suppliers give a range. A 4-5 oz. Side will have spots at the thinner end of that spectrum and spots at the thicker end.
This thickness dictates what you can do with it. Use the chart below, drawn from guides like the Boy Scouts leatherwork merit badge pamphlet, to match numbers to projects.
| Weight (Ounces) | Approx. Thickness | Best Project Examples |
|---|---|---|
| 2–3 oz | 1/32”–3/64” (0.8–1.2mm) | Linings, lightweight pouches, embossing |
| 4–5 oz | 1/16”–5/64” (1.6–2mm) | Wallet bodies, card holders, key fobs |
| 6–7 oz | 3/32”–7/64” (2.4–2.8mm) | Notebook covers, small clutch bags |
| 8–9 oz | 1/8”–9/64” (3.2–3.6mm) | Journal covers, carved purse bodies |
| 10–11 oz | 5/32”–11/64” (4–4.4mm) | Belts, knife sheaths, bag straps |
| 12–13 oz+ | 3/16”+ (4.8mm+) | Saddles, heavy-duty harnesses |
For your first project, I recommend 4-5 oz. Vegetable-tanned leather. It’s thick enough to feel substantial but thin enough to cut and punch without Herculean effort. It’s the sweet spot for learning. Trying to hand-stitch 10 oz. Leather on day one is a fast track to frustration and sore hands.
Your First Project: Why a Key Fob Beats a Wallet
Ambition is good. It’s also the reason half-started wallets end up in the trash. A wallet is a complex 3D puzzle with multiple layers, precise alignment, and interior stitching. A key fob is a single layer of leather, folded, with a few stitches. You learn the same fundamentals, cutting, hole punching, stitching, edge finishing, on a project you can complete in an afternoon, not a weekend.
The goal of a first project isn’t to make a masterpiece. It’s to build muscle memory without fear of wasting expensive material. Cutting a straight line, punching a straight line of holes, and making consistent stitches are the absolute bedrock skills. A key fob gives you a short, manageable length to practice on. Once you’ve made three, your hands will know the rhythm. Then you can scale up to a card holder, which is essentially a small, flat wallet.
Here’s the straightforward path:
1. Get a beginner’s guide and a simple key fob pattern.
2. Cut a rectangle from your 4-5 oz. Leather.
3. Punch holes along the two ends.
4. Stitch it together around the key ring.
5. Burnish the edges smooth.
You now have a finished, usable object and the confidence to try something with two pieces of leather instead of one. That’s how you start leatherworking correctly.
The Two Most Common Mistakes (And How to Dodge Them)
I see these two errors more than any others. They’re the reason people get discouraged or ruin a piece of leather.
Mistake One: Using the Wrong Dressing.
Conditioning leather is like building a roux. You need low, patient heat and the right fat to build a stable foundation without it turning gummy. Using a heavy, wax-based dressing like mink oil on a delicate aniline-dyed leather is like using a firehose to water a bonsai tree. It clogs the pores and can darken the leather unevenly. For most vegetable-tanned projects, a light coat of pure neatsfoot oil or a dedicated leather balm like Obernauf’s is sufficient. Let it dry completely between coats.
Mistake Two: Rushing the Stitch.
Hand-stitching is a meditation, not a race. Pulling the thread too hard on each stitch “cup” the leather, creating a wrinkled seam. Not pulling hard enough leaves loose loops that catch on everything. The sweet spot is a firm, consistent tension. Using a stitching pony, a clamp that holds your work, gives you two free hands to manage that tension perfectly. It’s the single best investment for improving your stitch quality after buying an awl.
Where this goes sideways: Using baking soda as a deodorizer inside leather shoes. The fine powder works deep into the lining and is nearly impossible to remove completely. You trade a temporary smell for a permanent, gritty interior.
Vegetable vs. Chrome: The Right Leather for the Job
You’ll see both types for sale. Here’s when to use which.
Vegetable-Tanned Leather
- Best for: Tooling, carving, items that will develop a patina (belts, wallets, journals).
- Feels like: Firm, dry, and malleable when cased.
- Ages: Darkens naturally with exposure to light and oils from your hands.
- Think: The classic, heritage material. It’s almost always superior for any item meant to last a lifetime.
Chrome-Tanned Leather
- Best for: Garments, bags, shoes, anything requiring high flexibility and water resistance.
- Feels like: Soft, supple, often with a painted or finished surface.
- Ages: Color remains more stable, but the surface may show scuffs more readily.
- Think: The modern, functional workhorse. It’s not better or worse, just differently engineered.
For crafters, vegetable-tanned is the starting point. It responds predictably to every technique. Chrome-tanned leather is less forgiving to tool and often comes pre-finished, so it’s better suited for projects focused on assembly rather than decoration. If you want to make a leather belt, you want vegetable-tanned. If you’re lining a bag, chrome-tanned might be your pick.
Before You Go
Leatherworking isn’t about buying every tool. It’s about mastering a short list of skills on progressively complex projects. Your first purchase should be a cutting mat, a sharp knife, and a stitching awl, not a suitcase of stamps. Your first leather should be 4-5 oz. Vegetable-tanned. Your first project should be a key fob.
Understand that leather is a manufactured material with set properties; you can’t force a thin leather to act like a thick one. The craft is a sequence: cut, shape, assemble, finish, dress. Skip a step and the leather will tell you, usually by looking poorly made.
The practical takeaway? Ignore the marketing copy on starter kits. Grab a PDF guide like the Montana State University leathercraft manual, buy three good tools, and cut a rectangle of leather this weekend. Stitch it into something simple. That’s how the craft begins.
Frequently Asked Questions
What is the difference between leatherworking and leather crafting?
They’re generally interchangeable terms. “Leatherworking” often implies a focus on the manual skills and trade aspects (using hand tools, traditional saddlery), while “leather crafting” can encompass a wider range of activities including machine sewing and more decorative arts. For most people starting out, the difference is academic; you’re learning the same core techniques.
Is leatherworking expensive to start?
It can be reasonably affordable if you avoid the pitfall of buying a large, low-quality starter kit. A self-healing cutting mat, a utility knife with blades, a stitching awl, and a side of 4-5 oz. Vegetable-tanned leather can cost less than a high-end video game. The expense scales with your ambition, specialized tools and exotic leathers cost more, but the barrier to entry is lower than many think.
What is the most important skill for a beginner to learn?
Consistency. Specifically, the muscle memory for making a straight cut, punching a straight line of holes, and pulling a stitch to the same tension every time. These aren’t glamorous skills, but every advanced technique builds on them. Practice on scrap leather until your hands know the pressure needed without you having to think about it.
Can I use a regular sewing machine for leather?
Only for very thin, garment-weight leathers (1-2 oz.). Most household sewing machines lack the motor power and needle strength to handle craft-weight leather (4 oz. And up). The needle will bend or break, and the machine will jam. For the thicknesses used in belts, wallets, and bags, hand-stitching with an awl is not just traditional; it’s the mechanically superior method, creating a lock-stitch that won’t unravel if the thread is cut.
How do I choose my first leatherworking project?
Pick a project that uses a single layer or a simple fold of leather, requires straight-line cutting, and has fewer than two dozen stitches. A key fob, a simple card sleeve, or a bookmark are perfect. The goal is a complete, usable object that teaches you the process from pattern to finish in one sitting. Avoid projects that require skiving (thinning edges), complex pattern drafting, or multiple internal layers for your very first attempt.
