
What Tools Do You Need for Leatherworking? A 3-Category Guide
This post contains affiliate links. As an Amazon Associate, we earn from qualifying purchases.
The tools you need for leatherworking fall into three categories: cutting and marking tools (utility knife, metal ruler, wing divider), stitching and assembly tools (needles, thread, stitching pony), and finishing tools (edge beveler, burnisher). You don’t need a full professional kit to start; a focused set of about ten core tools lets you build a simple card holder or key fob, which is the perfect first project.
That list is the foundation. The real question isn’t what to buy first, but what each tool actually does on the leather. A utility knife scores and slices, but a wing divider scribes a perfect parallel line for stitching. A stitching pony isn’t just a clamp; it’s the third hand that turns a frustrating tangle into even, tight saddle stitches.
What follows is a breakdown of each category, the specific tools within them, and the essential rules about their materials. You’ll also find the common mistakes that waste money and ruin projects, and a straightforward path to your first finished piece.
Key Takeaways
- Start with a simple card holder project; it teaches cutting, hole punching, and saddle stitching without the complexity of a wallet.
- Never strike metal tools with a metal hammer; use a rawhide, polyethylene, or wood mallet to avoid damaging the tool’s striking face.
- Your first leather should be a 3-4 oz vegetable-tanned cowhide from a supplier like Tandy Leather or MAIKE, it’s forgiving and marks easily.
- A stitching pony is the most underrated beginner tool; it pays for itself in saved time and frustration on your first stitching project.
- Avoid unpainted steel rulers and metal water containers; they will stain vegetable-tanned leather permanently.
The Three Core Categories of Leatherworking Tools
Forget the overwhelming wall of tools at the craft store. Every leatherworking task, from a simple key fob to a complex bag, uses tools from just three families. Thinking in categories stops you from buying a specialized groover before you own a basic knife.
The first family is for cutting and marking. This is how you turn a whole hide into the specific pieces of your project. The second is for stitching and assembly, which is how you join those pieces together permanently. The third is for finishing, which is how you turn a rough, assembled object into something smooth and professional to the touch.
The Boy Scouts leatherwork merit badge pamphlet breaks down tools by their action, pushed, pulled, or struck. This functional view is more useful than a simple list, because it tells you how the tool interacts with the leather.
Buying one quality tool from each core category beats a cheap kit full of items you’ll replace in a month. Let me share what I’ve learned: a sharp Wuta utility knife and a basic Tandy Leather stitching pony will do more for your early results than a $100 set of decorative stamps you don’t yet know how to use.
Cutting & Marking: Your Foundation
This is where every project begins. Poor cutting leads to pieces that don’t align, which makes every subsequent step harder.
- Utility Knife/Rotary Cutter: This is your primary cutter. A sharp, replaceable-blade knife (like an X-Acto or a dedicated leather knife) gives you control for curves and detail. A rotary cutter excels at long, straight cuts. Dull blades tear leather instead of slicing it.
- Metal Ruler (Aluminum): A 12- or 18-inch aluminum ruler is essential. It must be metal so your knife can’t cut into it. Avoid unpainted steel rulers, they can leave rust stains on damp leather. This is a specific, often-missed edge case that can ruin a piece before you even start.
- Wing Divider: This looks like a compass with two sharp points. You set the width and then pull it along the edge of your leather to scribe a perfectly parallel line. This line guides your stitching holes and edge beveling. It’s the difference between wobbly and professional stitching.
- Cutting Mat: A self-healing mat protects your table and keeps your blade sharp. A standard A3 size is 297 x 420 millimeters.
The act of cutting leather cleanly is the first core skill. Practice on scraps until you can follow a line without the blade wandering. This isn’t about strength; it’s about a sharp blade and steady, confident pressure.
Stitching & Assembly: Making the Connection
If cutting defines the shape, stitching defines the strength and character of the piece. Hand-stitching is the soul of traditional leathercraft.
- Needles: Use blunt-tipped harness needles or glover’s needles (often called “saddler’s needles”). Their rounded points push through pre-punched holes without splitting the leather fibers. For machine sewing, a 5×17 needle in size #20 is the recommended starting point for medium-weight leather.
- Thread: Polyester or waxed polyester thread is the standard. It’s strong, consistent, and resists rot. The thickness should match your project, 0.8mm is a common all-purpose size for many tasks. Don’t use ordinary sewing thread; it will break.
- Stitching Pony: This is a clamp that holds your work at a comfortable angle, leaving both hands free to manage the two needles of a saddle stitch. Calling a stitching pony an “optional accessory” is a beginner trap. It’s a force multiplier.
- Pricking Irons/Awl: These create the stitching holes. Pricking irons (like those from Wuta or KS Blade) make a series of slanted holes at once for perfect spacing. An awl makes single holes and is used for using an awl to punch through thick layers or add individual holes.
- Adhesive: A water-based contact cement (like Barge) is used to temporarily “glue” pieces together before stitching. This stops them from shifting, which is the main cause of uneven stitch lines.
| Tool | Purpose | Why It’s Non-Negotiable |
|---|---|---|
| Stitching Pony | Holds work for two-handed stitching | Prevents uneven tension and hand fatigue; essential for consistent saddle stitches. |
| Pricking Irons | Creates evenly spaced stitching holes | Ensures professional, straight stitch lines; faster and more accurate than marking each hole. |
| Harness Needles | Blunt needles for hand-sewing | Prevents cutting the pre-punched thread channel, which weakens the stitch. |
Where this goes sideways: Skipping the adhesive step before stitching. The top and bottom layers will creep apart as you sew, resulting in a seam that is longer on one side than the other. You’ll notice it halfway through, and the only fix is to pull the stitches out and start over.
The sound of a sharp pricking iron driven cleanly through leather is a soft pop, not a crunch. If you hear grinding, your tool is dull or you’re hitting a hard surface underneath. That leads to broken tool tips and deformed holes.
Finishing: The Professional Touch
Finishing is what separates a handmade item from a homemade one. It’s all about refining the edges and surfaces.
- Edge Beveler: This tool shaves off the sharp 90-degree corner of a leather edge. A size 2 edge beveler is the recommended general-purpose size. It creates a rounded profile that can then be slicked smooth. Using the wrong size will either do nothing or gouge the edge.
- Burnisher: This is used to smooth and polish the beveled edge. It can be a wooden slicker, a canvas cloth, or a dedicated tool like a glass burnisher. Friction from rapid rubbing heats up the leather’s natural oils and waxes, creating a glossy, sealed edge.
- Mallet: A mallet and maul are striking tools. You need one with a head made of rawhide, polyethylene, or wood. Never use a metal hammer on metal tools. Striking a steel punch with a steel hammer will damage the punch’s head and can send dangerous metal shards flying. The mallet provides the controlled force for setting rivets, driving punches, and stamping.
- Edge Paint or Gum Tragacanth: For a colored or super-high-gloss edge, you apply edge paint or a natural gum. This is an advanced step, but knowing it exists helps you understand the final look.
Finishing tools like the edge beveler and skiving tool are where you invest after mastering the basics. A clean, rounded edge feels expensive in the hand. A sharp, unfinished edge feels cheap and rough.
Building Your Starter Kit: What to Buy First
You don’t need everything listed above on day one. This sequential approach prevents clutter and waste.
Start with the absolute essentials for a first project: 1. Utility Knife & Cutting Mat 2. Aluminum Ruler 3. Wing Divider 4. Pricking Irons (3mm or 4mm spacing) 5. Two Harness Needles 6. Spool of 0.8mm Waxed Polyester Thread 7. Small Pot of Contact Cement 8. Sandpaper (400 grit)
This list lets you cut, mark, punch holes, and hand-stitch a simple item. Notice the stitching pony isn’t here, your first project should be small enough to hold in your hand. Buy the pony before your second project, when you’ll appreciate it.
Common mistake: Buying a full set of decorative stamping tools as part of a starter kit. You won’t use them for your first five projects. That money is better spent on higher-quality versions of the core tools above.
For your first leather, buy a 3-4 oz (1.2-1.6mm) vegetable-tanned cowhide side or shoulder. It’s firm enough to hold its shape but soft enough to punch and stitch by hand. Brands like Tandy Leather or MAIKE offer good beginner options. Avoid chrome-tanned or super-soft leathers for now, they behave differently and can be frustrating.
The First Project: A Leather Card Holder
This is the training ground. A card holder uses small pieces of leather, teaches you every core skill, and results in something useful. It avoids the complexity of pockets, folds, and multiple layers found in a wallet.
Here’s the process, with the “why” for each step: 1. Design & Cut: Sketch a rectangle (about 2.75″ x 4″). Use your ruler and knife to cut it from your leather. Why? You practice a straight cut on a manageable scale. 2. Mark & Bevel: Use the wing divider to mark a stitching line 3/16″ from all edges. Use your edge beveler to round the top edge (the card entry). Why? You learn to use the divider and see how beveling improves the feel. 3. Punch Holes: Place your pricking irons on the scribed line and tap with your mallet to create stitching holes around the perimeter. Why? You practice consistent spacing and driving a tool. 4. Stitch: Thread two needles and saddle stitch the two layers together. Why? You learn the fundamental hand-stitching technique. This is where a reader’s success with a simple needle and thread, like in an email I once received, proves the basics are everything. 5. Finish Edges: Sand the edges smooth, dampen them slightly, and burnish with a wooden slicker or canvas. Why? You complete the cycle and see a rough edge become polished.
This project fails gracefully. If your cuts are crooked, you’ve wasted a small piece of leather. If your stitches are uneven, you still have a functional holder. The lesson is embedded in the doing.
Tools to Avoid (For Now) and Why
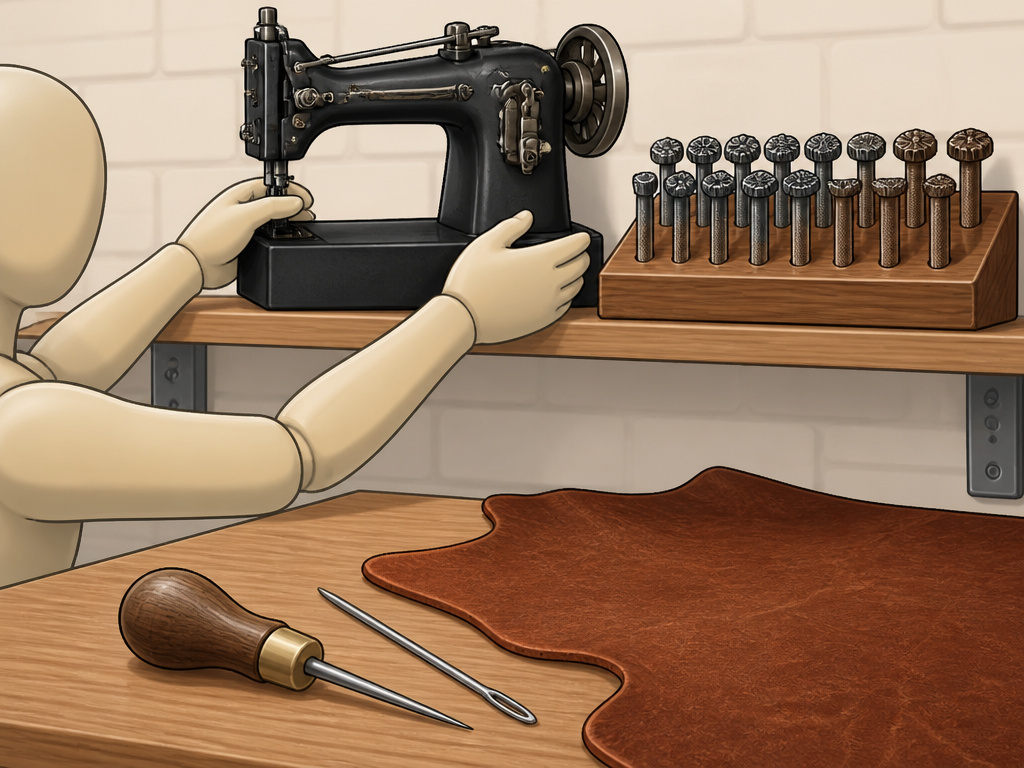 Part of building a sensible kit is knowing what to leave on the shelf. Here’s some straightforward advice on common early temptations.
- Leather Sewing Machines (e.g., Cobra Class 26): These are phenomenal for production, like the user who reported sewing boot sides in minutes instead of hours. For a beginner, they are a massive over-investment. Master hand-stitching first; it teaches you tension and control that will make you a better machine operator later.
- Full Sets of Stamps: Tooling and stamping are an entire art form unto themselves. Don’t buy a set until you’ve successfully made several plain projects and actively want to learn patterning.
- Exotic Leathers: Skip alligator, ostrich, or shell cordovan for now. They are expensive, behave differently, and amplify every mistake. Premium cowhide offers all the challenge and reward you need for years.
- Poor-Quality “Starter Kits”: Many cheap tool kits on Amazon include plastic awls, bent needles, and useless stamps. The metal is soft, the edges are dull, and they will frustrate you into quitting. It’s better to buy five good tools individually than 25 bad ones in a box.
The Ethiopian leather goods construction standard (ES 6847-2021) lists tools for professional manufacturing. Comparing your small starter kit to that industrial list is a useful reality check, you’re building skills, not a factory.
Maintaining Your Tools
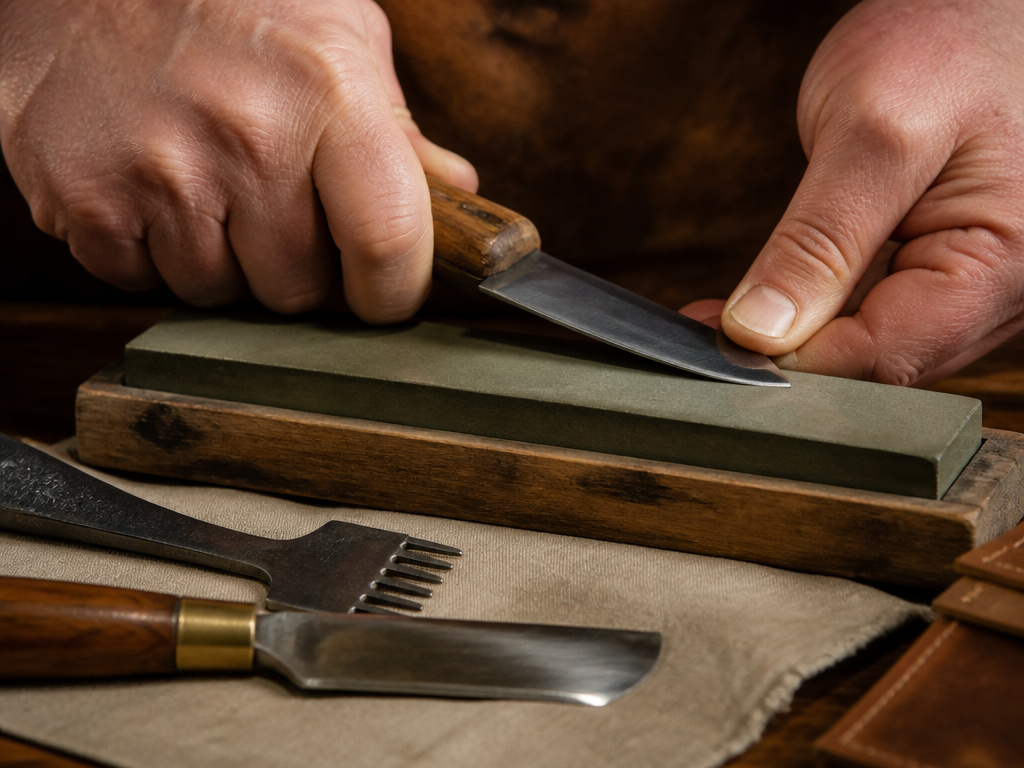 Your tools are an investment. A few simple habits keep them working.
- Keep Them Sharp: A dull knife or skiver is a dangerous tool that requires more force. Learn basic sharpening techniques for your blades. A few strokes on a honing stone maintain the edge.
- Clean After Use: Wipe adhesive off knives and metal tools. Brush leather dust out of pricking iron teeth.
- Store Properly: Keep tools in a dry place. Lightly oil metal surfaces to prevent rust. Don’t throw them loose in a drawer where edges can be damaged.
Tool care isn’t about obsession. It’s about respecting the items that let you shape a stubborn material. A well-maintained basic tool will outperform a neglected expensive one every time.
Frequently Asked Questions
What is the most important leatherworking tool for a beginner?
The utility knife. If you can’t cut cleanly, nothing else will align or look right. Pair it with a sharp blade and a metal ruler. Your second most important “tool” is patience, leather doesn’t forgive rushed steps.
Can I use regular scissors to cut leather?
You can, but you shouldn’t for anything beyond very thin leather. Scissors tend to pinch and distort the leather, resulting in a ragged edge. A sharp knife guided by a ruler gives a cleaner, more professional cut with less effort.
Do I need a special hammer?
Yes. You need a mallet with a head made of rawhide, polyethylene (poly), or wood. Striking metal tools with a metal hammer will damage the tool’s head and is a safety hazard. The right mallet delivers force without destruction.
How do I choose the right leather for my first project?
Choose a 3-4 oz vegetable-tanned cowhide. It’s widely available, affordable, and perfectly suited for practice. It cuts cleanly, punches easily, and burnishes to a nice finish. Let the tool recommendations for beginners guide you to suppliers known for consistent quality.
Is a stitching pony really necessary?
For your very first, tiny project, you can manage without it. For your second project and every one after that, it is necessary. It transforms stitching from a frustrating, awkward struggle into a controlled, enjoyable process. Consider it your first upgrade.
Before You Go
Start with the card holder. It seems simple, but it teaches the three pillars: cutting straight, punching straight, and stitching straight. Buy your tools one category at a time, cutting first, then stitching, then finishing. Ignore the shiny, specialized stuff until you can make that first holder without looking at the instructions.
The one rule I wish I’d known earlier involves materials. Never let vegetable-tanned leather sit against unpainted steel or in a metal water container. The chemical reaction causes a dark, permanent stain that no amount of sanding will fully remove. It’s a small detail that has sent more than one promising piece straight to the scrap bin.
Your tools are an extension of your intent. A sharp blade, a solid mallet, a reliable pony, they don’t make the craft easy, but they make it possible. Everything else is just refinement.
