
How to Dye Leather Furniture | What Works After 48 Hours
This post contains affiliate links. As an Amazon Associate, we earn from qualifying purchases.
To dye leather furniture, you must match three things: the leather type, a compatible dye product, and meticulous surface preparation. Skip any one, and the dye won’t penetrate, it will peel within weeks, or the finish will look painted-on and unnatural. This applies to dyeing leather for sofas, chairs, and other upholstery.
That surface prep is where almost every DIY attempt fails first. It’s not just cleaning; it’s about creating a surface the dye can bond to. On a sofa, the leather on the seat cushions is usually full-grain or top-grain and can take aggressive cleaners, but the backs and sides might be a different, more delicate leather that requires a gentler touch.
What follows is the process, stripped of marketing fluff. This guide confirms the three things you must check before starting, details the step-by-step application, and lists the specific products that work without guesswork.
Key Takeaways
- You cannot dye leather a lighter color than its original hue. Going darker works; going lighter requires professional stripping.
- Always test your leather dye products on a hidden area first. Dye can react differently depending on the leather’s original finish and tanning method.
- Preparation takes longer than dyeing. Rushing the cleaning and sanding steps guarantees a finish that cracks or rubs off.
- Apply multiple thin coats, not one thick one. Thin coats dry faster, penetrate deeper, and won’t obscure the natural grain.
- Allow a full 48 hours for the dyed finish to cure before using the furniture. The surface will be fragile before that.
The Three Non-Negotiables Before You Start
Forget the tutorials that start with “just apply the dye.” Three checks come first, and each one is a deal-breaker.
First, identify your leather type. Is it aniline, semi-aniline, or pigmented (also called corrected grain)? Aniline leather is absorbent and shows dye changes quickly, while pigmented leather has a heavy topcoat that must be completely removed. The types of leather used in furniture aren’t uniform; the back and sides of your sofa might be a cheap split leather, which requires a completely different, gentler prep than the seating areas.
The part nobody mentions: Working on a split-leather sofa back? Avoid strong prepping agents. Instead, wipe it down with a cloth dampened with isopropyl alcohol. Using the wrong prep here strips the color straight off the backing.
Second, accept the color limitation. You cannot dye leather a lighter color. If you have a black chair, you cannot make it tan with dye alone. The original pigment is embedded too deeply. This is a physical limitation, not a product shortcoming. You can go from tan to brown, brown to black, or red to black. The reverse is not a DIY project.
Third, control your environment. Leather dye needs 70-85°F (21-30°C) and low humidity to cure properly. High humidity extends drying times by hours and can cause the dye to dry cloudy or tacky. A cool garage in the fall is a terrible place for this job.
Gathering Your Tools and Materials
Don’t improvise. Having the right tools at hand keeps the process smooth and prevents the dye from drying in the brush while you search for sandpaper.
Essential Supplies:
- Leather Cleaner: A degreaser like Leatherique Rejuvenator or a dedicated leather cleaner. Avoid soaps that leave a film.
- Surface Prep: Leather prep solution (like Leatherique Prepping Agent #3) and isopropyl alcohol (99%).
- Abrasive Pads & Sandpaper: Green Scotch-Brite pads for initial stripping, 400-600 grit wet/dry sandpaper for smoothing, and 1500 grit for final touch-ups.
- Dye: A high-quality, water-based leather dye for furniture, such as Fiebing’s Leather Dye or a kit from Leather Magic!
- Applicators: Synthetic bristle brushes (one small for edges, one wider for panels), lint-free cloths, and disposable gloves.
- Protective Topcoat: A product like Leatherique Clear Coat #6 to seal and protect the new color.
| Tool | Purpose | What Happens If You Skip It |
|---|---|---|
| Degreaser/Cleaner | Removes skin oils, dirt, and silicones that block dye adhesion. | Dye sits on top of the grime and rubs off with the first touch. |
| Abrasive Pad (Scotch-Brite) | Removes the factory topcoat on pigmented leather. | Dye cannot penetrate; it forms a plastic-like layer that cracks. |
| 400-600 Grit Sandpaper | Smooths minor scratches and opens the leather grain. | Surface imperfections become permanently dyed highlights. |
| Synthetic Brush | Applies thin, even coats without shedding fibers. | Streaks, brush-hair inclusions, and uneven color saturation. |
| Protective Topcoat | Seals the dye, prevents color transfer, and adds scuff resistance. | Dye transfers to clothing, wears quickly on armrests, and stains easily. |
You can certainly attempt this without a dedicated furniture restoration kit, but the kits from brands like Leather Magic! Or Furniture Clinic remove the guesswork by including compatible cleaners, preps, and dyes designed to work together.
Step-by-Step: From Cleaning to Sealing
Let’s break down the sequence. The timing between steps matters as much as the steps themselves.
Step 1: Deep Cleaning
Apply a degreaser like Leatherique Rejuvenator liberally, about 2-4 ounces per seat cushion. Work it into every fold and seam. Let it soak for 24 hours. This pulls embedded oils and dirt to the surface. Wipe it away with a damp cloth. The leather should feel clean, not slippery.
Step 2: Surface Preparation
This is the make-or-break step. For the main seating areas (which get the most wear), use a green Scotch-Brite pad dampened with a leather prep solution. Scrub in small circles until the original finish is dull and you see color transferring onto the pad. This means you’ve reached the raw leather.
I learned this the hard way on a client’s chair. I skipped the abrasive step on one cushion, thinking a thorough cleaning was enough. Everywhere else, the dye bonded. On that cushion, it flaked off within a month, revealing the original shiny finish underneath. Patience during prep isn’t optional.
For the back and sides of the furniture, wipe with isopropyl alcohol only. Let the entire piece dry completely for at least 30 minutes. Any residual moisture will dilute your dye and weaken adhesion.
Step 3: Dye Application
Shake your dye bottle vigorously for three minutes. Pigments settle. Pour a small amount into a dish. Using your synthetic brush, start with the seams, piping, and edges, the hardest areas to reach. Then move to the larger panels. Apply thin coats. The first coat will look streaky and incomplete. That’s correct.
Let the first coat dry to the touch (a hair dryer on low heat can speed this up). Apply a second thin coat, brushing in different directions than the first. A significant color change often doesn’t appear until the third coat. If you get full coverage in one thick coat, you’ve applied too much. It will remain tacky and feel like plastic.
Step 4: Sealing and Curing
After your final dye coat is dry, apply a protective topcoat like Leatherique Clear Coat #6. This creates a barrier against oils and abrasion. Follow the product’s instructions for application, usually a thin, even layer.
Now, walk away. For 48 hours. This is the mandatory cure time. The dye molecules are still settling and cross-linking. Sitting on the piece before 48 hours can leave permanent pressure marks and cause the color to transfer.
Which Leather Dye Should You Use?
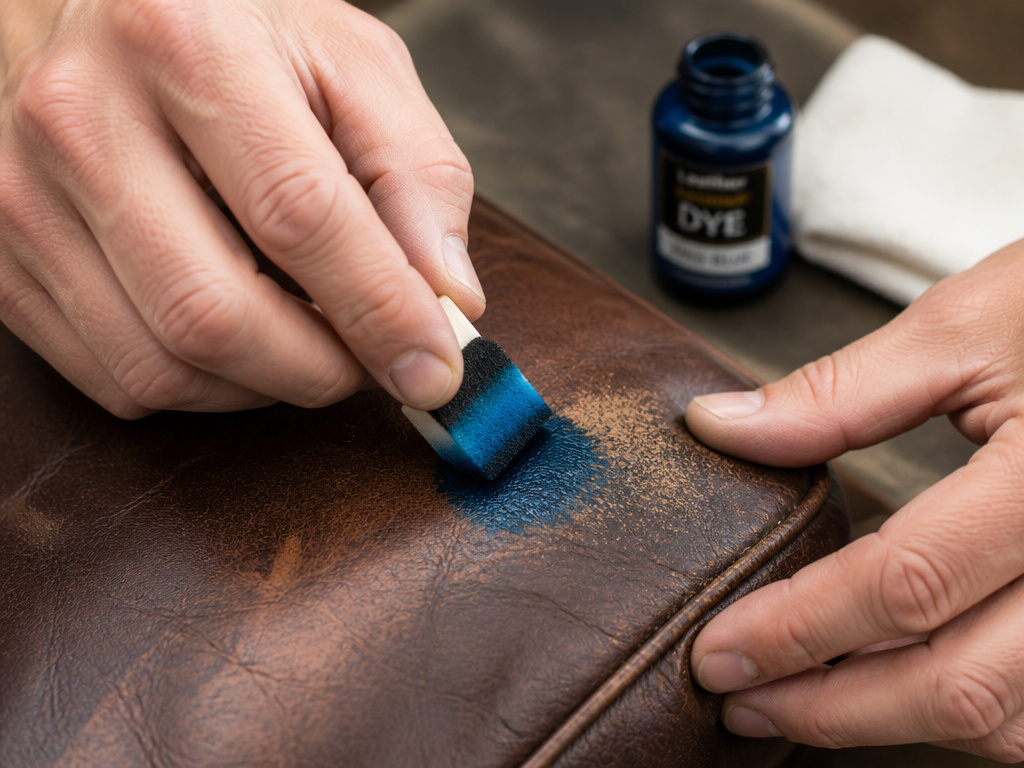
Not all dyes are created equal. Your choice depends on the leather and the look you want.
Alcohol-based Dyes (e.g., Fiebing’s): Penetrate deeply and dry quickly. Best for full-grain, aniline leathers where you want a rich, saturated color that becomes part of the leather. They can be tricky for beginners as they dry almost on contact, making even application a skill.
Water-based Dyes (e.g., Furniture Clinic, Leather Magic!): Dry slower, giving you more working time. They sit more on the surface, which makes them better for color changes on pigmented leathers. They also tend to be more forgiving and easier to blend.
Acrylic Paints / “Leather Colors”: These are paints, not dyes. They sit on top like a film. Use them for very specific, opaque color changes on vinyl or heavily damaged leather, but know they will change the hand-feel, often making the leather stiffer.
The difference between leather dye and paint is crucial. Dye soaks in; paint coats on. For most furniture, where you want to preserve the natural suppleness, a dye is the right choice. A quality [dye for leather sofas](https://leathergenesis.from a brand like Fiebing’s eliminates the risk of a gummy, painted finish.
Frequently Asked Questions
Can I dye my leather couch from dark to light?
No. Leather dye cannot lighten leather. The existing pigment is too deep. You can only dye to an equal or darker shade. Going from dark to light requires a professional who can strip the leather bare, a complex and costly process.
How long does it take to dye a leather sofa?
The active work takes a few hours, but the timeline is dictated by drying and curing times. Expect a minimum of three days: one for deep cleaning, one for dyeing (multiple coats with drying between), and 48 hours of untouched curing after the final sealant.
Will dye make my leather stiff?
Multiple thin coats of a dye with a high pigment concentration should not significantly stiffen good-quality leather. Stiffness comes from using a product that’s too thick (like a paint) or from not properly conditioning leather after the dye has fully cured.
How do I fix a mistake or streak?
If the dye is still wet, wipe it away immediately with the appropriate thinner (water for water-based, alcohol for alcohol-based). If it has dried, you’ll need to lightly sand the streaked area with 1000-1500 grit sandpaper and re-dye that section, feathering the edges into the surrounding color.
How do I maintain dyed leather furniture?
Once cured, maintain it like any other leather. Use a gentle cleaner for routine cleaning leather furniture and apply a conditioner like Leatherique Rejuvenator annually to keep the leather nourished. A periodic application of a leather protectant can also extend the life of the finish.
Before You Go
The single biggest factor isn’t your hand with a brush. It’s the hour you spend prepping the surface. A flawless dye job over a poorly prepared seat is just a glossy flaw.
If you’re hesitant, practice on the underside of a cushion or the back of the sofa first. Get a feel for how the dye flows from your brush and how quickly it dries. That practice square costs you nothing but time and teaches you more than any guide.
The goal isn’t to make an old couch look factory-new. It’s to give it a renewed, cohesive color that lets the character of the leather, its grain and texture, shine through. Done right, the piece doesn’t look dyed; it looks like it was always that color. And that’s the true mark of a job well done.
