
Sew Leather Together by Hand: A Strong Saddle Stitch Guide
This post contains affiliate links. As an Amazon Associate, we earn from qualifying purchases.
To sew two pieces of leather together, you join them with a hand-sitched seam using two harness needles and waxed thread. The process is: align the pieces, mark a stitch line, punch holes with pricking irons, thread the needles, and work a saddle stitch. This creates a seam that is stronger and more repairable than a machine stitch on leather over 3 oz.
That answer rests on a specific mechanical truth. The saddle stitch uses two separate threads that cross and lock inside each hole. If one thread wears through, the other holds the seam intact. A machine lockstitch, which makes a single knotted loop on the back, fails completely if its thread breaks.
Here’s a straightforward guide. The guide explains the four essential tools, how hole alignment affects seam strength, the saddle stitch procedure, and when to use a machine. By the end, you’ll know which thread to buy and how tight to pull each stitch.
Key Takeaways
- The saddle stitch, done by hand with two needles, is mechanically superior to a machine lockstitch for leather; one thread can fail without the seam unraveling.
- Use harness needles (blunted tip) with waxed polyester or linen thread; standard sewing needles and thread will bend or snap.
- Pricking irons, not a freehand awl, are mandatory for creating evenly spaced, clean holes, crooked holes guarantee a weak, puckered seam.
- A thin line of solvent-based rubber cement applied before stitching acts as a temporary clamp, replacing bulky clips and preventing piece drift.
- On leather thinner than 2–3 oz, a sewing machine with a walking foot and leather needle can work; anything thicker demands hand stitching to avoid broken needles and motor strain.
The Hand Stitch That Outlasts Machines
A student once brought me a machine-sewn bag that had split at the stress point after six months. The thread was intact, but the holes in the leather had elongated and torn. The machine’s consistent, high-tension lockstitch had sawed through the hide with every flex. That’s the day I stopped recommending machines for anything but the thinnest linings.
The saddle stitch fixes that problem by design. Two independent threads pass through the same hole in opposite directions, locking against each other in the middle. The force on the seam is distributed across two friction points, not concentrated on a single knot. It’s not just stronger, it’s repairable. You can unpick a section and re-stitch it without the whole seam coming undone.
The saddle stitch is the default for leatherwork because it creates a seam where the thread and leather share the load. If one thread breaks, the other maintains the seam’s integrity, a fail-safe that machine lockstitches lack.
Which leathers is this for? This method is built for vegetable-tanned leathers and other firm, full-grain hides from 3 oz to 10 oz in weight. It’s the backbone of belts, wallets, bags, and journal covers. For the full picture on material choices, our guide on leather types breaks down the grades.
The Four Tools You Cannot Substitute
You can’t sew leather with fabric tools. A standard needle bends, all-purpose thread snaps, and guessing your hole placement ruins the piece before the first stitch. These four items earn their bench space.
- Harness Needles. These have a blunt tip, designed to slide through pre-punched holes without cutting the leather. John James harness needles are the standard for a reason, they’re strong, consistently sized, and their eyes accommodate thick thread. Using a sharp needle risks slicing the thread inside the hole.
- Waxed Thread.You must use polyester or linen thread coated in wax. The wax reduces friction as the thread passes through the hole, helps the strands lay flat, and seals the stitch. Ritza Tiger Thread (polyester) and Meisi Superfine** (linen) are the two benchmarks. Thin, unwaxed thread will saw through itself under tension.
- Pricking Irons. This is where most first projects fail. A stitching awl used freehand makes uneven, ragged holes. Pricking irons are a set of chisel-like teeth that punch multiple perfectly spaced holes at once. They create a clean channel for the thread and make your stitch line straight. The investment here pays off in every seam you ever make.
- Solvent-Based Rubber Cement. This isn’t about permanent bonding. A thin line of rubber cement acts as a temporary clamp, holding pieces in perfect alignment while you stitch. It has high initial tack, a short open time, and its bond is weak enough to allow repositioning. It replaces a forest of binder clips that get in your way. For more on when and how to use adhesives, see our article on gluing leather.
| Tool | Purpose | Consequence If Skipped or Substituted |
|---|---|---|
| Harness Needles | To pass thread through pre-punched holes without cutting leather or thread. | Sharp needle slices thread mid-stitch; broken needle shafts. |
| Waxed Thread (e.g., Ritza Tiger) | To withstand leather’s abrasion and create a sealed, low-friction stitch. | Unwaxed thread frays and snaps under pull, often at the needle eye. |
| Pricking Irons | To create evenly spaced, clean holes for consistent stitch appearance and strength. | Crooked, ragged holes from an awl lead to puckered seams and weak spots. |
| Rubber Cement | To temporarily align and hold pieces without bulky hardware. | Pieces drift during stitching, resulting in misaligned edges and a crooked seam. |
The thread choice warrants its own discussion. Let’s be clear about one thing: the thread’s thickness should match the leather’s weight and the hole size. A 0.8mm Tiger Thread is overkill for a delicate wallet; it will distort the holes. A 0.5mm thread on a belt will look undersized and lack strength. Match them.
Marking, Punching, and the Science of Alignment
Everything before the needle touches thread determines the seam’s longevity. This is the unglamorous, critical phase.
First, align your two pieces exactly, flesh side to flesh side or grain side to grain side. Check the alignment from multiple angles. A seam that starts crooked stays crooked. Now, apply that thin line of rubber cement within the seam allowance and press the pieces together. You now have a stable, clip-free workpiece.
Second, mark your stitch line. Use a wing divider or a stitching groover to scribe a line a consistent distance from the edge. The ES 6847 leather goods construction standard specifies folding sizes (10mm for large bags, 5mm for small items), which informs where this line should go. Your stitch line should be just inside this fold line.
Third, punch your holes. Place the pricking irons perpendicular to the leather along your scribed line and strike them firmly with a mallet. The goal is a clean, vertical hole. The irons’ spacing (e.g., 3mm) decides your stitch length. This is not a place for improvisation.
Common mistake: Punching holes freehand with an awl. The awl tip follows the leather’s grain, not your straight line. The resulting zigzag hole path forces the thread to bend at odd angles, concentrating stress and guaranteeing a seam that puckers within weeks.
The sound tells you when it’s right: a clean thunk as the irons punch through, not a tearing crunch. If you hear the latter, your irons are dull or you’re not holding them straight.
Why does hole alignment matter so much? Leather is anisotropic, its strength differs along the lengthwise grain versus across it. A straight, evenly spaced line of holes ensures the tension from your pulling is distributed predictably. A wandering line creates random stress points. This is the core of quality leather sewing basics.
Threading the Needles and the Saddle Stitch Motion
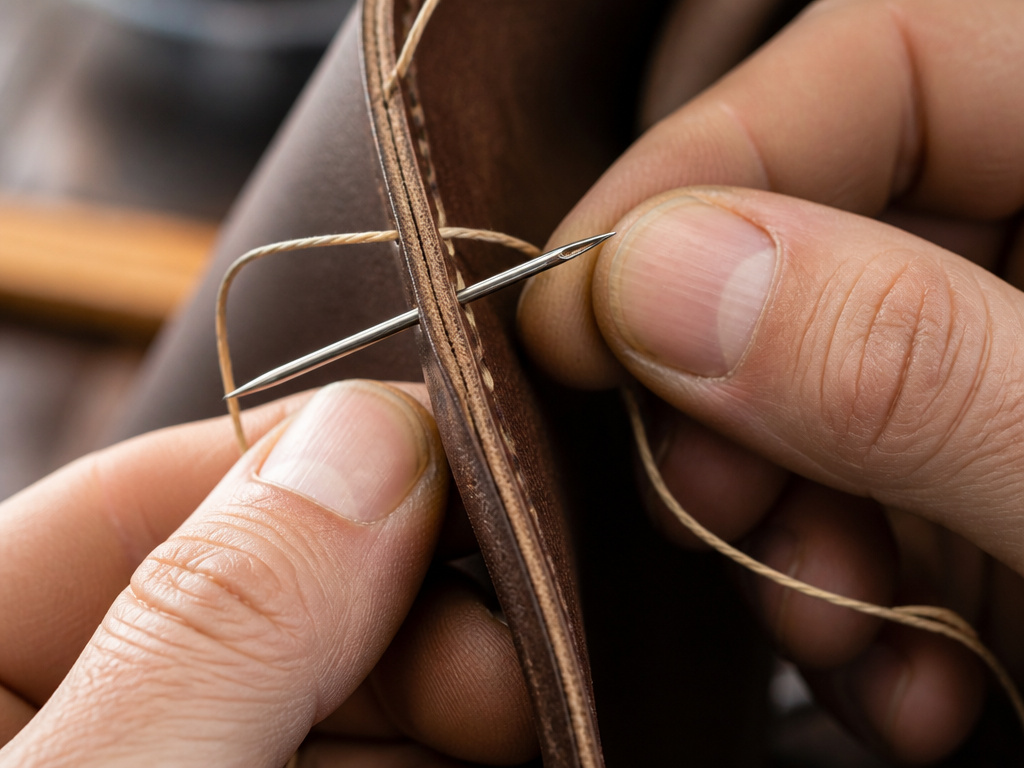
Cut a length of waxed thread about four times the length of your seam. It feels excessive, but running short mid-seam is a special kind of frustration. Thread a harness needle onto each end. Some crafters “set” the thread by pulling it through beeswax a final time, this further reduces friction and helps the thread bed into the hole.
You’ll start in the middle of your seam if possible, working outward in both directions. This balances tension. Pass one needle down through the first hole, pulling through until you have equal tail lengths. Now the dance begins.
- Take the needle in your dominant hand (right needle if you’re right-handed) and pass it through the next hole from the same side.
- Take the needle in your other hand and pass it through the same hole, but from the opposite side.
- Pull both threads gently until they snug up. You should feel a soft, balanced resistance, not a hard tug.
- Repeat for the next hole, always leading with your dominant hand’s needle.
This “leapfrog” motion is the saddle stitch. The two threads cross in the middle of the hole and lock. The rhythm is one stitch at a time, no doubling back. If you pull too tight, you’ll see the leather dimple around the hole and hear a faint creak from the thread. Ease up.
Where this goes sideways: Pulling each stitch maximally tight. This stretches the holes, compresses the leather unevenly, and can cut the thread against the hole’s edge. The seam should lie flat, not look like a tightened purse string.
Finish by backstitching two or three holes, then passing the threads between the leather layers to knot and trim. A dab of glue on the knot secures it. The whole process for a journal cover runs 6 to 8 hours, the patience is the real tool.
When a Machine Makes Sense (and When It Doesn’t)
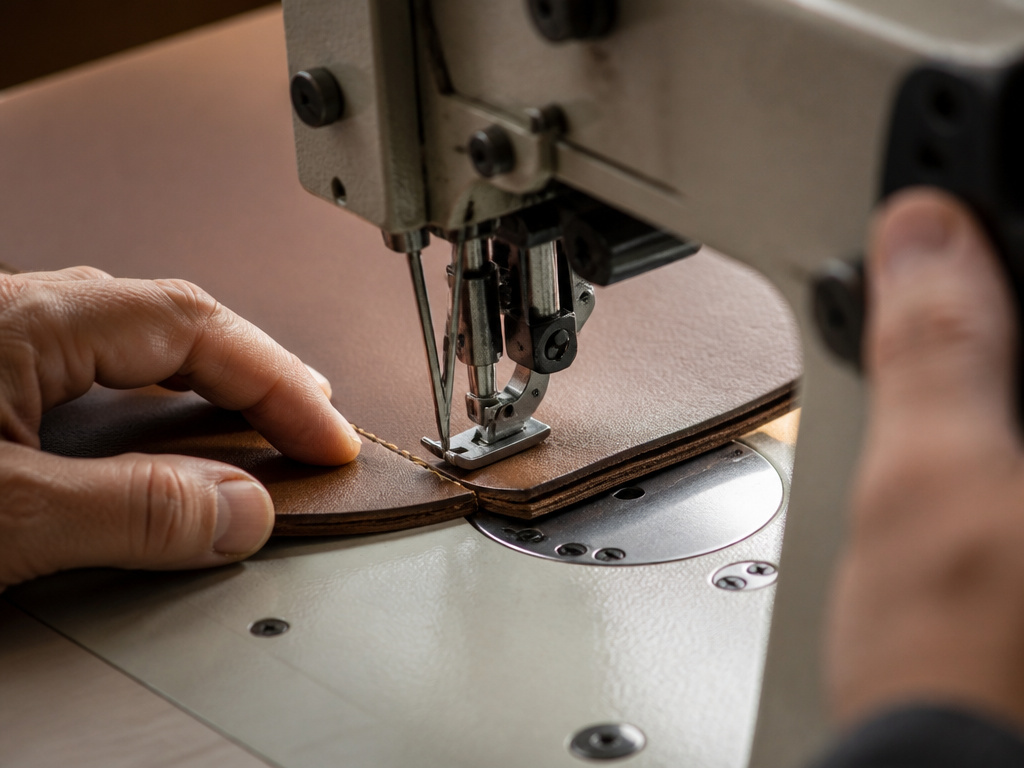
I’ve given the machine a hard time. It has its place. For long, straight seams on leather under 2–3 oz (think garment linings, lightweight pouches), a sewing machine with a walking foot and a leather needle can save hours. The walking foot feeds the top and bottom layers evenly, preventing the leather from sticking and stalling.
But the limits are sharp. Thicker leather, multiple layers, or curved seams will defeat most home machines. The needle struggles, the motor strains, and the thread tension slips. You’ll end up with skipped stitches, broken needles, and a piece that’s now perforated with unusable holes. At that point, switching to hand sewing is your only salvage path.
The trade-off is simple: speed versus control and ultimate strength. For a tote bag gusset or a belt, the machine’s lockstitch is a single point of failure. For a lining, it’s adequate. Your decision hinges on the leather’s weight and the seam’s stress duty. If you’re unsure, test on a scrap with your machine first. The machine will tell you quickly if it’s up to the task, listen for the motor bogging down and look for needle deflection.
The One Upgrade No One Talks About
Beyond the big four tools, one tiny step elevates everything: beeswaxing your own thread. Even pre-waxed thread benefits from a final pull through a block of beeswax before you stitch. This does three things.
It further reduces friction, making the pull smoother. It helps the thread strands bind together, creating a more round, cable-like cord. And it slightly seals the hole after the thread passes through, especially on vegetable-tanned leather. The difference isn’t visual; it’s in the hand. The stitch feels planted, not perched on top of the leather.
This is the kind of detail that separates a functional seam from a professional one. It costs almost nothing and adds a minute to your setup. Ignore it, and your stitches will still hold. Adopt it, and you’ll feel the difference on the tenth pull of the needle, less drag, more consistency. It’s the leatherwork equivalent of sharpening your knife before you chop an onion.
Frequently Asked Questions
Can I sew leather with a regular needle and thread?
No. A regular sewing needle will bend or break against leather’s density, and standard thread lacks the tensile strength and abrasion resistance. You must use blunt-tipped harness needles and waxed polyester or linen thread specifically made for leatherworking.
Is it better to glue leather before sewing?
For assembly, yes. A thin application of solvent-based rubber cement within the seam allowance holds pieces in perfect alignment while you stitch, acting as a temporary clamp. It is not a substitute for the mechanical strength of the stitch, but it prevents slippage. For permanent bonds, you need specific leather adhesive.
What is the strongest stitch for leather?
The hand-sewn saddle stitch is the strongest for leather. Its two independent threads lock within each hole, creating a redundant seam. If one thread wears through, the other maintains integrity. No machine lockstitch offers this fail-safe on thicker leather.
How do I prevent my leather from puckering when I stitch?
Puckering is caused by two things: holes that are too small or uneven for the thread, and pulling each stitch too tight. Ensure your pricking irons match your thread diameter, and pull the threads just until they are snug and the stitch lies flat, not with maximum force.
Can I use a sewing machine on thick leather?
It is not recommended for leather over 3 oz (approx. 1.2mm) for structural seams. The needle can break, the motor can stall, and the machine’s lockstitch creates a weaker, less repairable seam than hand saddling. Use a machine only for thin linings or very lightweight projects.
Before You Go
The single most common point of failure isn’t the stitch itself, it’s the hole preparation. Investing in pricking irons with a 3mm or 4mm iron spacing and learning to use them correctly saves more wasted leather than any other skill. Your first project with them will look like your tenth project without them.
If you take one action this week, make it this: practice the saddle stitch on a leather scrap. Don’t aim for a product. Just align two scraps, punch a line of six holes, and work the two-needle motion until the pull tension feels even and the threads lock without your conscious effort. That muscle memory is the foundation of every durable thing you’ll ever make from leather.
All the advice here assumes you’re working with a Hermann Oak or Wickett & Craig hide. If your leather is stiff, prone to cracking, or feels plasticky, the best technique in the world won’t yield a lasting piece. Start with a known vegetable-tanned leather or a reputable top-grain leather. The material tells you what it needs; your job is to listen.
