
The Ultimate Guide on How to Finish Leather Edges Perfectly
This post contains affiliate links. As an Amazon Associate, we earn from qualifying purchases.
Finishing leather edges requires a four-step sequence: bevel, sand, dampen, and burnish. This process compresses and seals the exposed fiber ends, creating a smooth, dark, and durable edge. For vegetable-tanned leather, the friction of burnishing releases natural tannins that form a hard, polished surface; chrome-tanned leather requires edge paint.
That’s the mechanical answer. The practical one is that an unfinished edge feels fuzzy, looks pale, and starts fraying within months of pocket use. A finished edge resists water and grime, looks intentionally crafted, and lasts for years. The difference isn’t subtle, it’s the single detail a trained eye looks for first.
What follows is a breakdown of each tool and technique, from the essential beveler cut to the final wax seal. You’ll learn why water works on some leathers and fails on others, how to diagnose a fuzzy edge, and when to reach for a compound like Tokonole instead of a bar of wax.
Key Takeaways
- Beveling isn’t just for looks. A sharp edge beveler, like a size 1 or 2 from Barry King, slices through leather fibers cleanly. A dull tool tears them, leaving fuzz that no amount of burnishing can fix.
- Burnishing works by heat and compression. The friction from a wood slicker or canvas cloth melts natural waxes and compresses fibers. On vegetable-tanned leather, this also releases tannins that polymerize into a hard seal.
- Chrome-tanned leather will not burnish. Its fibers are lubricated by chromium salts and lack reactive tannins. Your only option for a clean edge is a pigmented edge paint.
- The stitch line must be at least 4 mm from the edge. Any closer and the thread interferes with the burnishing tool, creating a ridged, uneven finish.
- Let me share what I’ve learned: rushing the sanding steps always shows. Skipping from 150 grit to burnishing leaves microscopic fibers that puff up later. Progress through 400, then 800 grit paper for a foundation that stays glassy.
The Four-Step Sequence to a Perfect Edge
Edge finishing is a linear process. Each step prepares the surface for the next, and skipping one creates a weakness that eventually fails. The goal is to transform a raw, cross-section of collagen fibers into a unified, sealed surface.
First, understand what you’re working on. The cut edge of vegetable-tanned leather exposes a matrix of long fiber bundles. These ends are hygroscopic, they suck up moisture and swell. Left unfinished, they act like tiny wicks, pulling in dirt and water that darken and weaken the leather over weeks. The finishing process compresses these fibers flat, then seals them shut.
A proper edge finish on vegetable-tanned leather isn’t just polish. The friction of burnishing releases locked-in tannins, which flow to the surface and harden into a natural, polymer-like seal that protects the underlying fibers from moisture and abrasion.
I learned the importance of sequence early. My first wallet had stitches placed a mere 2 mm from the edge. After beveling and sanding, I went to burnish. The slicker kept catching on the thread, gouging the leather and leaving a ragged ridge. That wallet taught me the 4 mm rule. Now, I mark my stitch lines before I ever cut the leather.
Here is the core workflow. You can adapt the tools, but the order is fixed.
| Step | Primary Tool | Purpose | What Happens If You Skip It |
|---|---|---|---|
| 1. Bevel | Edge beveler (size 1 or 2) | Removes the sharp 90° corner. | The edge “mushrooms” during burnishing, creating a bulky, unrefined look instead of a crisp round. |
| 2. Sand | Sandpaper (150 → 400 → 800 grit) | Smoothens the beveled surface and removes loose fibers. | Microscopic fibers remain raised. They absorb finish unevenly, causing a fuzzy, textured edge even after burnishing. |
| 3. Dampen | Water, Gum Tragacanth, or Tokonole | Lubricates the fibers and activates tannins (veg-tan) or adhesives (compounds). | Friction during burnishing scorches the leather instead of melting it, creating a burnt smell and a rough, matte finish. |
| 4. Burnish | Wood slicker, canvas cloth, or rotary tool | Compresses fibers and generates heat to create a sealed, shiny surface. | The edge remains porous, absorbs stains immediately, and will fray with the first encounter of moisture. |
Choosing and Using Your Edge Beveler
The beveler makes the first physical change to the edge. Its job is to slice off the sharp corner at a consistent 45-degree angle. This isn’t a job for sandpaper, you need a dedicated, sharp blade.
A blunt beveler is worse than useless. It tears through the leather fibers instead of cutting them. Torn fibers won’t lay flat during sanding; they create a weak, fuzzy base that guarantees a poor finish. You’ll spend ten times longer burnishing to achieve half the result. I strop my Barry King bevelers on a leather strop with green compound after every project. It takes sixty seconds and ensures every cut is clean.
Bevel direction matters. Always cut in the direction the grain runs. On a belt strap, that’s lengthwise. On a wallet, go around the entire perimeter. Cutting against the grain pulls and tears the fibers, leaving a ragged edge that no amount of sanding can fully correct.
Where this goes sideways: Using a size 4 or 5 beveler on thin leather. The large blade removes too much material, leaving a wide, flat bevel that looks clumsy and weakens the edge. For most projects, a size 1 or 2 beveler is the only tool you need.
This is the foundational step of beveling leather edges. Get it right, and the subsequent steps flow. Get it wrong, and you’re fighting the material all the way to the end. If you’re new to the craft, our guide on what is a leather edge beveler breaks down the types and choices.
Sanding: The Foundation of a Smooth Finish
Sanding is where patience pays a direct visual dividend. This isn’t about aggressive material removal; it’s about progressive refinement. You’re creating a perfectly smooth canvas for the burnishing compound.
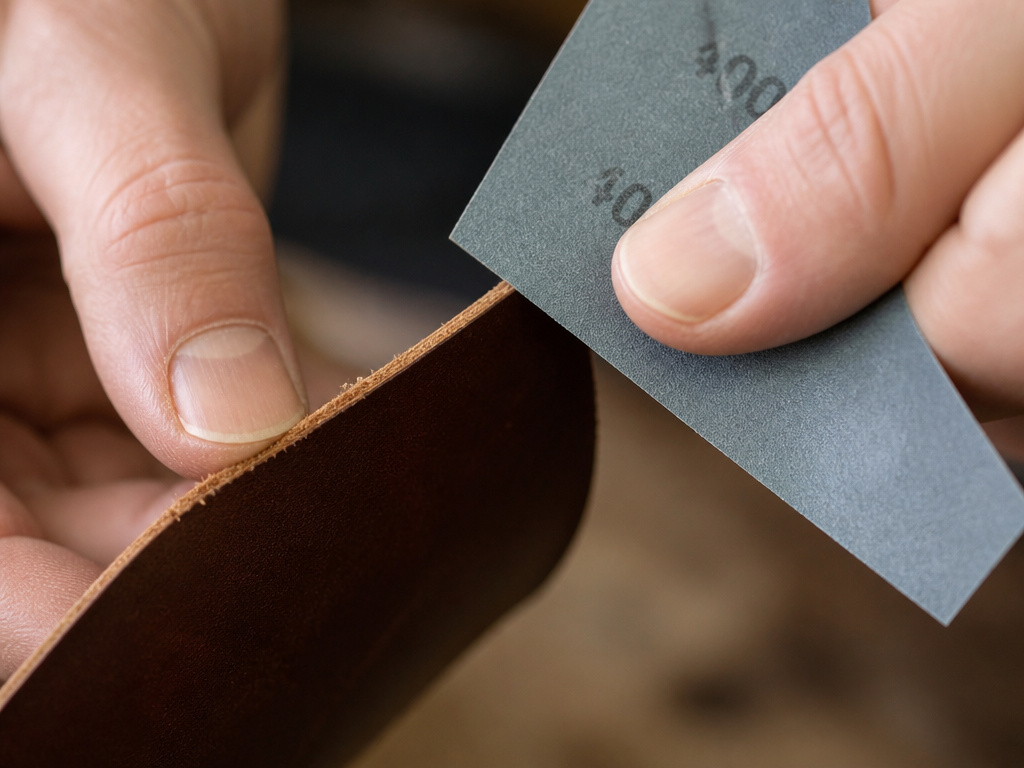
Start with 150 grit paper to level the beveled surface and knock down any major irregularities. Then move to 400 grit. This stage removes the scratches from the 150 grit and begins to polish the fiber ends. The final pass with 800 grit paper produces a surface that’s almost shiny to the eye. At this stage, the edge should feel like smooth paper, not fuzzy suede.
- Work in one direction. Sanding back and forth re-ruffles the fibers you’re trying to lay flat. Long, consistent strokes with the grain train the fibers in one direction.
- Check your progress by touch. Close your eyes and run your thumb across the edge. Any roughness you feel will be magnified after burnishing. Keep sanding until it’s perfectly smooth.
- Clean the dust. Use a dry brush or compressed air to remove all sanding dust before moving to dampening. Dust particles mix with your burnishing compound and create a gritty paste that scratches the surface.
This meticulous preparation is similar to preparing leather for tooling, the surface must be flawless for the next stage to succeed. It’s also the reason clean cutting leather is so important; a jagged cut demands far more sanding to correct.
Dampening and Burnishing: Sealing the Deal
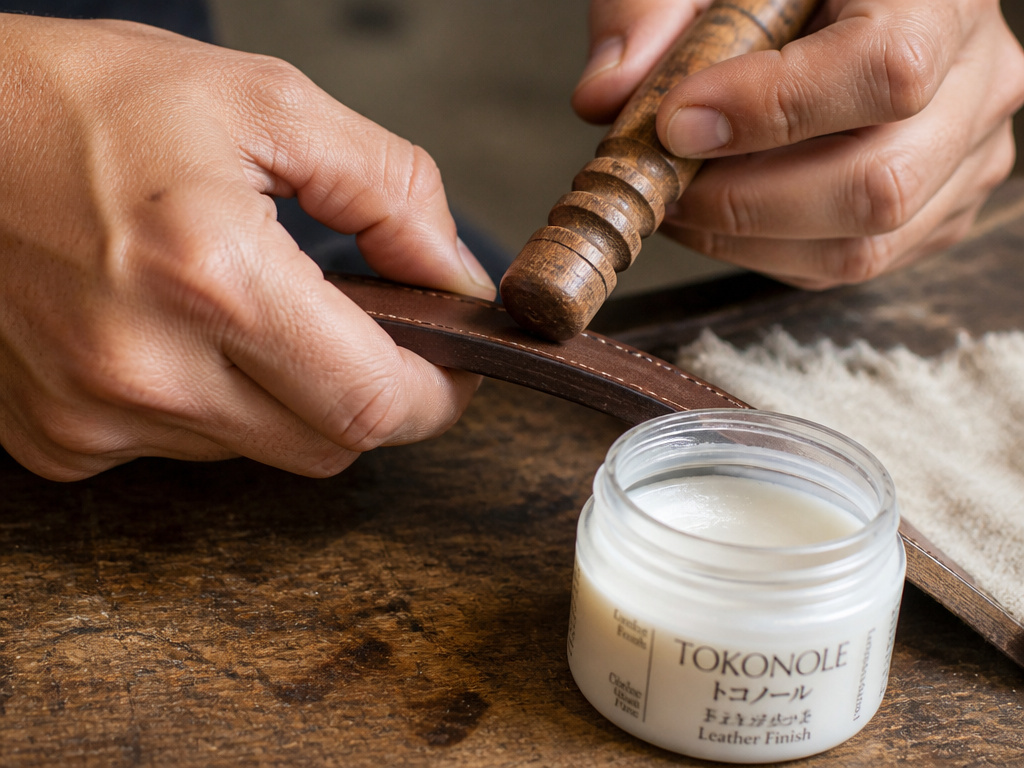 This is where the magic happens, and where most people choose the wrong helper. The “dampen” step introduces a lubricant that allows the fibers to slide and compress under friction without burning. Your choice here dictates the final look and durability.
For Vegetable-Tanned Leather:
- Water: The simplest option. It swells the fibers slightly, making them more pliable. The heat from friction then drives the water out and activates the leather’s natural tannins, which rise and harden. It’s free and effective, but offers no lasting water resistance.
- Gum Tragacanth: A natural sap that acts as a light adhesive and burnishing aid. It provides more lubrication than water and adds a slight seal. It’s traditional and works well, but can become sticky in humid conditions.
- Tokonole: A modern Japanese compound containing cellulose fibers and adhesive. It’s exceptionally effective. The adhesive binds the surface fibers together as you burnish, creating a hard, glossy seal that is highly water-resistant. It’s my default for any item that will see daily use.
For Chrome-Tanned or Oiled Leathers:
- Edge Paint: This is your only option. These leathers are lubricated from within and lack the reactive tannins needed for burnishing. A pigmented edge paint, like Uniters or Vernis, sits on the surface and must be built up in layers, then polished.
The burnishing tool generates the necessary heat and pressure. A wooden edge slicker is the classic hand tool. Use a groove that matches your edge thickness and rub briskly back and forth. The friction should warm the leather noticeably. For a leather burnisher, a motorized option speeds the process, but control is harder, too much pressure or speed burns the edge, producing a sour, acrid smell.
Common mistake: Applying too much compound. A little goes a long way. A soaked edge makes a mess and dilutes the friction needed for compression. For Tokonole, a thin, even coat is all you need. For wax, a few light strokes are sufficient.
After burnishing, a final pass with a dry canvas cloth removes excess compound and brings up a high shine. This is the final polish, and it’s what gives a luxury item its tactile satisfaction.
Troubleshooting Common Edge Problems
 Even with the right steps, edges can fail. The fix is usually in the step you rushed.
The edge stays fuzzy after burnishing.
This is almost always a sanding issue. You didn’t progress to a fine enough grit, or you sanded in multiple directions. The underlying fibers are still loose. Go back to 400 grit sandpaper, sand consistently in one direction until completely smooth, then re-burnish.
The edge has visible ridges or grooves.
The burnishing tool is catching on something. The most likely culprit is a stitch line placed too close to the edge (less than 4 mm). It could also be an uneven bevel. Inspect the edge before dampening. If stitching is the issue, you’ll need to live with it or remake the piece.
The color bleeds or looks streaky.
This happens when dye hasn’t fully set or when you’re burnishing a painted edge before it’s completely dry. If you’ve applied dye to the edge, let it cure for 24 hours before burnishing. If using edge paint, let each layer dry fully, overnight is best. Understanding the difference between dye and paint is crucial here; dyes penetrate and can bleed, paints sit on top and must cure.
The edge feels waxy or gummy.
You used too much wax or a wax that’s too soft. Beeswax can do this if over-applied. Scrape off the excess gently with a bone folder or the back of a knife, then reburnish with a clean canvas cloth to redistribute and melt the remaining wax thinly.
Frequently Asked Questions
Can you burnish chrome-tanned leather?
No. The chromium salts used in tanning lubricate the fibers from within, preventing them from compressing and fusing under friction. No amount of burnishing will produce a hard, shiny edge. Your only finish options for chrome-tan are edge paint or a folded/rolled edge.
What’s the best burnishing compound for a beginner?
Start with water. It’s free, and it teaches you the essential technique of generating friction and heat. Once you can produce a shine with water using consistent, overlapping strokes, move to Tokonole for its superior sealing and ease of use. It’s more forgiving than pure waxes.
How do you finish the edges of very thin leather?
The process is the same, but your tools change. Use a smaller beveler (size 0 or 00) and consider skiving the edge to a feather before beveling to reduce bulk. Sand with higher grits (600 and up) by hand to avoid removing too much material. Burnish with light pressure.
Is edge finishing necessary for all projects?
Structurally, no. A full-grain vegetable-tanned leather edge is strong without finish. Aesthetically, almost always. An unfinished edge looks raw and cheapens the piece. The only time to skip it is on edges that will be completely concealed, like a strap end tucked under a buckle.
How do you maintain a finished edge?
Re-burnish it. Over years, the sealed surface can wear down from abrasion. A quick pass with a dab of Tokonole and a wood slicker will restore the shine and seal. Avoid harsh chemicals or conditioners on the edge, they can break down the burnished surface.
Before You Go
The real test of an edge finish is time. A well-executed bevel, sand, and burnish should last the life of the piece, growing darker and richer with patina but never fraying. If your edge starts to fuzz within a year, you missed a step, likely the progression through fine-grit sandpaper.
For your next project, make the edge a priority, not an afterthought. Allocate a third of your total project time to it. The difference in perceived quality is disproportionate to the effort. And if you’re working with a leather whose origin or tannage you’re unsure of, test your finish sequence on a scrap first. The leather will tell you what it needs.
