
Your Guide on How to Skive Leather for Perfect Edges & Seams
This post contains affiliate links. As an Amazon Associate, we earn from qualifying purchases.
Skiving leather is the controlled thinning of its edge or surface, primarily from the flesh side, using an extremely sharp blade held at a shallow angle. The goal is to reduce bulk for seamless joins, create tapered edges for folding, or thin specific areas for pockets without compromising the leather’s structural integrity. You can do it by hand on a granite slab or with a dedicated machine like the Felsted Skiver.
That definition covers the what. The how comes down to three essential variables: blade sharpness, work surface hardness, and the angle of attack. Get one wrong and you don’t get a skive, you get a tear, a jagged edge, or a blade that digs in and stops.
What follows is a breakdown of the two fundamental types of skive, the step-by-step for each, and the one adjustment, a 0.1mm turn of an anvil, that separates a clean cut from a ruined piece of hide. By the end, you’ll know which method fits your project and how to execute it without the common first-timer mistakes.
Key Takeaways
- Skive dry leather only. Wet leather stretches and turns mushy, guaranteeing a ragged, uneven cut that’s impossible to control.
- A mirror-polished blade is non-optional. A dull blade requires more force, which deflects and tears the leather instead of slicing through it cleanly.
- The work surface must be harder than your blade. Glass, polished granite, or marble provides zero give, letting the blade skate across it to produce a consistent, paper-thin taper.
- Machine skiving demands micro-adjustments. Devices like the Felsted Skiver specify 0.1mm (0.002″) increments on the anvil; a half-turn adjustment when changing blades prevents digging into expensive hides.
- Understand the skive type before you start. A long, tapered bevel for edge reduction is a different motion and tool choice than a uniform pocket skive for removing bulk from a large area.
What Skiving Actually Does (And Why You Need It)
Skiving involves redistributing material to solve physical problems in construction, such as thinning leather to prevent lumps where thick pieces meet at a seam.That lump stresses thread, wears unevenly, and looks amateurish. Skiving tapering the edges so they overlap perfectly, creating a seam that looks and feels like a single, uniform layer.
The same principle applies to folding edges for a wallet or bag. A full-thickness edge folded over on itself is too stiff and bulky to crease cleanly. Skiving the fold area by up to half its thickness makes it pliable, allowing for a sharp, professional fold. This is why understanding the leather tanning process matters. A firm vegetable tanned leather holds a skived edge for folding better than a soft chrome tanned leather, which can sometimes be too supple.
Common mistake: Skiving on a soft cutting mat. The blade tip catches in the mat’s texture, causing a jerky, uneven cut that varies in depth with every millimeter. You’ll see a wavy, inconsistent taper instead of a smooth plane.
The Two Types of Skive: Bevel vs. Pocket
Not all skiving is the same. The technique and tool change completely based on whether you’re thinning an edge or hollowing out an area.
A bevel skive tapers the very edge of the leather to a feather edge. It’s long, gradual, and designed for joining seams or creating folded edges. You use a flat skiving knife, angling it lower with each pass to slowly reduce the material. The goal is an invisible transition from full thickness to almost nothing.
A pocket skive (or area skive) removes a uniform layer from a larger section of the leather, like the underside of a wallet pocket that sits behind another layer. The thickness is reduced evenly across a wide area, not just at the edge. For this, you’d use a French edger or a round knife, which can maintain a consistent depth over a longer distance.
| Skive Type | Primary Tool | Best For | Visual Result |
|---|---|---|---|
| Bevel / Edge | Flat skiving knife (e.g., C.S. Osborne) | Seams, folded edges, reducing edge bulk | Long, smooth taper to a feather edge |
| Pocket / Area | French edger or round knife | Thinning pocket flaps, large panels behind other layers | Uniform reduction across a wide surface |
What’s the difference between a bevel skive and a pocket skive?
The difference is in the geometry of removal. A bevel skive is a wedge, you’re creating a ramp. A pocket skive is a plateau, you’re shaving off a flat, consistent layer from the surface. Trying to create a plateau with a flat knife is frustrating; you’ll inevitably cut deeper as you go. Conversely, a French edger is terrible for a long taper because its blade is designed to cut at a fixed depth.
The Non-Negotiable Setup: Blade and Surface
Everything in skiving depends on the marriage between your blade and your work surface. Let me share what I’ve learned: a blade that’s merely “sharp” isn’t sharp enough. For skiving, you need a mirror polish.
I learned this the hard way on a custom wallet commission. My blade was sharp enough to cut the leather shapes, so I thought it was fine. On the first skiving pass for the card pocket edges, the blade dragged. It required pressure, which caused my angle to shift. The result was a wavy, uneven taper that made the pockets fit poorly. I had to recut the entire piece of full-grain leather. Now, I strop my blade to a high-gloss finish before every skiving session. The difference is night and day, the blade should glide through the leather with the resistance of butter.
Your surface must be non-negotiable, too. – Granite or Glass: Ideal. Perfectly hard and smooth, allowing the blade to skate. Marble is an alternative, though some varieties have a Mohs hardness under 5. – Cutting Mat: Banned for skiving. The soft surface grabs the blade tip.
Step-by-Step: Hand Skiving on a Hard Surface
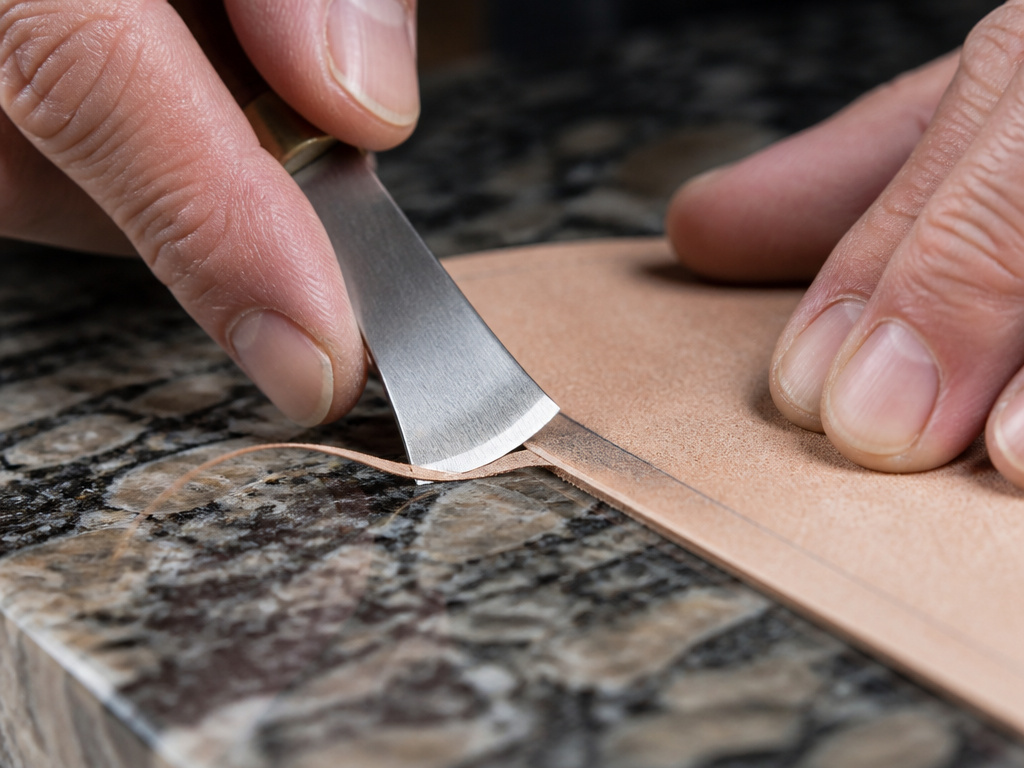
Here’s a straightforward guide for a basic bevel skive by hand. This is based on years of practical experience, and it’s the foundation for everything else.
- Prepare your leather. Mark the skive line lightly with a pencil or wing divider. Ensure the leather is dry and at room temperature. Place it grain side down on your granite slab. The flesh side must face up.
- Strop your blade to a polish. Don’t just sharpen it; use a stropping compound on leather or canvas to remove the micro-burrs and create that glassy edge. Do this now, and again every few minutes during the skive.
- Find the angle. Hold your flat knife at a very low angle, between 10 and 20 degrees relative to the slab. The goal is to barely lift the handle. Imagine shaving the hair off your arm without cutting the skin.
- Start the cut. Anchor the tip of the blade just inside your marked line. Use your other hand to apply firm, downward pressure on the leather ahead of the blade.
- Make the first pass. Pull the knife toward you in one long, smooth, confident motion. Let the blade skate on the granite. You should produce a long, thin ribbon of leather. If it’s dust or chunks, your angle is too high.
- Repeat and adjust. For a deeper taper, lower the angle slightly and make another pass. Never try to remove all the material in one go. Three to five light passes beat one heavy, uncontrolled one every time.
Where this goes sideways: Starting with the knife tip in mid-air above the leather. When you bring it down to start the cut, you’ll chop, not slice. Always start with the blade tip already touching the leather at your chosen angle.
The short version: Long strokes, low angle, constant blade polish, and a surface that doesn’t fight back.
When a Machine Makes Sense (and How to Adjust One)
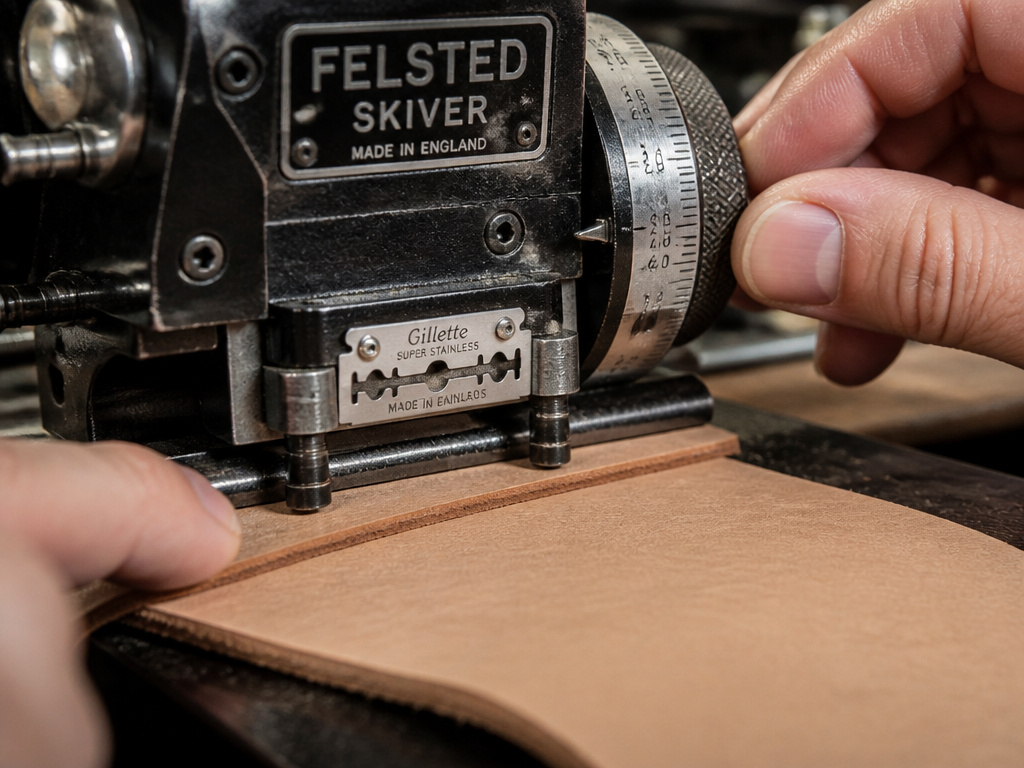
For production work, consistent pocket skives, or when working with very tough leathers, a manual skiving machine saves time and guarantees uniformity. The Felsted Skiver is a popular example. It uses standard double-edged razor blades and has an adjustable anvil that sets the cut depth.
The manual specifies that each division on its adjustment wheel moves the anvil by 0.1mm (0.002″). This specifies the tolerance of a clean cut. When installing a fresh blade, the manual advises retracting the anvil by 0.05mm (half a division) before the first cut.Why? A new blade is microscopically sharper and will bite deeper. That half-division adjustment prevents it from gouging your leather.
| Adjustment | Measurement | Purpose |
|---|---|---|
| Standard Increment | 0.1mm / 0.002″ per division | Fine-tuning cut depth for consistent material removal |
| Blade-Change Retraction | 0.05mm / 0.001″ (half-division) | Compensates for a new blade’s extreme sharpness to prevent gouging |
| Minimum Thickness | 0.3mm / 0.008″ (on book leathers) | The practical limit for how thin the machine can pare leather without tearing |
These machines excel on firm leathers like veg-tan or dense top-grain leather. They struggle with stretchy, soft, or highly textured leathers where a hand tool offers more control. The ChestofBooks footwear manufacturing guide notes that for “light, flexible, stretchy leathers, machines with revolving knives are most effective,” highlighting that tool choice has always been material-dependent.
Choosing Your Leather: What Skives Well and What Fights Back
Your leather choice dictates your skiving success. The leather production process creates different structures that react uniquely to a blade.
- Vegetable-Tanned Leather: The gold standard for skiving. It’s firm, has a consistent density, and the leather’s grain is tight. It produces clean, long shavings and holds a defined edge beautifully. This is what you should practice on first.
- Chrome-Tanned Leather: More variable. Soft chrome-tan can gum up on a blade and compress rather than cut. Firm chrome-tan skives well, but the shavings may curl or break differently. Test on a scrap first.
- Split Leather: This is the fibrous layer split from the underside of the hide. It can be fuzzy and lack cohesion. Skiving split leather often tears rather than cuts cleanly. A razor-sharp blade and a very light touch are critical.
A quick testing leather quality check before you skive: try to peel up a corner of the flesh side with your fingernail. If it lifts in a fuzzy, fibrous layer, expect a challenging skive. If it’s tight and smooth, you’re in good shape.
Frequently Asked Questions
Can you skive leather with a utility knife?
You can, but you shouldn’t for anything beyond a tiny, rough job. Utility knife blades are too thick and not nearly sharp enough for the fine, controlled removal skiving requires. They will tear and dig. A dedicated, thin-bladed skiving knife is a fundamental investment.
How do you skive leather without a skiving knife?
In a true pinch, you can use a very sharp head knife or round knife, but the technique is harder to master. The best “alternative” is a single-edged razor blade held in a safety holder. It gives you the required sharpness and a thin profile, though you sacrifice the control of a dedicated handle.
Why is my skiving knife tearing the leather?
Three likely causes: a dull blade, skiving on a soft surface, or trying to skive damp leather. Address the first by stropping. Fix the second by switching to granite or glass. For the third, let your leather sit in a dry, room-temperature environment for 24 hours before trying again.
What’s the best way to practice skiving?
Use vegetable-tanned leather scraps. Mark straight lines and practice creating long, consistent tapers. Focus on maintaining the same low angle from start to finish of each stroke. Don’t worry about achieving a perfect feather edge at first; aim for a smooth, uniform plane. The skill is in the muscle memory for that angle.
Is skiving the same as splitting?
No. Skiving is a tapered reduction, usually at an edge. Splitting (using a band knife splitting machine) is the uniform reduction of an entire hide’s thickness throughout. Skiving is a craftsmanship technique; industrial splitting is a manufacturing step that happens early in leather making.
Before You Go
Skiving transforms a project from bulky and homemade to sleek and professional. The core of it requires patience, a polished blade, and a hard surface. Start with veg-tan scraps and a flat knife, and get the feel of that shallow angle.Once your hand learns the motion, you’ll see where a machine like the Felsted Skiver, with its 0.1mm adjustments, earns its keep for volume or precision.
Remember the one rule that overrides all others: if your blade doesn’t glide, stop. Strop it. A sharp blade does the work; you’re just there to guide it. That’s the difference between fighting the leather and working with it.
